×
ToyotaParts- Hello
- Login or Register
- Quick Links
- Live Chat
- Track Order
- Parts Availability
- RMA
- Help Center
- Contact Us
- Shop for
- Toyota Parts
- Scion Parts
My Garage
My Account
Cart
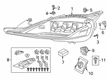
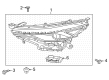
OEM Toyota Light Control Module
- Select Vehicle by Model
- Select Vehicle by VIN
Select Vehicle by Model
orMake
Model
Year
Select Vehicle by VIN
For the most accurate results, select vehicle by your VIN (Vehicle Identification Number).
81 Light Control Modules found


Toyota Control Module, Front
Part Number: 85967-WAA01$364.29 MSRP: $533.88You Save: $169.59 (32%)Ships in 1-3 Business DaysProduct Specifications- Other Name: Computer, Light Control; Headlight Control Module, Front; Lighting Control Module
- Position: Front
Toyota Control Module, Front
Part Number: 85967-WAA02$369.65 MSRP: $541.71You Save: $172.06 (32%)Ships in 1-3 Business DaysProduct Specifications- Other Name: Control Unit For Front; Headlight Control Module, Front; Lighting Control Module
- Manufacturer Note: HEADLAMP-LED
- Position: Front
- Replaced by: 85967-WAA03


Toyota Module, Passenger Side
Part Number: 89908-F4090$514.94 MSRP: $754.64You Save: $239.70 (32%)Ships in 1-3 Business DaysProduct Specifications- Other Name: Computer Sub-Assembly, Headlamp; Headlight Control Module, Front Right; Lighting Control Module
- Position: Passenger Side

Toyota Module, Passenger Side
Part Number: 89908-16030$514.86 MSRP: $754.54You Save: $239.68 (32%)Ships in 1-2 Business DaysProduct Specifications- Other Name: Computer Sub-Assembly, Headlamp; Computer Sub-Assembly, Headlamp, Passenger Side
- Manufacturer Note: HEADLAMP-LED & WITH(*AHB & *AFLS)
- Position: Passenger Side

Toyota Control Module, Driver Side
Part Number: 89907-48120$514.94 MSRP: $754.64You Save: $239.70 (32%)Ships in 1-3 Business DaysProduct Specifications- Other Name: Computer Sub-Assembly, Headlamp; Headlight Control Module, Front Left; Lighting Control Module; Actuator; Computer Sub-Assembly, Headlamp, Driver Side
- Manufacturer Note: HEADLAMP-PROJECTOR & *AHB & *AFLS
- Position: Driver Side


Toyota Control Module
Part Number: 89908-010B2$370.43 MSRP: $542.87You Save: $172.44 (32%)Ships in 1-3 Business DaysProduct Specifications- Other Name: Computer Sub-Assembly, Headlamp; Lighting Control Module

Toyota Control Module, Driver Side
Part Number: 89907-45010$601.19 MSRP: $881.05You Save: $279.86 (32%)Ships in 1-3 Business DaysProduct Specifications- Other Name: Computer Sub-Assembly, Headlamp; Headlight Control Module, Front Left; Lighting Control Module; Computer Sub-Assembly, Headlamp, Driver Side
- Manufacturer Note: HEADLAMP-LED(MATERIAL=*PES) & *DRL
- Position: Driver Side

Toyota Control Module, Passenger Side
Part Number: 89908-33040$381.01 MSRP: $558.37You Save: $177.36 (32%)Ships in 1-3 Business DaysProduct Specifications- Other Name: Computer Sub-Assembly, Headlamp; Headlight Control Module, Front Right; Lighting Control Module; Module; Computer Sub-Assembly, Headlamp, Passenger Side
- Manufacturer Note: HEADLAMP-FULL LED, WITH(*AFLS)
- Position: Passenger Side
Toyota Control Module, Passenger Side
Part Number: 89908-16020$514.86 MSRP: $754.54You Save: $239.68 (32%)Ships in 1-3 Business DaysProduct Specifications- Other Name: Computer Sub-Assembly, Headlamp; Headlight Control Module, Front Right; Lighting Control Module; Body Control Module; Module; Computer Sub-Assembly, Headlamp, Passenger Side
- Manufacturer Note: HEADLAMP-LED & WITH(*AHB & *AFLS)
- Position: Passenger Side
Toyota Control Module
Part Number: 85967-WAA03$369.65 MSRP: $541.71You Save: $172.06 (32%)Ships in 1-2 Business DaysProduct Specifications- Other Name: Computer, Light Control
- Replaces: 85967-WAA02


Toyota Control Module, Front
Part Number: 81107-2D020$347.19 MSRP: $508.81You Save: $161.62 (32%)Ships in 1-3 Business DaysProduct Specifications- Other Name: Computer Sub-Assembly, Headlamp; Headlight Control Module, Front; Lighting Control Module; Computer Sub-Assembly, Headlamp Light Control, Passenger & Driver Side
- Position: Front
Toyota Control Module, Passenger Side
Part Number: 89908-48120$514.86 MSRP: $754.54You Save: $239.68 (32%)Ships in 1-3 Business DaysProduct Specifications- Other Name: Computer Sub-Assembly, Headlamp; Headlight Control Module, Front Right; Lighting Control Module; Actuator; Computer Sub-Assembly, Headlamp, Passenger Side
- Manufacturer Note: HEADLAMP-PROJECTOR & *AHB & *AFLS
- Position: Passenger Side
Toyota Module, Driver Side
Part Number: 89907-16030$514.86 MSRP: $754.54You Save: $239.68 (32%)Ships in 1-2 Business DaysProduct Specifications- Other Name: Computer Sub-Assembly, Headlamp; Computer Sub-Assembly, Headlamp, Driver Side
- Manufacturer Note: HEADLAMP-LED & WITH(*AHB & *AFLS)
- Position: Driver Side
Toyota Control Module
Part Number: 89907-010B2$370.43 MSRP: $542.87You Save: $172.44 (32%)Ships in 1-3 Business DaysProduct Specifications- Other Name: Computer Sub-Assembly, Headlamp; Lighting Control Module
Toyota Control Module, Driver Side
Part Number: 89907-16020$514.86 MSRP: $754.54You Save: $239.68 (32%)Ships in 1-3 Business DaysProduct Specifications- Other Name: Computer Sub-Assembly, Headlamp; Headlight Control Module, Front Left; Lighting Control Module; Body Control Module; Module; Computer Sub-Assembly, Headlamp, Driver Side
- Manufacturer Note: HEADLAMP-LED & WITH(*AHB & *AFLS)
- Position: Driver Side
Toyota Control Module, Driver Side
Part Number: 89907-33040$514.94 MSRP: $754.64You Save: $239.70 (32%)Ships in 1-3 Business DaysProduct Specifications- Other Name: Computer Sub-Assembly, Headlamp; Headlight Control Module, Front Left; Lighting Control Module; Module; Computer Sub-Assembly, Headlamp, Driver Side
- Manufacturer Note: HEADLAMP-FULL LED, WITH(*AFLS)
- Position: Driver Side
Toyota Module, Driver Side
Part Number: 89907-F4090$514.94 MSRP: $754.64You Save: $239.70 (32%)Ships in 1-3 Business DaysProduct Specifications- Other Name: Computer Sub-Assembly, Headlamp; Headlight Control Module, Front Left; Lighting Control Module
- Position: Driver Side
Toyota Control Module, Passenger Side
Part Number: 89908-45010$601.20 MSRP: $881.07You Save: $279.87 (32%)Ships in 1-3 Business DaysProduct Specifications- Other Name: Computer Sub-Assembly, Headlamp; Headlight Control Module, Front Right; Lighting Control Module; Computer Sub-Assembly, Headlamp, Passenger Side
- Manufacturer Note: HEADLAMP-LED(MATERIAL=*PES) & *DRL
- Position: Passenger Side

Toyota Control Module, Front
Part Number: 81107-51050$377.26 MSRP: $552.89You Save: $175.63 (32%)Ships in 1-3 Business DaysProduct Specifications- Other Name: Computer Sub-Assembly, Headlamp; Headlight Control Module, Front; Lighting Control Module; Computer Sub-Assembly, Headlamp Light Control, Passenger & Driver Side
- Manufacturer Note: W(VSC)
- Position: Front

Toyota Control Module
Part Number: 89940-73010$275.86 MSRP: $393.86You Save: $118.00 (30%)Ships in 1-3 Business DaysProduct Specifications- Other Name: Computer Assembly, Headlamp Swivel; Lighting Control Module
| Page 1 of 5 |Next >
1-20 of 81 Results
Toyota Light Control Module
OEM parts deliver unmatched quality you can rely on. They pass extensive quality control inspections. Toyota produces them to the official factory specifications. This process helps prevent defects and imperfections. So you can get exceptional lifespan and a flawless fit. Need new OEM Toyota Light Control Module? You'll love our wide selection of genuine options. Shop in minutes and skip the hunt. Our prices are unbeatable, you'll save time and money. It's easy to shop and find the right piece. Our committed customer service team gives professional help from start to finish. Every part includes a manufacturer's warranty. We ship quickly, your parts will arrive fast at your door.
The Toyota Light Control Module makes sure that all the bulbs are on time and operational without wasting even a single watt. Toyota gained international confidence by manufacturing vehicles that use lean manufacturing and reduce wastage, solve issues in the minimum time possible, and allow the driver to have an enjoyable long and cheap ride in any corner of the world. Efficiency Toyota continues to pound the nail with new more intelligent versions of Hybrid Synergy Drive that stretch fuel, cut emissions, keep cabins quiet, and retain strong acceleration even in congested urban streets, highways, and winding mountain roads. Introducing the TNGA platform enabled Toyota to lower center of gravity, stiffen frames, shrink handling, and increase crash safety in compact hatches, roomy SUVs, and sleek sedans in all parts of the world. Recently, Toyota has extended the range of its plug-in RAV4 to 42 electric miles, which confirms that the company pays attention to drivers who want to get the range, the torque, and the feeling of safety in adverse conditions. Light Control Module regulates headlamps, tails, cabin lamps, and signals with solid state switches and voltage senses to regulate the current flow, shield the wiring, and maintain the brightness constant. A Light Control Module works with light sensors to turn daytime running lights down, pulse at the brake lights during panic stops, and switch off when the battery is depleted. Due to the similarity between the Light Control Module instructions given to each of these units, drivers are able to replace years of units without the need to rewire their dashboards or lose the on-screen diagnostics. The new Light Control Module can withstand vibration using sealed boards and thicker solder paths, giving a 10-year reliability.
Toyota Light Control Module Parts and Q&A
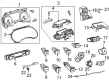
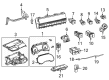
- Q: How to replace the Light Control Module Assembly on Toyota Prius?A:The first step for replacing the Headlamp Leveling ECU Assembly is to disconnect the negative terminal of the battery. The glove compartment door assembly along with the ECM need removal as part one of the process. The headlamp leveling ECU assembly can be removed by disconnecting the connector then removing the bolt. After the installation you should reinstall the ECM before reconnecting the battery negative terminal. Finally, perform initialization.

Related Toyota Parts
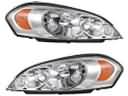 Toyota Headlight
 Toyota Headlight Bulb
 Toyota Fog Light Bulb
 Toyota Light Socket
 Toyota Tail Light
 Toyota Fog Light
 Toyota Back Up Light