×
ToyotaParts- Hello
- Login or Register
- Quick Links
- Live Chat
- Track Order
- Parts Availability
- RMA
- Help Center
- Contact Us
- Shop for
- Toyota Parts
- Scion Parts
My Garage
My Account
Cart
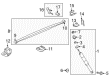
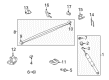
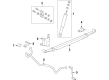
OEM Toyota Leaf Spring
Leaf Helper Spring- Select Vehicle by Model
- Select Vehicle by VIN
Select Vehicle by Model
orMake
Model
Year
Select Vehicle by VIN
For the most accurate results, select vehicle by your VIN (Vehicle Identification Number).
338 Leaf Springs found


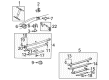
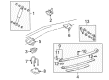
Toyota Leaf Spring, Rear Part Number: 48210-04340
$609.26 MSRP: $892.87You Save: $283.61 (32%)Ships in 1-3 Business DaysProduct Specifications- Other Name: Spring Assembly, Rear; Leaf Spring, Rear, Rear Right; Coil Springs; Spring Assembly; Spring Assembly, Rear Passenger Side; Spring Assembly, Rear Driver Side
- Manufacturer Note: 4-LEAF,HEAVY DUTY SPRING
- Position: Rear


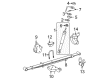
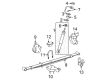
Toyota Leaf Spring Assembly, Rear Driver Side Part Number: 48220-04300
$641.15 MSRP: $939.61You Save: $298.46 (32%)Ships in 1-3 Business DaysProduct Specifications- Other Name: Spring Assembly, Rear Left-Hand; Leaf Spring, Rear Left; Spring Assembly, Rear Driver Side; Leaf Spring
- Position: Rear Driver Side
- Replaces: 48220-04211, 48220-04210, 48220-35050, 48220-35020, 48220-04201, 48220-04200


Toyota Leaf Spring Assembly, Rear Passenger Side Part Number: 48210-04660
$641.15 MSRP: $939.61You Save: $298.46 (32%)Ships in 1-3 Business DaysProduct Specifications- Other Name: Spring Assembly, Rear Right-Hand; Leaf Spring; Spring Assembly, Rear Passenger Side
- Position: Rear Passenger Side
- Replaces: 48210-04560, 48210-04561, 48210-04570, 48210-04571, 48210-35A20, 48210-35A70

Toyota Leaf Spring, Rear Passenger Side Part Number: 48210-04360
$676.34 MSRP: $991.18You Save: $314.84 (32%)Ships in 1-3 Business DaysProduct Specifications- Other Name: Spring Assembly, Rear Right-Hand; Leaf Spring, Rear Right; Coil Springs; Spring Assembly; Spring Assembly, Rear Passenger Side
- Manufacturer Note: 4-LEAF
- Position: Rear Passenger Side


Toyota Leaf Spring, Rear Passenger Side Part Number: 48210-0C282
$717.88 MSRP: $1052.06You Save: $334.18 (32%)Ships in 1-3 Business DaysProduct Specifications- Other Name: Spring Assembly, Rear Right-Hand; Leaf Spring, Rear Right; Leaf Spring Assembly; Spring Assembly, Rear Passenger Side
- Manufacturer Note: MAIN 3+HELPER 1-LEAF
- Position: Rear Passenger Side


Toyota Leaf Spring, Rear Passenger Side Part Number: 48210-0C240
$901.75 MSRP: $1321.52You Save: $419.77 (32%)Ships in 1-3 Business DaysProduct Specifications- Other Name: Spring Assembly, Rear Right-Hand; Leaf Spring, Rear Right; Leaf Spring Assembly; Spring Assembly, Rear Passenger Side
- Manufacturer Note: MAIN 3+HELPER 1-LEAF
- Position: Rear Passenger Side

Toyota Leaf Spring, Rear Passenger Side Part Number: 48210-04852
$575.89 MSRP: $843.97You Save: $268.08 (32%)Ships in 1-3 Business DaysProduct Specifications- Other Name: Spring Assembly, Rear Right-Hand; Spring Assembly, Rear Passenger Side
- Position: Rear Passenger Side
- Replaces: 48210-04850, 48210-04851

Toyota Leaf Spring, Rear Driver Side Part Number: 48220-04290
$579.75 MSRP: $849.63You Save: $269.88 (32%)Ships in 1-3 Business DaysProduct Specifications- Other Name: Spring Assembly, Rear Left-Hand; Leaf Spring, Rear Left; Leaf Spring Assembly; Spring Assembly, Rear Driver Side
- Manufacturer Note: MAIN 2-LEAF+HELPER 1
- Position: Rear Driver Side
- Replaces: 48220-04191, 48220-35040, 48220-04190
Toyota Leaf Spring, Rear Passenger Side Part Number: 48210-04650
$579.75 MSRP: $849.63You Save: $269.88 (32%)Ships in 1-3 Business DaysProduct Specifications- Other Name: Spring Assembly, Rear Right-Hand; Leaf Spring, Rear Right; Leaf Spring Assembly; Spring Assembly, Rear Passenger Side
- Manufacturer Note: MAIN 2-LEAF+HELPER 1
- Position: Rear Passenger Side
- Replaces: 48210-04551, 48210-35A40, 48210-04550
Toyota Leaf Spring, Rear Driver Side Part Number: 48220-04060
$626.46 MSRP: $918.08You Save: $291.62 (32%)Ships in 1-3 Business DaysProduct Specifications- Other Name: Spring Assembly, Rear Left-Hand; Leaf Spring, Rear Left; Coil Springs; Spring Assembly; Spring Assembly, Rear Driver Side
- Position: Rear Driver Side
Toyota Leaf Spring, Rear Driver Side Part Number: 48220-04130
$411.77 MSRP: $603.45You Save: $191.68 (32%)Ships in 1-3 Business DaysProduct Specifications- Other Name: Spring Assembly, Rear Left-Hand; Leaf Spring, Rear Left; Coil Springs; Spring Assembly; Spring Assembly, Rear Driver Side
- Manufacturer Note: 4-LEAF
- Position: Rear Driver Side
Toyota Leaf Spring, Rear Passenger Side Part Number: 48210-04330
$418.01 MSRP: $612.60You Save: $194.59 (32%)Ships in 1-3 Business DaysProduct Specifications- Other Name: Spring Assembly, Rear Right-Hand; Leaf Spring, Rear, Rear Right; Coil Springs; Spring Assembly; Spring Assembly, Rear Passenger Side
- Manufacturer Note: 4-LEAF
- Position: Rear Passenger Side

Toyota Leaf Spring, Rear Part Number: 48210-04042
$425.42 MSRP: $623.46You Save: $198.04 (32%)Ships in 1-3 Business DaysProduct Specifications- Other Name: Spring Assembly, Rear; Leaf Spring, Rear Left, Rear Right; Coil Springs; Spring Assembly; Spring Assembly, Rear Passenger Side; Spring Assembly, Rear Driver Side
- Manufacturer Note: 3-LEAF
- Position: Rear

Toyota Leaf Spring, Rear Passenger Side Part Number: 48210-04032
$427.62 MSRP: $626.68You Save: $199.06 (32%)Ships in 1-3 Business DaysProduct Specifications- Other Name: Spring Assembly, Rear; Leaf Spring, Rear Left, Rear Right; Coil Springs; Spring Assembly; Spring Assembly, Rear Passenger Side
- Manufacturer Note: 2-LEAF
- Position: Rear Passenger Side
Toyota Leaf Spring, Rear Passenger Side Part Number: 48210-04053
$497.92 MSRP: $729.71You Save: $231.79 (32%)Ships in 1-3 Business DaysProduct Specifications- Other Name: Spring Assembly, Rear; Leaf Spring, Rear Right; Coil Springs; Spring Assembly; Spring Assembly, Rear Passenger Side
- Manufacturer Note: 4-LEAF
- Position: Rear Passenger Side
- Replaces: 48210-04052
Toyota Leaf Spring, Rear Driver Side Part Number: 48220-04022
$499.03 MSRP: $731.32You Save: $232.29 (32%)Ships in 1-3 Business DaysProduct Specifications- Other Name: Spring Assembly, Rear Left-Hand; Leaf Spring, Rear Left, Rear Right; Coil Springs; Spring Assembly; Spring Assembly, Rear Driver Side
- Manufacturer Note: 4-LEAF
- Position: Rear Driver Side

Toyota Leaf Spring, Rear Passenger Side Part Number: 48210-04630
$503.83 MSRP: $738.36You Save: $234.53 (32%)Ships in 1-3 Business DaysProduct Specifications- Other Name: Spring Assembly, Rear Right-Hand; Leaf Spring, Rear Right; Leaf Spring Assembly; Spring Assembly, Rear Passenger Side
- Manufacturer Note: MAIN 2-LEAF+HELPER 1
- Position: Rear Passenger Side
Toyota Leaf Spring, Rear Driver Side Part Number: 48220-04270
$509.14 MSRP: $746.15You Save: $237.01 (32%)Ships in 1-3 Business DaysProduct Specifications- Other Name: Spring Assembly, Rear Left-Hand; Leaf Spring, Rear Left; Leaf Spring Assembly; Spring Assembly, Rear Driver Side
- Manufacturer Note: MAIN 2-LEAF+HELPER 1
- Position: Rear Driver Side
Toyota Leaf Spring, Rear Driver Side Part Number: 48220-AD020
$540.48 MSRP: $792.07You Save: $251.59 (32%)Ships in 1-3 Business DaysProduct Specifications- Other Name: Spring Assembly, Rear Left-Hand; Leaf Spring, Rear Left; Leaf Spring Assembly; Spring Assembly, Rear Driver Side
- Manufacturer Note: MAIN 2-LEAF+HELPER 1
- Position: Rear Driver Side
Toyota Leaf Spring, Rear Passenger Side Part Number: 48210-AD020
$528.56 MSRP: $774.61You Save: $246.05 (32%)Ships in 1-3 Business DaysProduct Specifications- Other Name: Spring Assembly, Rear Right-Hand; Leaf Spring, Rear Right; Leaf Spring Assembly; Spring Assembly, Rear Passenger Side
- Manufacturer Note: MAIN 2-LEAF+HELPER 1
- Position: Rear Passenger Side
| Page 1 of 17 |Next >
1-20 of 338 Results
Toyota Leaf Spring
OEM parts deliver unmatched quality you can rely on. They pass extensive quality control inspections. Toyota produces them to the official factory specifications. This process helps prevent defects and imperfections. So you can get exceptional lifespan and a flawless fit. Need new OEM Toyota Leaf Spring? You'll love our wide selection of genuine options. Shop in minutes and skip the hunt. Our prices are unbeatable, you'll save time and money. It's easy to shop and find the right piece. Our committed customer service team gives professional help from start to finish. Every part includes a manufacturer's warranty. We ship quickly, your parts will arrive fast at your door.
Toyota Leaf Spring absorbs road shock and provides stubborn road anchoring of the axle. Toyota expanded out of the offshoot of a cloth loom to be a global powerhouse due to its aversion to waste. Toyota assembly lines move in close harmony, as the employees cease the belt as soon as a defect is spotted. Toyota continues to promote hybrids, expanding the combination to allow commuters in urban areas or farmlands to reduce fuel consumption. Toyota uses the TNGA design as a foundation to the new car, reducing the center of gravity and improving the turns. Badge relies on trust from drivers due to the fact that this vehicle loses years of bad weather and devastating roads. The new hybrid RAV4 travels 42 miles on battery only before the engine is introduced to the party. Same thinking is current in sedans, SUVs, and pickups all over the world. Leaf Spring piles of rolled steel compress and stretch out to ingest potholes and maintain the center of the axle, then bend upwards under pressure. Leaf Spring design incorporates a master leaf featuring curled eyes that attach directly to the chassis, enhancing brute strength and easy fitting. Leaf Spring packs react in a predictable way and remain firm, and as a result, drivers are stable when transporting lumber or pulling boats. Leaf Spring endures endless bouncing due to the reason that it is made of heat-treated metal which cannot be fatigued or corroded.
Toyota Leaf Spring Parts and Q&A
- Q: How to service and repair the leaf spring on Toyota Tacoma?A:Service and repair operations for the leaf spring of RZN191L-TRPDKAB, RZN196L-CRPDKAB and PZN196L-PRPDKAB, VZN195L-CRPDKAB, VZN195L-PRPDKAB models need to start by placing safety stands under the body as you lower the axle housing to release leaf spring tension. Detach the rear wheel before tightening it to 110 Nm (1,150 kgf-cm, 83 ft. lbs.). To begin rear shock absorber and parking brake disconnection service engineers should first unscrew the bolt and apply torque of 26 Nm (260 kgf-cm, 19 ft. lbs.) for 2WD (except PreRunner) or 71 Nm (730 kgf-cm, 53 ft. lbs.) for 4WD and PreRunner models. Begin by first removing the 4 U-bolt mounting nuts and washers before taking out the spring seat along with U-bolts under a torque of 123 Nm (1,250 kgf-cm, 90 ft. lbs.). Always check that the U-bolts maintain equal length during installation. The spring bumper should be removed when working on 4WD and PreRunner vehicles. Starting with the hanger pin bolt and nut along with washer, apply the specified torque of 157 Nm then proceed to remove the shackle pin plate together with the rear leaf spring by taking off the 2 shackle pin mounting nuts and washers using 92 Nm torque. Special Service Tool: 09550-10013 (09252-10010, 09553-10010) functions together with a press to replace the front eye bushing while Special Service Tool: 09950-60010 (09951-00350) and 09950-70010 (09951-07150) press out the inner tubes and rubber parts followed by tapping out outer tubes with a chisel and hammer before installing new bushings with Special Service Tool: 09710-28012 (09710-07062), 09710-30041 (09710-03211) and a press. The procedure for leaf spring replacement starts by prying up the spring clip before removing the center bolt. Then replace the spring clip through drilling the rivet head and adding a new rivet before installing the spring center bolt with a torque of 44 Nm (450 kgf-cm, 33 ft. lbs.) while bending the spring clip back into position. Users should replace the spring bumper of 2WD (except PreRunner) vehicles by torquing 2 bolts to 29 Nm (300 kgf-cm, 22 ft. lbs.). The technical installation process starts by doing what was done in reverse order when removing components.
- Q: How to disassemble the rear leaf spring on Toyota Tundra?A:You should put matchmarks on the front-side bush before aligning the leaf spring through the opening area for marking. Proceed by using Special Service Tool: 09950-60010 and a press to drive out bushes from both vehicle sides. The technician should combine Special Service Tools: 09951-00350 and 09951-07150: 09950-70010. You must protect the matchmark on the leaf spring before you remove the bush which is located on the front side of your vehicle.


Related Toyota Parts
 Toyota Sway Bar Link
 Toyota Axle Beam Mount
 Toyota Control Arm Bolt
 Toyota Control Arm Bracket
 Toyota Crossmember Bushing
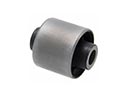 Toyota Differential Mount
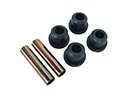 Toyota Leaf Spring Bushing
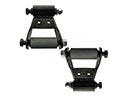 Toyota Leaf Spring Shackle
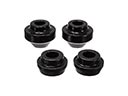 Toyota Radius Arm Bushing
 Toyota Strut Mounts
 Toyota Sway Bar Bracket
 Toyota Transfer Case Output Shaft Snap Ring