×
ToyotaParts- Hello
- Login or Register
- Quick Links
- Live Chat
- Track Order
- Parts Availability
- RMA
- Help Center
- Contact Us
- Shop for
- Toyota Parts
- Scion Parts
My Garage
My Account
Cart
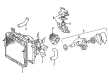
OEM Toyota Land Cruiser Radiator Cap
Cooling Radiator Cap- Select Vehicle by Model
- Select Vehicle by VIN
Select Vehicle by Model
orMake
Model
Year
Select Vehicle by VIN
For the most accurate results, select vehicle by your VIN (Vehicle Identification Number).
11 Radiator Caps found


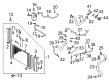
Toyota Land Cruiser Radiator Cap Part Number: 16475-28140
$24.13 MSRP: $33.58You Save: $9.45 (29%)Ships in 1 Business Day


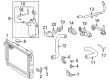
Toyota Land Cruiser Radiator Cap Part Number: 16401-67150
$19.23 MSRP: $26.76You Save: $7.53 (29%)


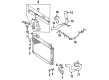
Toyota Land Cruiser Radiator Cap Part Number: 16401-15210
$20.30 MSRP: $28.26You Save: $7.96 (29%)Ships in 1-3 Business Days

Toyota Land Cruiser Cap Sub-Assembly, Reserve Tank Part Number: 16405-50080
$12.66 MSRP: $17.61You Save: $4.95 (29%)Ships in 1-3 Business Days


Toyota Land Cruiser Radiator Cap Part Number: 16401-50371
$15.40 MSRP: $21.44You Save: $6.04 (29%)Ships in 1 Business Day

Toyota Land Cruiser Cap Assembly Part Number: 16405-50020
$35.48 MSRP: $49.39You Save: $13.91 (29%)Ships in 1-3 Business Days


Toyota Land Cruiser Radiator Cap Part Number: 16401-54750
$17.20 MSRP: $23.94You Save: $6.74 (29%)Ships in 1-3 Business Days

Toyota Land Cruiser Cap Sub-Assembly, Reserve Tank Part Number: 16405-66020
$18.39 MSRP: $25.60You Save: $7.21 (29%)Ships in 1-2 Business Days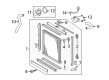
Toyota Land Cruiser Radiator Cap Part Number: 16401-17010
$15.64 MSRP: $21.77You Save: $6.13 (29%)Ships in 1-3 Business Days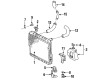
Toyota Land Cruiser Cap Part Number: 16405-61040

Toyota Land Cruiser Radiator Cap Part Number: 16405-90A03
Toyota Land Cruiser Radiator Cap
Choose genuine Radiator Cap that pass strict quality control tests. You can trust the top quality and lasting durability. Shopping for OEM Radiator Cap for your Toyota Land Cruiser? Our website is your one-stop destination. We stock an extensive selection of genuine Toyota Land Cruiser parts. The price is affordable so you can save more. It only takes minutes to browse and find the exact fit. Easily add to cart and check out fast. Our hassle-free return policy will keep you stress-free. We process orders quickly for swift delivery. Your parts will arrive faster, so you can get back on the road sooner.
The Toyota Land Cruiser Radiator Cap protects the cooling system by sealing in pressure so the engine will remain cool on deserts, mountains, and city streets. For decades the Toyota Land Cruiser has demonstrated itself as a reliable workhorse that combines rugged body-on-frame strength with a sophisticated four-wheel drive system that allows the driver to cross rocky trails or flooded roads without hesitation. Its responsive automated or manual gearboxes provide smooth shifts, the chunky suspension keeps cabin comfort high even when the way becomes violent, and the spacious interior enables families, aid teams, or explorers to venture far from paved highways. Owners also enjoy the massive global parts network that Toyota maintains, making maintenance simple wherever adventure calls. That indomitable character is why there are so many vintage Land Cruiser trucks from the 1970s still roaming confidently today. To aid such stamina, the dedicated Radiator Cap made for the Land Cruiser holds about 16 PSI, routes expanding coolant to the overflow tank, and then sucks it back to prevent boil-over and air pockets that could jeopardize performance. Its robust gasket and spring are as good as Toyota pressure specs, proving that a Radiator Cap can be as tough as any drivetrain component and will last a long time under constant vibration. Installing a new Radiator Cap is simple, allowing the engine to cool, loosening the old cap using a cloth, inspecting and cleaning the neck, pressing and twisting the new unit until locked, starting the motor, and checking for leaks.
Related Toyota Land Cruiser Parts
 Toyota Land Cruiser Radiator
 Toyota Land Cruiser Thermostat
 Toyota Land Cruiser Coolant Reservoir
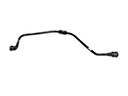 Toyota Land Cruiser Coolant Reservoir Hose
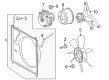
 Toyota Land Cruiser Cooling Fan Assembly
 Toyota Land Cruiser Fan Blade
 Toyota Land Cruiser Fan Shroud
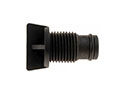 Toyota Land Cruiser Radiator Drain Plug
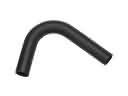 Toyota Land Cruiser Radiator Hose
 Toyota Land Cruiser Thermostat Gasket
 Toyota Land Cruiser Water Hose
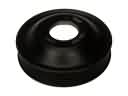 Toyota Land Cruiser Water Pump Pulley