×
ToyotaParts- Hello
- Login or Register
- Quick Links
- Live Chat
- Track Order
- Parts Availability
- RMA
- Help Center
- Contact Us
- Shop for
- Toyota Parts
- Scion Parts
My Garage
My Account
Cart
OEM 2010 Scion xD Front Cross-Member
Front Engine Cross Member- Select Vehicle by Model
- Select Vehicle by VIN
Select Vehicle by Model
orMake
Model
Year
Select Vehicle by VIN
For the most accurate results, select vehicle by your VIN (Vehicle Identification Number).
3 Front Cross-Members found
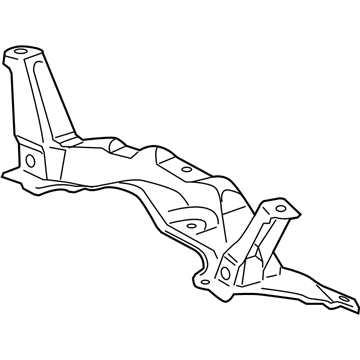
2010 Scion xD Suspension Crossmember, Front
Part Number: 51201-52097$923.54 MSRP: $1353.45You Save: $429.91 (32%)Ships in 1-3 Business DaysProduct Specifications- Other Name: Crossmember Sub-Assembly; Suspension Subframe Crossmember, Front; Crossmember Sub-Assembly, Front Suspension
- Position: Front
- Replaces: 51201-52094, 51201-52090, 51201-52092, 51201-52095, 51201-52093, 51201-52096
- Part Name Code: 51201
- Item Weight: 26.90 Pounds
- Condition: New
- Fitment Type: Direct Replacement
- SKU: 51201-52097
- Warranty: This genuine part is guaranteed by Toyota's factory warranty.
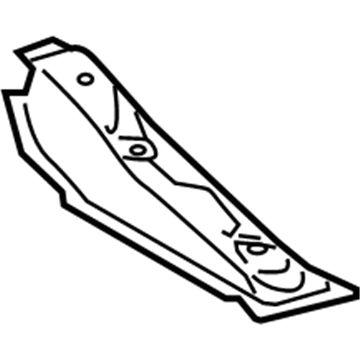
2010 Scion xD Floor Crossmember, Driver Side
Part Number: 57454-52010$69.39 MSRP: $97.40You Save: $28.01 (29%)Ships in 1-3 Business DaysProduct Specifications- Other Name: Floor Pan Crossmember, Left; Member, Front Floor Cross Side, Driver Side
- Position: Driver Side
- Part Name Code: 57454B
- Condition: New
- Fitment Type: Direct Replacement
- SKU: 57454-52010
- Warranty: This genuine part is guaranteed by Toyota's factory warranty.
2010 Scion xD Floor Crossmember, Passenger Side
Part Number: 57453-52020$68.67 MSRP: $96.40You Save: $27.73 (29%)Ships in 1-3 Business DaysProduct Specifications- Other Name: Floor Pan Crossmember, Right; Member, Front Floor Cross Side, Passenger Side
- Position: Passenger Side
- Part Name Code: 57453C
- Item Weight: 5.30 Pounds
- Condition: New
- Fitment Type: Direct Replacement
- SKU: 57453-52020
- Warranty: This genuine part is guaranteed by Toyota's factory warranty.
2010 Scion xD Front Cross-Member
Looking for affordable OEM 2010 Scion xD Front Cross-Member? Explore our comprehensive catalogue of genuine 2010 Scion xD Front Cross-Member. All our parts are covered by the manufacturer's warranty. Plus, our straightforward return policy and speedy delivery service ensure an unparalleled shopping experience. We look forward to your visit!
2010 Scion xD Front Cross-Member Parts Q&A
- Q: How to remove the front cross-member on 2010 Scion xD?A: Start by placing the front wheels straight ahead then remove the hood by unbolting the 4 fasteners. Start by taking out the front wiper arm head cap and then continue by taking off both the left and right front wiper arm assemblies with their blades in tow. Next remove the hood to cowl top seal before removing the right and left cowl top ventilator louvers and the windshield wiper motor with link. Start by taking off the front air shutter seal from the right-hand side followed by the removal of the outer cowl top panel. To access the column hole cover silencer sheet remove floor carpet material while detaching its 2 retaining clips. Secure the steering wheel assembly with a seat belt to protect the spiral cable before marking the sliding yoke with matchmarks then you can remove bolt B along with steel A to separate the steering intermediate shaft assembly. Uninstall the No. 1 steering column hole cover by first removing clip A then removing clip B from the body structure. Both tie rod end sub-assemblies can be separated by following the same steps individually for the left and right sides. The same method should be used to separate the left and right front stabilizer link assemblies. Use the identical method to separate left and right front lower suspension arm assemblies on both sides. The engine assembly requires hanging through proper installation of 2 hangers followed by chain hoist attachment to hangers but avoids contact by hooking the chain to other engine parts. The engine hangers feature components Engine Hanger No. 1: 12281-37020 and Engine Hanger No. 2: 12282-37010 attached with bolt part number 91552-81050 where torque settings must reach 43 Nm (438 kgf-cm, 32 ft-lbf). The engine moving control rod must be separated from the bolt before using a transmission jack to support the crossmember and then unfastening all 6 bolts. Detach the power steering gear by taking out its 2 bolts and 2 nuts where the nuts require stabilization to prevent rotation. Proceed with removing the left and right front stabilizer No. 1 brackets through the existing procedure twice before removing the front stabilizer bar. The process used to remove both left and right front lower suspension arm sub-assemblies needs to be identical. The procedure requires removal of both clips from the engine moving control rod cover followed by removal of the engine moving control rod with the respective bolt from automatic and manual transaxles. The final step involves removing the front suspension member dumper weight through removal of its 2 retaining bolts.


