×
ToyotaParts- Hello
- Login or Register
- Quick Links
- Live Chat
- Track Order
- Parts Availability
- RMA
- Help Center
- Contact Us
- Shop for
- Toyota Parts
- Scion Parts
My Garage
My Account
Cart
OEM 2009 Toyota Tundra Seat Heater
Seat Warmer- Select Vehicle by Model
- Select Vehicle by VIN
Select Vehicle by Model
orMake
Model
Year
Select Vehicle by VIN
For the most accurate results, select vehicle by your VIN (Vehicle Identification Number).
2 Seat Heaters found

2009 Toyota Tundra Seat Back Heater, Upper
Part Number: 87530-0C010$303.35 MSRP: $433.12You Save: $129.77 (30%)Ships in 1-3 Business DaysProduct Specifications- Other Name: Heater Assembly, Seat Ba; Seat Heater Pad, Front Left Upper, Front Right Upper, Right Upper; Element; Heater Assembly, Front Seat Back, Passenger Side; Heater Assembly, Front Seat Back, Driver Side; Seat Heater
- Position: Upper
- Item Weight: 1.60 Pounds
- Item Dimensions: 16.6 x 11.0 x 2.9 inches
- Condition: New
- Fitment Type: Direct Replacement
- SKU: 87530-0C010
- Warranty: This genuine part is guaranteed by Toyota's factory warranty.

2009 Toyota Tundra Seat Cushion Heater, Front Lower
Part Number: 87510-0C030$401.78 MSRP: $588.81You Save: $187.03 (32%)Ships in 1-3 Business DaysProduct Specifications- Other Name: Heater Assembly, Seat; Seat Heater Pad, Front Left Lower, Front Right Lower, Right Lower; Heater Assembly, Front Seat Cushion, Passenger Side; Driver Side; Seat Heater
- Position: Front Lower
- Item Weight: 1.60 Pounds
- Item Dimensions: 17.1 x 11.3 x 2.9 inches
- Condition: New
- Fitment Type: Direct Replacement
- SKU: 87510-0C030
- Warranty: This genuine part is guaranteed by Toyota's factory warranty.
2009 Toyota Tundra Seat Heater
Looking for affordable OEM 2009 Toyota Tundra Seat Heater? Explore our comprehensive catalogue of genuine 2009 Toyota Tundra Seat Heater. All our parts are covered by the manufacturer's warranty. Plus, our straightforward return policy and speedy delivery service ensure an unparalleled shopping experience. We look forward to your visit!
2009 Toyota Tundra Seat Heater Parts Q&A
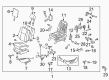
- Q: How to remove the front seat cushion heater for those equipped with a seat heater system on 2009 Toyota Tundra?A: The procedure for front seat cushion heater removal begins with protective glove usage because seat frame and adjuster material presents possible safety risks. Proceed with the front seat assembly LH removal followed by extracting the slide and vertical power seat switch knob LH then the reclining power seat switch knob LH. The removal process starts with taking off the front seat cushion shield LH as well as the front seat inner belt assembly LH. Begin by taking out the inner front seat cushion shield LH together with the front power seat switch LH and the front seat cushion cover with pad LH. To finish the process you must remove the separate type front seat cushion cover LH followed by the front seat cushion heater assembly LH.
Related 2009 Toyota Tundra Parts
 2009 Toyota Tundra Seat Cover
 2009 Toyota Tundra Armrest
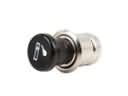 2009 Toyota Tundra Cigarette Lighter
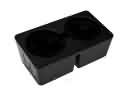 2009 Toyota Tundra Cup Holder
 2009 Toyota Tundra Instrument Cluster
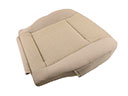 2009 Toyota Tundra Seat Cushion
 2009 Toyota Tundra Window Motor
 2009 Toyota Tundra Center Console Base
 2009 Toyota Tundra Dome Light
 2009 Toyota Tundra Door Lock Cylinder
 2009 Toyota Tundra Seat Heater Switch
 2009 Toyota Tundra Seat Switch