×
ToyotaParts- Hello
- Login or Register
- Quick Links
- Live Chat
- Track Order
- Parts Availability
- RMA
- Help Center
- Contact Us
- Shop for
- Toyota Parts
- Scion Parts
My Garage
My Account
Cart
OEM 2009 Toyota Land Cruiser A/C Condenser
Air Conditioning Condenser- Select Vehicle by Model
- Select Vehicle by VIN
Select Vehicle by Model
orMake
Model
Year
Select Vehicle by VIN
For the most accurate results, select vehicle by your VIN (Vehicle Identification Number).
1 A/C Condenser found

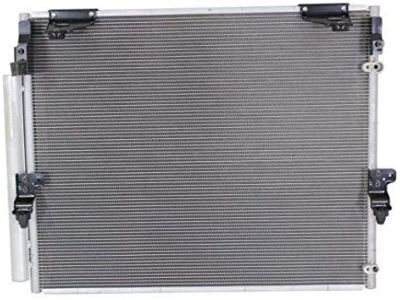
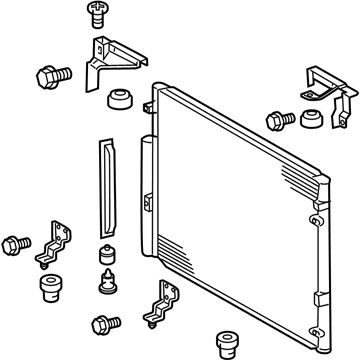
2009 Toyota Land Cruiser Condenser Assembly
Part Number: 88460-60400$310.34 MSRP: $443.10You Save: $132.76 (30%)Ships in 1-3 Business DaysProduct Specifications- Other Name: A/C Condenser; Condenser; Condenser Assembly, Cooler
- Part Name Code: 88460
- Item Weight: 13.40 Pounds
- Item Dimensions: 29.8 x 19.5 x 5.1 inches
- Condition: New
- Fitment Type: Direct Replacement
- SKU: 88460-60400
- Warranty: This genuine part is guaranteed by Toyota's factory warranty.
2009 Toyota Land Cruiser A/C Condenser
Looking for affordable OEM 2009 Toyota Land Cruiser A/C Condenser? Explore our comprehensive catalogue of genuine 2009 Toyota Land Cruiser A/C Condenser. All our parts are covered by the manufacturer's warranty. Plus, our straightforward return policy and speedy delivery service ensure an unparalleled shopping experience. We look forward to your visit!
2009 Toyota Land Cruiser A/C Condenser Parts Q&A
- Q: How to install the A/C Condenser on 2009 Toyota Land Cruiser?A: Begin HVAC condenser installation by tightening the cooler dryer with pliers while applying sufficient ND-OIL 8 or equivalent compressor oil to new O-ring areas of the cap before installing the O-ring to the cap. A 14 mm socket hexagon wrench should be used to install the cap onto the modulator while maintaining torque at 2.9 Nm (30 kgf-cm, 26 in-lbf). Next, install the cooler condenser as illustrated, followed by the radiator support sub-assembly using 8 bolts, with a torque of 21.7 Nm (221 kgf-cm, 16 ft-lbf) for bolt A and 9.8 Nm (100 kgf-cm, 7 ft-lbf) for bolt B. Install the hood lock assembly and the hood lock control cable cover, then proceed to install the hood lock support brace sub-assembly with 3 bolts and a nut, applying a torque of 21.7 Nm (221 kgf-cm, 16 ft-lbf) for the bolt and 5.5 Nm (56 kgf-cm, 49 in-lbf) for the nut, followed by the installation of the hood lock nut cap. Attach the oil cooler assembly temporarily on the radiator support so the 2 claws stay tightly secured and applies a bolt torque of 12 Nm (122 kgf-cm, 9 ft-lbf) to all bolts in their specified sequence. Screw in the transmission oil cooler air duct with 4 bolts following the installation order while tightening each bolt to 4.9 Nm (50 kgf-cm, 43 in-lbf). The No. 1 cooler refrigerant discharge hose requires removal of vinyl tape along with compressor oil application on new O-rings and the fitting surface of liquid pipe A joint before connection of the cooler condenser with bolts tightened to 5.4 Nm (55 kgf-cm, 48 in-lbf) while avoiding tool contact with the pipe. To complete the refrigerant liquid pipe A installation apply compressor oil to a fresh O-ring then join the components using 2 bolts that need to be tightened to 5.4 Nm (55 kgf-cm, 48 in-lbf). The order to finish the task consists of installing the front bumper cover followed by connecting the negative battery terminal cable and proceeding to charge the refrigerant before engine warm up and ultimately inspecting for leakage and SRS warning light operation.


