×
ToyotaParts- Hello
- Login or Register
- Quick Links
- Live Chat
- Track Order
- Parts Availability
- RMA
- Help Center
- Contact Us
- Shop for
- Toyota Parts
- Scion Parts
My Garage
My Account
Cart
OEM 2009 Toyota Highlander Differential
Front Differential- Select Vehicle by Model
- Select Vehicle by VIN
Select Vehicle by Model
orMake
Model
Year
Select Vehicle by VIN
For the most accurate results, select vehicle by your VIN (Vehicle Identification Number).
2 Differentials found

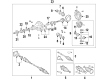
2009 Toyota Highlander Carrier Assembly, Rear
Part Number: 41110-21071$2026.19 MSRP: $2969.41You Save: $943.22 (32%)Ships in 1-3 Business DaysProduct Specifications- Other Name: Carrier Assembly, Differential; Drive Axle Assembly, Rear; Differential Assembly; Carrier; Carrier Assembly, Differential, Rear; Differential
- Manufacturer Note: *FGR=41:14=2.928
- Position: Rear
- Replaces: 41110-48080, 41110-48081
- Part Name Code: 41110
- Item Weight: 49.70 Pounds
- Item Dimensions: 30.5 x 27.4 x 18.7 inches
- Condition: New
- Fitment Type: Direct Replacement
- SKU: 41110-21071
- Warranty: This genuine part is guaranteed by Toyota's factory warranty.

2009 Toyota Highlander Differential
Part Number: 41301-21060$518.34 MSRP: $759.64You Save: $241.30 (32%)Ships in 1-3 Business DaysProduct Specifications- Other Name: Case Sub-Assembly, Differential; Case Sub-Assembly, Rear Differential
- Part Name Code: 41301
- Item Weight: 6.50 Pounds
- Item Dimensions: 7.2 x 7.0 x 6.4 inches
- Condition: New
- Fitment Type: Direct Replacement
- SKU: 41301-21060
- Warranty: This genuine part is guaranteed by Toyota's factory warranty.
2009 Toyota Highlander Differential
Looking for affordable OEM 2009 Toyota Highlander Differential? Explore our comprehensive catalogue of genuine 2009 Toyota Highlander Differential. All our parts are covered by the manufacturer's warranty. Plus, our straightforward return policy and speedy delivery service ensure an unparalleled shopping experience. We look forward to your visit!
2009 Toyota Highlander Differential Parts Q&A
- Q: How to remove and replace the rear differential carrier assembly on 2009 Toyota Highlander?A: Start the rear differential carrier assembly replacement process by collecting all needed items for the procedure. Set up jack stands under the vehicle while safely lifting it to perform the task. The driveshaft and its components should be disconnected first before the differential cover removal enables inner part accessibility. You must disconnect the carrier assembly from its housing position while remembering the original component arrangements that will help with reassembly. When replacing the old carrier assembly properly install the new component by maintaining the required alignment according to torque specifications. To finish the process you should first reconnect the driveshaft then lower the vehicle before reattaching the differential cover.
Related 2009 Toyota Highlander Parts
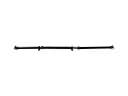 2009 Toyota Highlander Drive Shaft
 2009 Toyota Highlander CV Joint Companion Flange
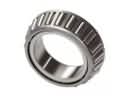 2009 Toyota Highlander Differential Bearing
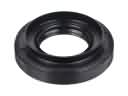 2009 Toyota Highlander Differential Seal
 2009 Toyota Highlander Pinion Bearing
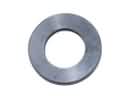 2009 Toyota Highlander Pinion Washer
 2009 Toyota Highlander Transfer Case Bearing
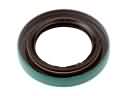 2009 Toyota Highlander Transfer Case Seal