×
ToyotaParts- Hello
- Login or Register
- Quick Links
- Live Chat
- Track Order
- Parts Availability
- RMA
- Help Center
- Contact Us
- Shop for
- Toyota Parts
- Scion Parts
My Garage
My Account
Cart
OEM 2009 Toyota Corolla Air Bag
Air Bag Module- Select Vehicle by Model
- Select Vehicle by VIN
Select Vehicle by Model
orMake
Model
Year
Select Vehicle by VIN
For the most accurate results, select vehicle by your VIN (Vehicle Identification Number).
9 Air Bags found

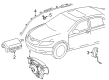
2009 Toyota Corolla Head Air Bag, Driver Side
Part Number: 62180-12032$663.96 MSRP: $973.05You Save: $309.09 (32%)Ships in 1-3 Business DaysProduct Specifications- Other Name: Air Bag Assembly, Curtain Shield; Curtain Air Bag, Left; Air Bag Assembly, Curtain Shield, Driver Side
- Manufacturer Note: KOREA SPEC
- Position: Driver Side
- Replaces: 62180-12030, 62180-12031
- Part Name Code: 62180A
- Item Weight: 11.40 Pounds
- Item Dimensions: 47.4 x 18.6 x 9.3 inches
- Condition: New
- Fitment Type: Direct Replacement
- SKU: 62180-12032
- Warranty: This genuine part is guaranteed by Toyota's factory warranty.
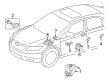
2009 Toyota Corolla Head Air Bag, Passenger Side
Part Number: 62170-12032$663.96 MSRP: $973.05You Save: $309.09 (32%)Ships in 1-3 Business DaysProduct Specifications- Other Name: Air Bag Assembly, Curtain Shield; Curtain Air Bag, Right; Air Bag Assembly, Curtain Shield, Passenger Side
- Manufacturer Note: KOREA SPEC
- Position: Passenger Side
- Replaces: 62170-12031, 62170-12030
- Part Name Code: 62170A
- Item Weight: 12.00 Pounds
- Item Dimensions: 46.9 x 19.1 x 9.3 inches
- Condition: New
- Fitment Type: Direct Replacement
- SKU: 62170-12032
- Warranty: This genuine part is guaranteed by Toyota's factory warranty.

2009 Toyota Corolla Passenger Air Bag
Part Number: 73960-12161$598.13 MSRP: $876.57You Save: $278.44 (32%)Ships in 1-3 Business DaysProduct Specifications- Other Name: Air Bag Assembly, Instrument Panel; Instrument Panel Air Bag
- Replaces: 73960-12160, 73960-12130
- Condition: New
- SKU: 73960-12161
- Warranty: This genuine part is guaranteed by Toyota's factory warranty.
2009 Toyota Corolla Passenger Air Bag
Part Number: 73960-02121$543.54 MSRP: $796.56You Save: $253.02 (32%)Ships in 1-3 Business DaysProduct Specifications- Other Name: Air Bag Assembly, Instrument Panel; Instrument Panel Air Bag; Passenger Inflator Module
- Replaces: 73960-02120, 73960-02140
- Condition: New
- SKU: 73960-02121
- Warranty: This genuine part is guaranteed by Toyota's factory warranty.

2009 Toyota Corolla Front Seat Air Bag, Driver Side
Part Number: 73920-02170$446.33 MSRP: $654.09You Save: $207.76 (32%)Ships in 1-3 Business DaysProduct Specifications- Other Name: Air Bag Assembly, Front Seat; Seat Air Bag; Air Bag Assembly, Front Seat, Driver Side
- Position: Driver Side
- Part Name Code: 73920A
- Item Weight: 2.40 Pounds
- Item Dimensions: 11.4 x 7.3 x 6.2 inches
- Condition: New
- Fitment Type: Direct Replacement
- SKU: 73920-02170
- Warranty: This genuine part is guaranteed by Toyota's factory warranty.

2009 Toyota Corolla Front Seat Air Bag, Driver Side
Part Number: 73920-02130$413.36 MSRP: $605.78You Save: $192.42 (32%)Ships in 1-3 Business DaysProduct Specifications- Other Name: Air Bag Assembly, Front Seat; Seat Air Bag, Front Left; Side Air Bag; Air Bag Assembly, Front Seat, Driver Side
- Position: Driver Side
- Part Name Code: 73920A
- Item Weight: 2.40 Pounds
- Item Dimensions: 11.4 x 8.4 x 7.1 inches
- Condition: New
- Fitment Type: Direct Replacement
- SKU: 73920-02130
- Warranty: This genuine part is guaranteed by Toyota's factory warranty.
2009 Toyota Corolla Front Seat Air Bag, Passenger Side
Part Number: 73910-02130$413.36 MSRP: $605.78You Save: $192.42 (32%)Ships in 1-3 Business DaysProduct Specifications- Other Name: Air Bag Assembly, Front Seat; Seat Air Bag, Front Right; Side Air Bag; Air Bag Assembly, Front Seat, Passenger Side
- Position: Passenger Side
- Part Name Code: 73910A
- Item Weight: 2.10 Pounds
- Condition: New
- Fitment Type: Direct Replacement
- SKU: 73910-02130
- Warranty: This genuine part is guaranteed by Toyota's factory warranty.
- Product Specifications
- Other Name: Air Bag Assembly, Curtain Shield; Curtain Air Bag, Right; Head Air Bag
- Position: Passenger Side
- Condition: New
- SKU: 62170-02101
- Warranty: This genuine part is guaranteed by Toyota's factory warranty.
- Product Specifications
- Other Name: Air Bag Assembly, Curtain Shield; Curtain Air Bag, Left; Head Air Bag
- Position: Driver Side
- Condition: New
- SKU: 62180-02101
- Warranty: This genuine part is guaranteed by Toyota's factory warranty.
2009 Toyota Corolla Air Bag
Looking for affordable OEM 2009 Toyota Corolla Air Bag? Explore our comprehensive catalogue of genuine 2009 Toyota Corolla Air Bag. All our parts are covered by the manufacturer's warranty. Plus, our straightforward return policy and speedy delivery service ensure an unparalleled shopping experience. We look forward to your visit!
2009 Toyota Corolla Air Bag Parts Q&A
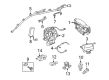
- Q: What does the Air Bag system include and what precautions should be taken during servicing on 2009 Toyota Corolla?A: The Air Bag system includes the center Air Bag sensor assembly, front Air Bag sensors LH and RH, side Air Bag sensors LH and RH , and rear Air Bag sensors LH and RH , collectively known as Air Bag sensors, while the steering pad, front passenger Air Bag assembly, front seat side Air Bag assembly , curtain shield Air Bag assembly , center Air Bag sensor assembly, front Air Bag sensor, side Air Bag sensor , rear Air Bag sensor , seat position Air Bag sensor, front seat inner belt assembly, and front seat outer belt assembly are referred to as SRS parts. The vehicle implements a Supplemental Restraint System (SRS) which contains a driver Air Bag and front passenger Air Bag and also includes a center Air Bag sensor together with front seat side Air Bags and curtain shield Air Bags and front seat belt pretensioners as well as seat position Air Bag sensor and seat belt buckle switch and front Air Bag sensors and side Air Bag sensors and rear Air Bag sensors . Service operations should start only after a 90-second delay from turning off the ignition switch and removing the negative (-) battery terminal. You must check the DTCs before battery removal since the symptom detection will be challenging. Also avoid subjecting SRS parts to high temperatures or fire exposure. Inspection of SRS components is required following every traffic incident even minimum ones and potentially damaging Air Bag sensors need complete removal before service operations start. SRS components require new replacement items only and technicians must never attempt repairs or alterations on these components while all defective parts must be replaced with new ones. The correct tool for investigating electrical circuits employs a high impedance (10 kOhms/V minimum) volt/ohmmeter. The maintenance of SRS parts requires following instructions from their information labels together with performing SRS warning light inspections after finishing work. Log down the system contents you memorized before disconnecting the battery and restore all systems to their original state during the post-work process. Replacing or readjusting the front/rear doors requires waiting 90 seconds once the negative (-) battery terminal is disconnected before performing the task. Vehicle operators must install sensor connectors before beginning vehicle operation when making any connector changes to those devices. Additionally keep all Air Bags sensors off the floor while performing these operations. Check DTCs for undeployed Air Bags then change Air Bag sensors which have already deployed. Those yellow connector pins used in SRS systems have built-in features for secure attachment and avoidance of incorrect wiring connections. The stereo pad pad requires releasing the lock button and raising the connector in order to disconnect it along with the front passenger Air Bag assembly and curtain shield Air Bag assembly and front seat outer belt assembly. The lock button needs secure pressure for both insertion and removal until a distinct click can be heard. Users must disconnect spiral cable connectors by sliding the slider lock until release then keep the slider positioned as it was before removing the cables. You must pull the lever on the center Air Bag sensor assembly to detach the holder before releasing the fitting lances while unlocking the retainer. The holder needs a firm insertion until all insertion is complete before you push the lever to establish the lock position. Success in mounting the front Air Bag sensor and front seat side Air Bag assembly requires checking that the housing lock is properly positioned before connection followed by connector attachment until it locks. To disconnect side and rear Air Bag sensors you should hold the sides of the outer connector locking sleeve and make sure it returns to its original position when reconnection occurs.
Related 2009 Toyota Corolla Parts
 2009 Toyota Corolla TPMS Sensor
 2009 Toyota Corolla Oxygen Sensor
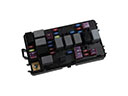 2009 Toyota Corolla Fuse
 2009 Toyota Corolla Clock Spring
 2009 Toyota Corolla Crankshaft Position Sensor
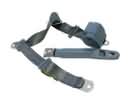 2009 Toyota Corolla Seat Belt
 2009 Toyota Corolla Antenna
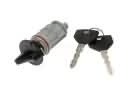 2009 Toyota Corolla Ignition Lock Cylinder
 2009 Toyota Corolla Air Bag Control Module
 2009 Toyota Corolla Air Bag Sensor
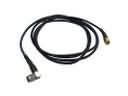 2009 Toyota Corolla Antenna Cable
 2009 Toyota Corolla Relay Block