×
ToyotaParts- Hello
- Login or Register
- Quick Links
- Live Chat
- Track Order
- Parts Availability
- RMA
- Help Center
- Contact Us
- Shop for
- Toyota Parts
- Scion Parts
My Garage
My Account
Cart
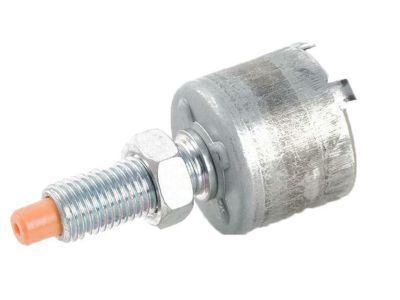
OEM 2008 Toyota Prius Brake Light Switch
Brake Lamp Switch- Select Vehicle by Model
- Select Vehicle by VIN
Select Vehicle by Model
orMake
Model
Year
Select Vehicle by VIN
For the most accurate results, select vehicle by your VIN (Vehicle Identification Number).
1 Brake Light Switch found

2008 Toyota Prius Switch Assembly, Stop Lamp
Part Number: 84340-47020$85.78 MSRP: $120.42You Save: $34.64 (29%)Ships in 1 Business DayProduct Specifications- Other Name: Brake Light Switch
- Part Name Code: 84340
- Item Weight: 0.50 Pounds
- Item Dimensions: 3.4 x 1.6 x 1.2 inches
- Condition: New
- Fitment Type: Direct Replacement
- SKU: 84340-47020
- Warranty: This genuine part is guaranteed by Toyota's factory warranty.
2008 Toyota Prius Brake Light Switch
Looking for affordable OEM 2008 Toyota Prius Brake Light Switch? Explore our comprehensive catalogue of genuine 2008 Toyota Prius Brake Light Switch. All our parts are covered by the manufacturer's warranty. Plus, our straightforward return policy and speedy delivery service ensure an unparalleled shopping experience. We look forward to your visit!
2008 Toyota Prius Brake Light Switch Parts Q&A
- Q: How to Properly Install a Brake Light Switch on 2008 Toyota Prius?A: The brake pedal stroke sensor assembly must be installed by first mounting the new sensor onto the brake pedal support through 2 bolts while verifying that the sensor lever hooks inside the brake pedal groove and checking that the sensor's contact areas remain free of any foreign matter. Torque the bolts to 9.3 Nm (95 kgf-cm, 82 in-lbf). Mobiletool has two steps for sensor installation: first break the sensor lever set pin by rapidly pressing the brake pedal followed by removing the broken pin then connecting the sensor connector. Install any reused sensor on the brake pedal support by using both bolts but maintain contact at the sensor lever with the brake pedal groove and keep the contacting surfaces clean. Turn the power switch ON (IG) at the DLC3 and sensor connector when adjusting the sensor performance to reach the standard voltage measurement range of 0.8 to 1.2 V before securing the bolts with 9.3 Nm (95 kgf-cm, 82 in-lbf) torque setting without releasing the brake pedal during the power operation. Finally, carry out system initialization. The sensor installation process should finish before installing the lower instrument panel finish panel sub-assembly followed by the No. 1 instrument panel register assembly.


