×
ToyotaParts- Hello
- Login or Register
- Quick Links
- Live Chat
- Track Order
- Parts Availability
- RMA
- Help Center
- Contact Us
- Shop for
- Toyota Parts
- Scion Parts
My Garage
My Account
Cart
OEM 2006 Toyota Tacoma Fuel Tank
Gas Tank- Select Vehicle by Model
- Select Vehicle by VIN
Select Vehicle by Model
orMake
Model
Year
Select Vehicle by VIN
For the most accurate results, select vehicle by your VIN (Vehicle Identification Number).
1 Fuel Tank found


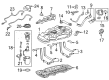 Product Specifications
- Other Name: Tank Sub-Assembly, Fuel; Tank Assembly, Fuel
- Replaces: 77001-04190, 77001-04200
- Part Name Code: 77100
- Item Weight: 61.20 Pounds
- Item Dimensions: 63.0 x 30.9 x 20.8 inches
- Condition: New
- Fitment Type: Direct Replacement
- SKU: 77001-04201
- Warranty: This genuine part is guaranteed by Toyota's factory warranty.
2006 Toyota Tacoma Fuel Tank
Looking for affordable OEM 2006 Toyota Tacoma Fuel Tank? Explore our comprehensive catalogue of genuine 2006 Toyota Tacoma Fuel Tank. All our parts are covered by the manufacturer's warranty. Plus, our straightforward return policy and speedy delivery service ensure an unparalleled shopping experience. We look forward to your visit!
2006 Toyota Tacoma Fuel Tank Parts Q&A
- Q: How to remove and install a fuel tank on 2006 Toyota Tacoma?A: The first step towards removing the fuel tank includes draining fuel system pressure while disconnecting the negative battery terminal cable. The removal process requires disconnecting both the fuel tank main tube and return tube by first unfastening fuel pipe clamps and gently pinching the retainers until their connectors detach with a specific check for dirt and scratches on all components. Start by disconnecting the fuel breather tube through its clamp bolt and follow by inserting a mission jack under the fuel tank to remove its two bands. After taking out the bolts and pins along with clips one can successfully extract the tank. To start the fuel tank removal process, disconnect the fuel pump cover and then jack the tank down slightly before eliminating the fuel pump connector and fuel tank vent hose through retainer pinching. The assembly requires three steps for maintenance where technicians need to first remove the fuel tank assembly followed by the removal of fuel tank main tube and fuel tank return tube by unmounting joint clips. When removing the fuel suction from the pump assembly and gauge tube protect the connections while releasing the retainer with Special Service Tool, 09808-14020 (09808-01410, 09808-01420, 09808-01430) to extract the assembly from the fuel tank. The first step is fuel drain followed by hose removal from the fuel tank to filler pipe by releasing the clamp bolt and subsequent clip removal that enables the No. 1 fuel tank protector to be extracted. First install the No. 1 fuel tank protector with its clips before installing the fuel tank to filler pipe hose followed by tightening the clamp bolt opposite. Set the fuel pump assembly into the fuel tank while maintaining attention to the sender gauge arm and position the fuel suction tube assembly into the keyway before installing the new retainer by turning it 740 to 780 degrees clockwise. The installation of the fuel tank main tube and return tube should include joint clips and must be free from scratches and foreign objects. Place the fuel tank assembly on the mission jack after connecting both the fuel tank vent hose and fuel pump connector then fit in the fuel tank to filler pipe hose. Insert the fuel pump cover and set on the two fuel tank bands before tightening these components to 62 N.m (632 kgf.cm, 46 ft.lbf). Next attach the fuel tank breather tube while tightening the bolt clamp. Conclude the fuel tank main tube combined with the return tube before securing the fuel pipe clamp. Add fuel to the tank then connect the cable to the negative battery terminal with a torque of 3.9 N.m (40 kgf.cm, 35 in.lbf) and perform a leakage inspection.
Related 2006 Toyota Tacoma Parts
 2006 Toyota Tacoma Fuel Pump
 2006 Toyota Tacoma Gas Cap
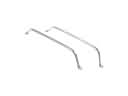 2006 Toyota Tacoma Fuel Tank Strap
 2006 Toyota Tacoma Fuel Filler Neck
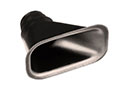 2006 Toyota Tacoma Air Duct
 2006 Toyota Tacoma Fuel Filler Hose
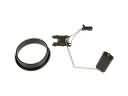 2006 Toyota Tacoma Fuel Level Sensor
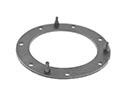 2006 Toyota Tacoma Fuel Pump Gasket
 2006 Toyota Tacoma Fuel Pump Seal
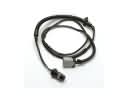 2006 Toyota Tacoma Fuel Pump Wiring Harness
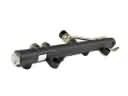 2006 Toyota Tacoma Fuel Rail
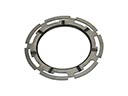 2006 Toyota Tacoma Fuel Tank Lock Ring