×
ToyotaParts- Hello
- Login or Register
- Quick Links
- Live Chat
- Track Order
- Parts Availability
- RMA
- Help Center
- Contact Us
- Shop for
- Toyota Parts
- Scion Parts
My Garage
My Account
Cart
OEM 2006 Toyota Matrix Car Speakers
Audio Speakers- Select Vehicle by Model
- Select Vehicle by VIN
Select Vehicle by Model
orMake
Model
Year
Select Vehicle by VIN
For the most accurate results, select vehicle by your VIN (Vehicle Identification Number).
9 Car Speakers found


2006 Toyota Matrix Tweeter, Driver Side
Part Number: 86160-02640$80.95 MSRP: $110.12You Save: $29.17 (27%)Ships in 1-3 Business DaysProduct Specifications- Other Name: Speaker Assembly, Radio; Speaker, Front Left; Speaker Assembly, Front
- Manufacturer Note: W(AM/FM CD CHANGER JBL PREMIUM SOUND SYSTEM 7SPEAKER)
- Position: Driver Side
- Part Name Code: 86160P
- Item Weight: 1.20 Pounds
- Condition: New
- Fitment Type: Direct Replacement
- SKU: 86160-02640
- Warranty: This genuine part is guaranteed by Toyota's factory warranty.
2006 Toyota Matrix Tweeter, Passenger Side
Part Number: 86160-02630$80.97 MSRP: $110.16You Save: $29.19 (27%)Ships in 1-3 Business DaysProduct Specifications- Other Name: Speaker Assembly, Radio; Speaker, Front Right; Speaker Assembly, Front
- Manufacturer Note: W(AM/FM CD CHANGER JBL PREMIUM SOUND SYSTEM 7SPEAKER)
- Position: Passenger Side
- Part Name Code: 86160P
- Item Weight: 1.20 Pounds
- Condition: New
- Fitment Type: Direct Replacement
- SKU: 86160-02630
- Warranty: This genuine part is guaranteed by Toyota's factory warranty.

2006 Toyota Matrix Front Driver Speaker
Part Number: 86160-02610$133.36 MSRP: $182.98You Save: $49.62 (28%)Ships in 1-3 Business DaysProduct Specifications- Other Name: Speaker Assembly, Radio; Speaker, Center Front; Speaker Assembly, Front
- Part Name Code: 86160
- Item Weight: 2.40 Pounds
- Condition: New
- Fitment Type: Direct Replacement
- Require Quantity: 2
- SKU: 86160-02610
- Warranty: This genuine part is guaranteed by Toyota's factory warranty.
2006 Toyota Matrix Front Driver Speaker
Part Number: 86160-02450$171.22 MSRP: $242.39You Save: $71.17 (30%)Ships in 1-3 Business DaysProduct Specifications- Other Name: Speaker Assembly, Radio; Speaker, Center Front, Front; Speaker Assembly, Front
- Part Name Code: 86160
- Item Weight: 2.20 Pounds
- Condition: New
- Fitment Type: Direct Replacement
- Require Quantity: 2
- SKU: 86160-02450
- Warranty: This genuine part is guaranteed by Toyota's factory warranty.

2006 Toyota Matrix Rear Driver Speaker
Part Number: 86160-01190$171.02 MSRP: $242.10You Save: $71.08 (30%)Ships in 1-3 Business DaysProduct Specifications- Other Name: Speaker Assembly, Radio; Speaker, Center Rear, Rear; Speaker Assembly, Rear
- Position: Rear
- Part Name Code: 86160B
- Item Weight: 2.50 Pounds
- Condition: New
- Fitment Type: Direct Replacement
- Require Quantity: 2
- SKU: 86160-01190
- Warranty: This genuine part is guaranteed by Toyota's factory warranty.
2006 Toyota Matrix Tweeter, Passenger Side
Part Number: 86160-01200$103.90 MSRP: $145.85You Save: $41.95 (29%)Ships in 1-3 Business DaysProduct Specifications- Other Name: Speaker Assembly, Radio; Speaker, Front Right, Right; Speaker Assembly, Front
- Manufacturer Note: RH
- Position: Passenger Side
- Part Name Code: 86160P
- Item Weight: 0.80 Pounds
- Condition: New
- Fitment Type: Direct Replacement
- SKU: 86160-01200
- Warranty: This genuine part is guaranteed by Toyota's factory warranty.
- Product Specifications
- Other Name: Speaker Assembly, Radio; Speaker, Front Left, Left; Speaker Assembly, Front
- Manufacturer Note: LH
- Position: Driver Side
- Part Name Code: 86160P
- Item Weight: 0.80 Pounds
- Condition: New
- Fitment Type: Direct Replacement
- SKU: 86160-01210
- Warranty: This genuine part is guaranteed by Toyota's factory warranty.
- Product Specifications
- Other Name: Speaker Assembly, Radio; Speaker, Center Rear; Speaker Assembly, Rear
- Manufacturer Note: W(AM/FM CD CHANGER JBL PREMIUM SOUND SYSTEM 7SPEAKER)
- Position: Rear
- Part Name Code: 86160B
- Item Weight: 2.40 Pounds
- Condition: New
- Fitment Type: Direct Replacement
- Require Quantity: 2
- SKU: 86160-02620
- Warranty: This genuine part is guaranteed by Toyota's factory warranty.
 Product Specifications
- Other Name: Speaker Assembly, With Box; Speaker, Rear; Speaker Assembly, W/Box
- Position: Rear
- Part Name Code: 86150
- Item Weight: 14.60 Pounds
- Item Dimensions: 25.0 x 24.2 x 14.7 inches
- Condition: New
- Fitment Type: Direct Replacement
- SKU: 86150-02050
- Warranty: This genuine part is guaranteed by Toyota's factory warranty.
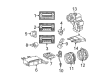
2006 Toyota Matrix Car Speakers
Looking for affordable OEM 2006 Toyota Matrix Car Speakers? Explore our comprehensive catalogue of genuine 2006 Toyota Matrix Car Speakers. All our parts are covered by the manufacturer's warranty. Plus, our straightforward return policy and speedy delivery service ensure an unparalleled shopping experience. We look forward to your visit!
2006 Toyota Matrix Car Speakers Parts Q&A
- Q: How to replace the front no.1 car speakers assy on 2006 Toyota Matrix?A: The front NO.1 speaker assy replacement starts with the removal of the front door pull handle LH along with power window regulator master switch assy (w/ power window), front armrest base panel upper LH (w/o power window), front door window regulator handle assy (w/o power window) and front door trim board sub-assy LH. First disconnect the connector from the front NO.1 speaker assy before using a 4 mm or smaller diameter (0.16 inches) drill to remove the 3 rivet heads by carefully cutting the flanges vertical to the drilling surface while carefully maintaining drill verticality to prevent any damage. Proceed with caution because the cut rivets may be hot before continuing with drilling action to remove remaining fragments. Conduct vacuum cleaning inside the front door panel to collect both drilled rivets and dust which was produced during the drilling procedure. The new front NO.1 speaker assy installation requires a hand or air riveter with which users can secure the assembly through three new strike rivets according to its designated installation order. The riveter must not be prized during use to protect integrity of assemblies and new rivets should be installed after firmly mounting both materials. Finally, reconnect the connector.
Related 2006 Toyota Matrix Parts
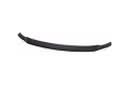 2006 Toyota Matrix Spoiler
 2006 Toyota Matrix Bumper
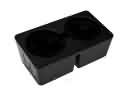 2006 Toyota Matrix Cup Holder
 2006 Toyota Matrix Emblem
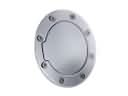 2006 Toyota Matrix Fuel Door
 2006 Toyota Matrix Windshield
 2006 Toyota Matrix Dash Panels
 2006 Toyota Matrix Door Lock
 2006 Toyota Matrix Instrument Panel Light Bulb
 2006 Toyota Matrix Interior Door Handle
 2006 Toyota Matrix Rear Passenger Door Handle Latch
 2006 Toyota Matrix Wiper Linkage