×
ToyotaParts- Hello
- Login or Register
- Quick Links
- Live Chat
- Track Order
- Parts Availability
- RMA
- Help Center
- Contact Us
- Shop for
- Toyota Parts
- Scion Parts
My Garage
My Account
Cart
OEM 2005 Toyota RAV4 Sway Bar Kit
Stabilizer Sway Bar Set- Select Vehicle by Model
- Select Vehicle by VIN
Select Vehicle by Model
orMake
Model
Year
Select Vehicle by VIN
For the most accurate results, select vehicle by your VIN (Vehicle Identification Number).
1 Sway Bar Kit found
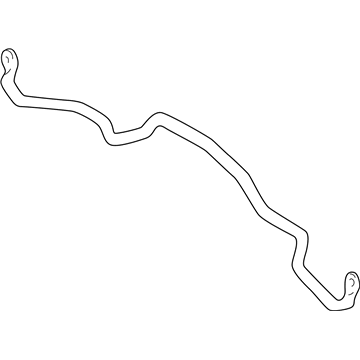
2005 Toyota RAV4 Stabilizer Bar, Front
Part Number: 48811-42050$134.64 MSRP: $190.61You Save: $55.97 (30%)Ships in 1-3 Business DaysProduct Specifications- Other Name: Bar, Stabilizer; Suspension Stabilizer Bar, Front; Sway Bar; Bar, Stabilizer, Front
- Position: Front
- Part Name Code: 48811
- Item Weight: 5.10 Pounds
- Item Dimensions: 53.0 x 6.1 x 6.1 inches
- Condition: New
- Fitment Type: Direct Replacement
- SKU: 48811-42050
- Warranty: This genuine part is guaranteed by Toyota's factory warranty.
2005 Toyota RAV4 Sway Bar Kit
Looking for affordable OEM 2005 Toyota RAV4 Sway Bar Kit? Explore our comprehensive catalogue of genuine 2005 Toyota RAV4 Sway Bar Kit. All our parts are covered by the manufacturer's warranty. Plus, our straightforward return policy and speedy delivery service ensure an unparalleled shopping experience. We look forward to your visit!
2005 Toyota RAV4 Sway Bar Kit Parts Q&A
- Q: How to service and repair the Sway Bar Kit on 2005 Toyota RAV4?A: The first step to service and repair the sway bar kit requires removing the sway bar links through the process of taking off the 2 nuts followed by the sway bar link while applying a torque of 44 Nm (450 kgf-cm, 32 ft. lbs.). Make use of a hexagon wrench with 5 mm size to hold the stud while the ball joint can rotate with the nut. Perform the same operation on the sway bar link on the opposite side. Start by disconnecting the sway bar through the removal of 2 bolts along with bracket and bushing using 29 Nm (300 kgf-cm, 22 ft. lbs.) torque before completing the opposite side and removing the sway bar. Install the bushing while orienting its cutout toward the back and placing the bushing beyond the bushing stopper during setup. During inspections of the sway bar link perform a five-step rotation test by spinning the ball joint stud 5 times before tightening the nut with a torque wrench while maintaining a rotation of 2 - 4 seconds per turn until reaching the target 0.05 - 1.0 Nm (0.5 - 10 kgf-cm, 0.4 - 8.7 inch lbs.) torque reading on the fifth turn. The inspection process includes checking sway bar bushings for any signs of cracking while replacement is mandatory when such damage is detected. The installation procedure resolves in the opposite sequence that removal performed.


