×
ToyotaParts- Hello
- Login or Register
- Quick Links
- Live Chat
- Track Order
- Parts Availability
- RMA
- Help Center
- Contact Us
- Shop for
- Toyota Parts
- Scion Parts
My Garage
My Account
Cart
OEM 2005 Toyota Prius Camshaft Position Sensor
Cam Position Sensor- Select Vehicle by Model
- Select Vehicle by VIN
Select Vehicle by Model
orMake
Model
Year
Select Vehicle by VIN
For the most accurate results, select vehicle by your VIN (Vehicle Identification Number).
1 Camshaft Position Sensor found

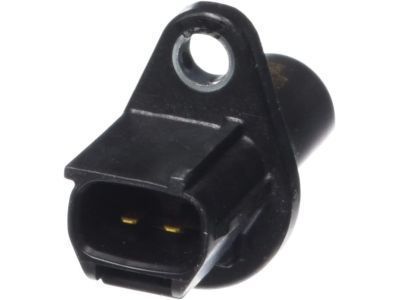
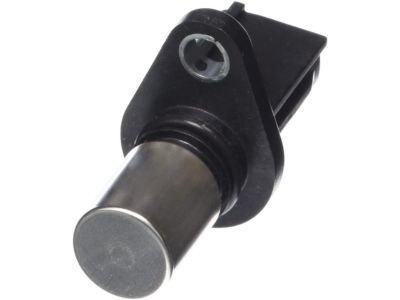
2005 Toyota Prius Camshaft Position Sensor
Part Number: 90919-05024$116.24 MSRP: $163.16You Save: $46.92 (29%)Ships in 1-3 Business DaysProduct Specifications- Other Name: Sensor, Cam Position; Engine Camshaft Position Sensor; Cam Position Sensor; Camshaft Sensor; Cam Sensor
- Replaces: 19300-BZ020
- Part Name Code: 11101E
- Item Weight: 0.50 Pounds
- Item Dimensions: 13.4 x 11.2 x 2.1 inches
- Condition: New
- Fitment Type: Direct Replacement
- SKU: 90919-05024
- Warranty: This genuine part is guaranteed by Toyota's factory warranty.
2005 Toyota Prius Camshaft Position Sensor
Looking for affordable OEM 2005 Toyota Prius Camshaft Position Sensor? Explore our comprehensive catalogue of genuine 2005 Toyota Prius Camshaft Position Sensor. All our parts are covered by the manufacturer's warranty. Plus, our straightforward return policy and speedy delivery service ensure an unparalleled shopping experience. We look forward to your visit!
2005 Toyota Prius Camshaft Position Sensor Parts Q&A
- Q: How to replace the Camshaft Position Sensor on 2005 Toyota Prius?A: The first step to install a new Camshaft Position Sensor requires you to remove the radiator support opening cover and engine under covers along with the draining of HV coolant. The replacement process begins with unlatching the rear floor board No.2 and deck floor box rear and rear floor board No.3. Production personnel should disconnect engine wire number 3 (also known as the battery negative terminal) before they remove the service plug grip. The service should start with removing the windshield wiper arm cover followed by the front wiper arms (RH and LH) together with the hood to cowl top seal along with the cowl top ventilator louvers (LH and RH). You should remove the windshield wiper link assembly and cowl top panel sub-assembly outer front along with the inverter cover. Verify that the w/converter inverter assembly voltage is zero before disconnecting Inverter cooling hoses number 2, number 1, and number 6 and cutting circuit breaker sensor number 1. The camshaft position sensor can be removed after you disconnect connector wire No.2 and remove the w/converter inverter assembly as well as the bolt securing it. Install the new camshaft position sensor by first applying engine oil to the O-ring and then securing it with the bolt which requires 8.0 Nm torque specification and finally attach the sensor connector. After the w/converter inverter assembly installation, connect frame wire No.2 and circuit breaker sensor No.1 before installing inverter cooling hoses (No.6, No.1, and No.2). Here you must attach in order the inverter cover followed by the cowl top panel sub-assembly outer front and windshield wiper link assembly then place the service plug grip and finish by restoring engine wire No.3 (battery negative terminal). Add HV coolant while inspecting for fluid leaks in the HV cooling system as well as engine oil. After installing rear floor board No.2 and engine under covers and the radiator support opening cover, power window control system initialization should be performed before installing windshield wiper arm cover and front wiper arms (LH and RH) and hood to cowl top seal. Also reinstall the cowl top ventilator louvers (RH and LH).


