×
ToyotaParts- Hello
- Login or Register
- Quick Links
- Live Chat
- Track Order
- Parts Availability
- RMA
- Help Center
- Contact Us
- Shop for
- Toyota Parts
- Scion Parts
My Garage
My Account
Cart
OEM 2005 Toyota Prius Ball Joint
Control Arm Joint- Select Vehicle by Model
- Select Vehicle by VIN
Select Vehicle by Model
orMake
Model
Year
Select Vehicle by VIN
For the most accurate results, select vehicle by your VIN (Vehicle Identification Number).
1 Ball Joint found

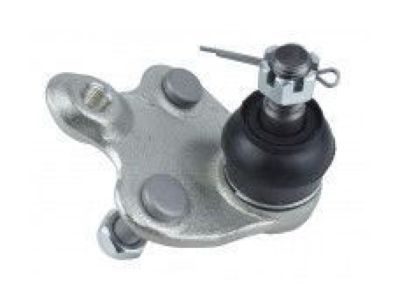
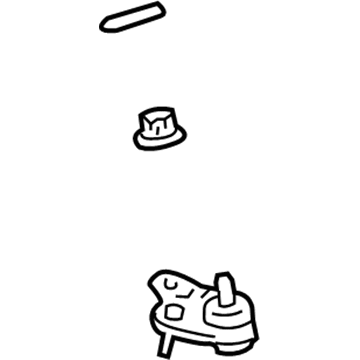
2005 Toyota Prius Lower Ball Joint
Part Number: 43330-49055$70.38 MSRP: $98.79You Save: $28.41 (29%)Ships in 1-3 Business DaysProduct Specifications- Other Name: Joint Assembly, Lower Ball; Suspension Ball Joint, Front; Joint Assembly, Lower Ball, Front Passenger Side; Front Driver Side; Suspension Ball Joint.
- Position: Lower
- Item Weight: 2.10 Pounds
- Item Dimensions: 5.4 x 3.3 x 2.5 inches
- Condition: New
- Fitment Type: Direct Replacement
- SKU: 43330-49055
- Warranty: This genuine part is guaranteed by Toyota's factory warranty.
2005 Toyota Prius Ball Joint
Looking for affordable OEM 2005 Toyota Prius Ball Joint? Explore our comprehensive catalogue of genuine 2005 Toyota Prius Ball Joint. All our parts are covered by the manufacturer's warranty. Plus, our straightforward return policy and speedy delivery service ensure an unparalleled shopping experience. We look forward to your visit!
2005 Toyota Prius Ball Joint Parts Q&A
- Q: How to replace the lower ball joint assembly front LH on 2005 Toyota Prius?A: Begin the replacement of the lower ball joint assembly front LH by inspecting its condition with a method that includes jacking the front of the car and testing vertical looseness in the lower ball joint assembly front through movements of the front suspension arm sub-assembly lower NO.1 using a wooden block wrapped in cloth for protection. First remove the front wheel and then employ special service tool: 09930-00010 to take off the front axle hub LH nut. The technician needs to disconnect the speed sensor front LH before removing the front disc brake caliper assembly LH to extract the front disc. use special service tool 09628-62011 to detach the tie rod end sub-assembly LH and then remove the bolt alongside two nuts allowing the front suspension arm sub-assembly lower NO.1 LH to drop away from the front lower ball joint assembly. use special service tool: 09611-36020 to remove the front axle assembly LH together with the front wheel bearing dust deflector NO.1 LH before taking out the lower ball joint assembly front LH by using the clip and castle nuts remover. maintain the steering knuckle from damage during removal step while securely hanging the tool to the spacer. when inspecting the lower ball joint assembly front LH an installer must operate the ball joint stud five cycles back and forth before nut installation with a torque wrench setting for turning torque between 0.98 to 4.90 Nm (10 to 50 kgf-cm, 8.7 to 43 inch lbs.). finally check for dust boot cracks or grease leakage. if needed replace the entire assembly. the new lower ball joint assembly front LH should be installed onto the steering knuckle using the castle nut while both thread and taper remain free from oil with a torque value of 71 Nm (724 kgf-cm, 52 ft. lbs.). additional tightening up to 60 degrees can be applied if the cotter pin holes are misaligned which requires installation of a new clip. stage the front wheel bearing dust deflector NO.1 LH with special service tool: 09950-70010 (09951-07150), 09608-32010 and install the front axle assembly LH along with the front suspension arm sub-assembly lower NO.1 LH to which you attach the bolt and two nuts at 89 Nm (908 kgf-cm, 66 ft. lbs.). install the tie rod end sub-assembly LH followed by front disc, front disc brake caliper assembly LH, speed sensor front LH, and the front axle hub LH nut then torque it to 103 Nm (1,050 kgf-cm, 76 ft. lbs.). the end of the installation requires checking and adjusting the front wheel alignment while verifying the abs speed sensor functionality.


