×
ToyotaParts- Hello
- Login or Register
- Quick Links
- Live Chat
- Track Order
- Parts Availability
- RMA
- Help Center
- Contact Us
- Shop for
- Toyota Parts
- Scion Parts
My Garage
My Account
Cart
OEM 2005 Toyota Echo Air Bag
Air Bag Module- Select Vehicle by Model
- Select Vehicle by VIN
Select Vehicle by Model
orMake
Model
Year
Select Vehicle by VIN
For the most accurate results, select vehicle by your VIN (Vehicle Identification Number).
2 Air Bags found

2005 Toyota Echo Passenger Air Bag
Part Number: 73970-52010-E0$737.14 MSRP: $1080.29You Save: $343.15 (32%)Ships in 1-3 Business DaysProduct Specifications- Other Name: Air Bag Assembly, Instrument Panel; Instrument Panel Air Bag, Upper; Air Bag Assembly, Instrument Panel Passenger
- Manufacturer Note: SANDAL WOOD,TRIM4#
- Part Name Code: 73970A
- Item Weight: 9.70 Pounds
- Item Dimensions: 15.7 x 11.6 x 8.6 inches
- Condition: New
- Fitment Type: Direct Replacement
- SKU: 73970-52010-E0
- Warranty: This genuine part is guaranteed by Toyota's factory warranty.
- Product Specifications
- Other Name: Air Bag Assembly, Instrument Panel; Instrument Panel Air Bag, Upper; Passenger Inflator Module; Air Bag Assembly, Instrument Panel Passenger
- Replaces: 73970-52010-B0
- Part Name Code: 73970A
- Item Weight: 9.80 Pounds
- Item Dimensions: 15.4 x 11.2 x 8.8 inches
- Condition: New
- Fitment Type: Direct Replacement
- SKU: 73970-52010-B2
- Warranty: This genuine part is guaranteed by Toyota's factory warranty.
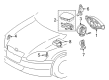
2005 Toyota Echo Air Bag
Looking for affordable OEM 2005 Toyota Echo Air Bag? Explore our comprehensive catalogue of genuine 2005 Toyota Echo Air Bag. All our parts are covered by the manufacturer's warranty. Plus, our straightforward return policy and speedy delivery service ensure an unparalleled shopping experience. We look forward to your visit!
2005 Toyota Echo Air Bag Parts Q&A
- Q: How to remove and reinstall the side Air Bag assembly and front seat on 2005 Toyota Echo?A: A screwdriver removes the seat track covers and lets you detach the front seat by taking out its four bolts and separating its connectors followed by seat extraction while protecting the body from damage. Proceed by taking out the 2 screws to remove the headrest and reclining release handle and seat cushion shield in the sequence provided in the illustration. The inner seat belt removal process involves removing the driver-side inner belt bolt along with disconnecting its connector and both the inner belt and seat sensor connectors from the passenger side. First disconnect the seat cushion inner shield by removing its clip along with screw before moving onto the seatback assembly to disconnect its connector then wire harness followed by hog ring removal and bolt extraction. The headrest supports must be installed onto the seatback assembly first while attaching the full seatback assembly with 4 bolts torqued to 43 N.m (440 kgf.cm, 32 ft.lbf) after adding new hog rings. The operation requires downloading the wire harness onto connector clamps for both the driver and passenger sides. After screwing and clipping the seat cushion inner shield it is time to install the front seat inner belt utilizing a bolt that requires 41 N.m (420 kgf.cm, 30 ft.lbf) of torque and reusing existing inner belt connectors in the same way described previously. Fitting the seat cushion shield requires using two screws according to the given illustration sequence before reinstalling the reclining release handle and headrest. Complete the front seat installation by retracting the seat to its most forward position, making sure the adjuster has engaged then secure the seat to the vehicle without grasping the track handle, route the connectors before briefly securing the rear bolts then torque them to 37 N.m (375 kgf.cm, 27 ft.lbf) and install the front bolts after moving the seat to its maximum rear position while finishing by installing the seat track covers.
Related 2005 Toyota Echo Parts
 2005 Toyota Echo Ignition Coil
 2005 Toyota Echo Air Bag Control Module
 2005 Toyota Echo Air Bag Sensor
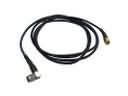 2005 Toyota Echo Antenna Cable
 2005 Toyota Echo Clock Spring
 2005 Toyota Echo Coolant Temperature Sensor
 2005 Toyota Echo Engine Control Module
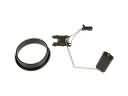 2005 Toyota Echo Fuel Level Sensor
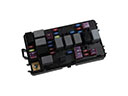 2005 Toyota Echo Fuse
 2005 Toyota Echo Horn
 2005 Toyota Echo Neutral Safety Switch
 2005 Toyota Echo Seat Belt