×
ToyotaParts- Hello
- Login or Register
- Quick Links
- Live Chat
- Track Order
- Parts Availability
- RMA
- Help Center
- Contact Us
- Shop for
- Toyota Parts
- Scion Parts
My Garage
My Account
Cart
OEM 2005 Scion xA Knock Sensor
Engine Knock Sensor- Select Vehicle by Model
- Select Vehicle by VIN
Select Vehicle by Model
orMake
Model
Year
Select Vehicle by VIN
For the most accurate results, select vehicle by your VIN (Vehicle Identification Number).
1 Knock Sensor found

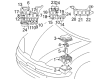 Product Specifications
- Other Name: Sensor, Knock Control; Ignition Knock (Detonation) Sensor
- Manufacturer Note: DENSO
- Replaces: 89615-52040
- Part Name Code: 89615
- Item Weight: 0.70 Pounds
- Item Dimensions: 3.7 x 1.8 x 1.3 inches
- Condition: New
- Fitment Type: Direct Replacement
- SKU: 89615-52030
- Warranty: This genuine part is guaranteed by Toyota's factory warranty.
2005 Scion xA Knock Sensor
Looking for affordable OEM 2005 Scion xA Knock Sensor? Explore our comprehensive catalogue of genuine 2005 Scion xA Knock Sensor. All our parts are covered by the manufacturer's warranty. Plus, our straightforward return policy and speedy delivery service ensure an unparalleled shopping experience. We look forward to your visit!
2005 Scion xA Knock Sensor Parts Q&A
- Q: How to replace the Knock Sensor on 2005 Scion xA?A: The first steps to replace the knock sensor start with coolant drain before removing the air cleaner assembly and separating the accelerator control cable assembly. Separate the transmission oil level gage sub-assembly (A/T transaxle) and the transmission oil filler tube sub-assembly (A/T transaxle) before disconnecting ISC valve connector and throttle position sensor connector (M/T transaxle) and removing the wire harness clamp and then taking off the accelerator control cable bracket and throttle body with its accompanying gasket from the intake manifold. Begin by removing the cylinder head cover No.2 through four nut removal and disconnecting the radiator hose inlet and then taking off the oil level gage sub-assembly. Start by disconnecting the ventilation hose followed by dissociating the union to connector tube hose then the 3 wire harness clamps. Remove the manifold gasket by unfastening the specified 3 bolts and 2 nuts. Remove the knock sensor with special service tool: 09816 30010 by disconnecting its connector. Use special service tool: 09816 30010 to install the new knock sensor and tighten the sensor to 44 N.m (450 kgf.cm, 32 ft.lbf) before reconnecting its connector. Install a new gasket on the intake manifold before installing the intake manifold through its 3 bolts and 2 nuts while applying uniform torque to 30 N.m (306 kgf.cm, 22 ft.lbf) in the specified sequence. After this step, install the 3 wire harness clamps and reconnect both the union to connector tube hose and the ventilation hose. Afterward, attach the oil level gage sub-assembly to the unit and put the radiator hose inlet into position along with cylinder head cover No.2 that requires tightening nut A first followed by nut B to 7.0 N.m (71 kgf.cm, 62 in.lbf). To complete the throttle body installation use a new gasket on the intake manifold and fasten the components together with the bolt and 2 nuts to 30 N.m (306 kgf.cm, 22 ft.lbf). Then proceed with installing the wire harness clamp while reattaching the throttle position sensor connector (M/T transaxle) and the ISC valve connector. As a final step, install the transmission oil filler tube sub-assembly (A/T transaxle) together with the transmission oil level gage sub-assembly (A/T transaxle) and the accelerator control cable assembly followed by the air cleaner assembly then top off the engine with coolant while inspecting for leaks.
Related 2005 Scion xA Parts
 2005 Scion xA Fuse Box
 2005 Scion xA Ignition Coil
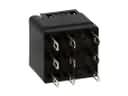 2005 Scion xA ABS Relay
 2005 Scion xA Camshaft Position Sensor
 2005 Scion xA Coolant Temperature Sensor
 2005 Scion xA Daytime Running Light Relay
 2005 Scion xA Engine Control Module
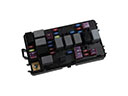 2005 Scion xA Fuse
 2005 Scion xA Headlight Relay
 2005 Scion xA Mass Air Flow Sensor
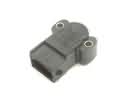 2005 Scion xA Throttle Position Sensor
 2005 Scion xA Turn Signal Flasher