×
ToyotaParts- Hello
- Login or Register
- Quick Links
- Live Chat
- Track Order
- Parts Availability
- RMA
- Help Center
- Contact Us
- Shop for
- Toyota Parts
- Scion Parts
My Garage
My Account
Cart
OEM 2005 Scion tC Exhaust Pipe
Exhaust Tail Pipe- Select Vehicle by Model
- Select Vehicle by VIN
Select Vehicle by Model
orMake
Model
Year
Select Vehicle by VIN
For the most accurate results, select vehicle by your VIN (Vehicle Identification Number).
3 Exhaust Pipes found
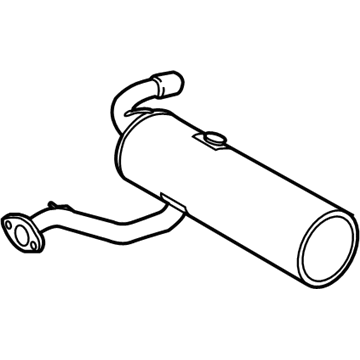
2005 Scion tC Muffler & Pipe
Part Number: 17430-28611$504.04 MSRP: $676.57You Save: $172.53 (26%)Ships in 1-3 Business DaysProduct Specifications- Other Name: Pipe Assembly, Exhaust Tail; Exhaust Muffler; Direct-Fit Exhaust; Exhaust System Kit; Exhaust Pipe; Tail Pipe; Muffler
- Replaces: 17430-28610
- Condition: New
- SKU: 17430-28611
- Warranty: This genuine part is guaranteed by Toyota's factory warranty.
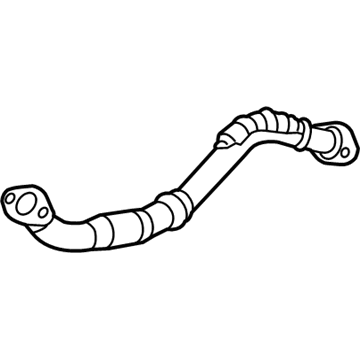
2005 Scion tC Front Pipe
Part Number: 17410-28500$260.37 MSRP: $340.48You Save: $80.11 (24%)Ships in 1-3 Business DaysProduct Specifications- Other Name: Pipe Assembly, Exhaust; Exhaust Intermediate Pipe; Exhaust Pipe; Pipe Assembly, Exhaust, Front
- Position: Front
- Part Name Code: 17410
- Item Weight: 11.80 Pounds
- Item Dimensions: 48.6 x 18.0 x 9.3 inches
- Condition: New
- Fitment Type: Direct Replacement
- SKU: 17410-28500
- Warranty: This genuine part is guaranteed by Toyota's factory warranty.
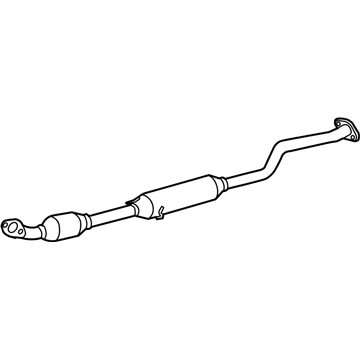
2005 Scion tC Center Pipe
Part Number: 17420-28520$1114.67 MSRP: $1496.21You Save: $381.54 (26%)Ships in 1-3 Business DaysProduct Specifications- Other Name: Pipe Assembly, Exhaust; Exhaust Pipe; Pipe Assembly, Exhaust, Center
- Position: Center
- Part Name Code: 17420
- Item Weight: 7.50 Pounds
- Item Dimensions: 34.0 x 3.6 x 17.2 inches
- Condition: New
- Fitment Type: Direct Replacement
- SKU: 17420-28520
- Warranty: This genuine part is guaranteed by Toyota's factory warranty.
2005 Scion tC Exhaust Pipe
Looking for affordable OEM 2005 Scion tC Exhaust Pipe? Explore our comprehensive catalogue of genuine 2005 Scion tC Exhaust Pipe. All our parts are covered by the manufacturer's warranty. Plus, our straightforward return policy and speedy delivery service ensure an unparalleled shopping experience. We look forward to your visit!
2005 Scion tC Exhaust Pipe Parts Q&A
- Q: How to service the exhaust pipe assembly on 2005 Scion tC?A: Service of the exhaust pipe assembly (2AZ-FE) starts by disconnecting the battery negative terminal and using Special Service Tool: 09224-00010 to remove the heated oxygen sensor. Remove the floor panel brace front section by removing its four bolts. Disassemble the exhaust pipe assembly tail by removing its two bolts and two compression springs which enables tail removal from three exhaust pipe supports Number 4 while retrieving the gasket at the exhaust pipe center. To service the exhaust pipe assembly center remove two bolts initially before separating it from two supports No. 4 and stripping off its gasket facing the exhaust pipe front. Start by detaching the exhaust pipe front by unfastening its 2 bolts and removing the 2 compression springs before taking off the gasket from the exhaust manifold. The next step requires detachments of the 5 exhaust pipe supports from the body to remove exhaust pipe support No. 4. A plastic faced hammer will enable the removal of the exhaust tail pipe baffle sub-assembly through uniform tapping. Use a plastic faced hammer to drive the exhaust tail pipe baffle into its keyway on the exhaust pipe tail while ensuring essential alignment. The body must receive its five exhaust pipe supports, following a test of the exhaust pipe assembly front compression spring free length which should exceed 40.5 mm (1.594 inch) and requires new replacement if this measurement fails. A combination of wooden block and plastic faced hammer ensures precise installation of fresh gaskets on the exhaust manifold while maintaining correct orientation and avoidance of reusing old gaskets. The 2 compression springs together with the 2 bolts need to be installed on the exhaust pipe front where torque reaches 43 Nm (440 kgf-cm, 32 ft. lbs.). At the exhaust pipe assembly center position a new gasket onto the exhaust pipe front before installing it onto the 2 exhaust pipe supports No. 4 while tightening the 2 bolts to 43 Nm (440 kgf-cm, 32 ft. lbs.). Examine the compression spring length on the exhaust pipe assembly tail because a free length shorter than 38.5 mm (1.516 inch) requires replacement. New gaskets should be installed directly to the exhaust pipe center while keeping the proper orientation and skipping the use of previously removed gaskets. The exhaust pipe tail must be fastened to the 3 exhaust pipe supports by tightening both compression springs and bolts to 43 Nm (440 kgf-cm, 32 ft. lbs.). Reinstall the heated oxygen sensor using Special Service Tool: 09224-00010 before reconnecting the battery negative terminal with a torque of 5.4 Nm (55 kgf-cm, 48 inch lbs.). Check for exhaust gas leakage and finally install the floor panel brace front with the 4 bolts torqued to 29.6 Nm (300 kgf-cm, 22 ft. lbs.) following proper orientation.


