×
ToyotaParts- Hello
- Login or Register
- Quick Links
- Live Chat
- Track Order
- Parts Availability
- RMA
- Help Center
- Contact Us
- Shop for
- Toyota Parts
- Scion Parts
My Garage
My Account
Cart
OEM 2005 Scion tC Brake Master Cylinder
- Select Vehicle by Model
- Select Vehicle by VIN
Select Vehicle by Model
orMake
Model
Year
Select Vehicle by VIN
For the most accurate results, select vehicle by your VIN (Vehicle Identification Number).
1 Brake Master Cylinder found


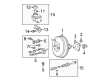
2005 Scion tC Master Cylinder
Part Number: 47201-21080$187.20 MSRP: $267.29You Save: $80.09 (30%)Ships in 1-3 Business DaysProduct Specifications- Other Name: Cylinder Sub-Assembly, Brake Stroke Simulator; Brake Master Cylinder; Brake Reservoir; Cylinder Sub-Assembly, Brake Master
- Part Name Code: 47201
- Item Weight: 6.20 Pounds
- Item Dimensions: 9.2 x 7.1 x 5.8 inches
- Condition: New
- Fitment Type: Direct Replacement
- SKU: 47201-21080
- Warranty: This genuine part is guaranteed by Toyota's factory warranty.
2005 Scion tC Brake Master Cylinder
Looking for affordable OEM 2005 Scion tC Brake Master Cylinder? Explore our comprehensive catalogue of genuine 2005 Scion tC Brake Master Cylinder. All our parts are covered by the manufacturer's warranty. Plus, our straightforward return policy and speedy delivery service ensure an unparalleled shopping experience. We look forward to your visit!
2005 Scion tC Brake Master Cylinder Parts Q&A
- Q: How to overhaul the brake master cylinder sub-assembly on 2005 Scion tC?A: Operation of the brake master cylinder sub-assembly starts with draining brake fluid then cleansing any fluid residue from painted parts. Start by removing the front wiper arm head cap and both front wiper arm and blade assemblies (LH and RH) together with the hood to cowl top seal and the cowl top ventilator louver (LH). Finally detach the windshield wiper motor and link assembly as well as the cowl top panel sub-assembly outer by extracting the 7 bolts. Detach hose No.1 of the cowl water extract system through its clip before removing the cowl body mounting bracket lower (LH) by unscrewing one bolt. The technician must employ Special Service Tool: 09023-00101 to disconnect brake tubes from the master cylinder and No.1 way together with reservoir tubes before removing the 2 nuts to pull out the master cylinder sub-assembly and No.1 way. Extract the union and remove both stopper screw and master cylinder union followed by the two grommets within the master cylinder sub-assembly. A vise holding the master cylinder sub-assembly with two aluminum plates enables technicians to remove the O-ring while pushing in the piston and extracting the snap ring with specialized snap ring pliers while being careful of fluid spatter. While pressing in the piston you can first remove the piston stopper bolt with its gasket before taking out the No.1 piston directly from the cylinder body without surface damage. Tap the flanged section onto wooden blocks producing the exit of the No.2 piston before extracting it by straight pull motion. You must check for scratches inside the brake master cylinder and perform a replacement when necessary. When installing the master cylinder sub-assembly place it inside a vise with aluminum plates and apply lithium soap base glycol grease to its rubber parts before carefully inserting the No.1 and No.2 pistons without causing any damage. The procedure begins with piston pushing to install a new gasket and piston stopper bolt that requires a torque setting at 10 Nm (102 kgf-cm, 7 ft. lbs.). Then use the piston to insert the snap ring and apply lithium soap base glycol grease to a new O-ring before its installation on the master cylinder body. The union installation requires application of lithium soap base glycol grease and silicon grease to two grommets before installation together with stopper screw. Adjust the brake booster push rod through a measurement process which involves using Special Service Tool: 09737-00013 on the master cylinder to lower the rod until it touches the piston lightly then record the clearance on the master cylinder with chalk. Adjust the rod by using Special Service Tool: 09737-00020 to hold it as you turn the tip with a 7 mm socket driver. Install the brake master cylinder sub-assembly and No.1 way with 2 nuts to 12.5 Nm (127 kgf-cm, 9 ft. lbs.), then connect the 2 reservoir tubes with clips but establish the 2 brake tubes with Special Service Tool: 09023-00101 between the No.1 way and master cylinder sub-assembly followed by a torque setting to 15 Nm (155 kgf-cm, 11 ft. lbs.). The service technician installs the air cleaner cap sub-assembly by putting the cowl body mounting bracket lower (LH) with its bolt torqued to 13 Nm (133 kgf-cm, 10 ft. lbs.) while adding the cowl water extract hose No.1 with its clip then securing the cowl top panel sub-assembly outer using 7 bolts torqued to 13 Nm (133 kgf-cm, 10 ft. lbs.). Use Special Service Tool: 09023-00101 to bleed the master cylinder as you fill the brake fluid reservoir while inspecting the master cylinder for leakage at the end of the procedure. The vehicle requires installation of the windshield wiper motor and link assembly together with the cowl top ventilator louver (LH), hood to cowl top seal and both front wiper arm and blade assemblies (RH and LH) and the front wiper arm head cap.
Related 2005 Scion tC Parts
 2005 Scion tC Brake Caliper
 2005 Scion tC Brake Booster
 2005 Scion tC Wheel Hub
 2005 Scion tC Wheel Stud
 2005 Scion tC Brake Caliper Piston
 2005 Scion tC Brake Disc
 2005 Scion tC Brake Master Cylinder Reservoir
 2005 Scion tC Brake Pad Set
 2005 Scion tC Brake Shoe Set
 2005 Scion tC Hydraulic Hose
 2005 Scion tC Parking Brake Shoe
 2005 Scion tC Wheel Cylinder