×
ToyotaParts- Hello
- Login or Register
- Quick Links
- Live Chat
- Track Order
- Parts Availability
- RMA
- Help Center
- Contact Us
- Shop for
- Toyota Parts
- Scion Parts
My Garage
My Account
Cart
OEM 2004 Toyota Echo Timing Chain
Engine Timing Chain- Select Vehicle by Model
- Select Vehicle by VIN
Select Vehicle by Model
orMake
Model
Year
Select Vehicle by VIN
For the most accurate results, select vehicle by your VIN (Vehicle Identification Number).
1 Timing Chain found
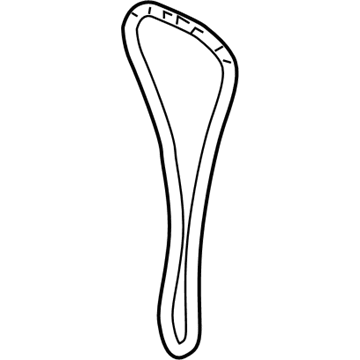
2004 Toyota Echo Timing Chain
Part Number: 13506-21050$209.11 MSRP: $298.55You Save: $89.44 (30%)Ships in 1-3 Business DaysProduct Specifications- Other Name: Chain Sub-Assembly, Timing; Chain Sub-Assembly
- Part Name Code: 13506
- Item Weight: 1.20 Pounds
- Item Dimensions: 6.3 x 3.3 x 1.2 inches
- Condition: New
- Fitment Type: Direct Replacement
- SKU: 13506-21050
- Warranty: This genuine part is guaranteed by Toyota's factory warranty.
2004 Toyota Echo Timing Chain
Looking for affordable OEM 2004 Toyota Echo Timing Chain? Explore our comprehensive catalogue of genuine 2004 Toyota Echo Timing Chain. All our parts are covered by the manufacturer's warranty. Plus, our straightforward return policy and speedy delivery service ensure an unparalleled shopping experience. We look forward to your visit!
2004 Toyota Echo Timing Chain Parts Q&A
- Q: How to service and repair the timing chain on 2004 Toyota Echo?A: The service and repairs of the timing chain begin with draining the engine coolant followed by removing the RH front wheel and the RH engine under cover and drive belt and generator. The technicians must remove the liquid tube bolt if applicable only after disconnecting the PS pump from the engine and removing the RH engine mounting insulator through jack placement with a wooden block beneath the engine. This process also requires removing the five bolts and insulator nut. Begin by removing the cylinder head cover through the sequence of taking off 4 nuts followed by ignition coils then 2 PCV hoses and lastly 7 bolts, 2 seal washers, 2 nuts while you should keep the gasket in place. Set the No.1 cylinder to TDC/compression through crankshaft pulley alignment with the timing mark "0" while validating the proper positioning of markers on camshaft sprocket and valve timing controller. Users must first remove the crankshaft pulley through Special Service Tool: 09213-70010, 09330-00021 and can employ Special Service Tools: 09950-50013 (09951-05010, 09952-05010, 09953-05020, 09954-05021 as needed for assistance. The crankshaft position sensor along with RH engine mounting bracket and water pump and oil control valve should be removed by first detaching 13 bolts and nut while also using E8 Torx wrench socket for stud bolt then carefully prying off the timing chain cover to prevent damage. Extract the 2 O-rings which are installed on the cylinder block and oil pan No. 1 after you remove the chain tensioner together with chain tensioner slipper and chain vibration damper. The examination of the timing chain together with its sprockets should confirm elongation remains below 123.2 mm (4.850 inch) while sprocket diameters should measure at least 96.2 mm (3.787 inch) for the camshaft component and 50.5 mm (1.988 inch) for the crankshaft. Check the wear of the chain tensioner slipper and vibration damper by measuring it against 1.0 mm (0.039 inch). During your inspection of the chain tensioner ensure the plunger operates without resistance and achieves proper locking position. The installation of a new crankshaft front oil seal requires cutting off the existing lip, gentle lip removal, and the use of Special Service Tool: 09612-22011 to smoothly tap in the seal to reach the timing chain cover edge. Installation requires positioning the crankshaft to ATDC 40 - 140 degrees before aligning the intake and exhaust sprockets at ATDC 20 degrees. Then install the chain vibration damper with two bolts reaching 9.0 Nm (92 kgf-cm, 80 inch lbs.). Install the timing chain by positioning its match marks and maintain continuous control over the exhaust camshaft while doing so. The chain tensioner installation requires the slipper piece first followed by the tensioner while still pushing the plunger into its locked position before tightening the bolts to 9.0 Nm (92 kgf-cm, 80 inch lbs.). The cleaning process includes surfaces for timing chain cover along with cylinder head and cylinder block. Then apply Part No. 08826-00100 or equivalent seal packing to timing chain cover before installing it with water pump and new O-rings through specified bolt and nut torques. The mounting bracket requires seal packing (Part No. 08826-00080 or equivalent) before its installation with four bolts which need to be torqued to 55 Nm (561 kgf-cm, 41 ft. lbs.). Afterward, install the crankshaft position sensor and oil control valve and crankshaft pulley with specified torque settings. Finish the repair by installing the cylinder head cover while also adding the RH engine mounting insulator then the PS pump followed by the generator and finally a drive belt and both engine under covers and front wheels before adding coolant to start the engine to detect any fluid leakage.


