×
ToyotaParts- Hello
- Login or Register
- Quick Links
- Live Chat
- Track Order
- Parts Availability
- RMA
- Help Center
- Contact Us
- Shop for
- Toyota Parts
- Scion Parts
My Garage
My Account
Cart
OEM 2004 Scion xA Starter Motor
Starter Ignition- Select Vehicle by Model
- Select Vehicle by VIN
Select Vehicle by Model
orMake
Model
Year
Select Vehicle by VIN
For the most accurate results, select vehicle by your VIN (Vehicle Identification Number).
1 Starter Motor found

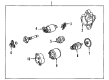
2004 Scion xA Starter
Part Number: 28100-21062-84$158.26 MSRP: $222.70You Save: $64.44 (29%)Ships in 1-3 Business DaysProduct Specifications- Other Name: Reman Starter; Starter Motor
- Replaces: 28100-21061, 28100-21062
- Item Weight: 8.70 Pounds
- Item Dimensions: 9.2 x 7.3 x 5.3 inches
- Condition: New
- SKU: 28100-21062-84
- Warranty: This genuine part is guaranteed by Toyota's factory warranty.
2004 Scion xA Starter Motor
Looking for affordable OEM 2004 Scion xA Starter Motor? Explore our comprehensive catalogue of genuine 2004 Scion xA Starter Motor. All our parts are covered by the manufacturer's warranty. Plus, our straightforward return policy and speedy delivery service ensure an unparalleled shopping experience. We look forward to your visit!
2004 Scion xA Starter Motor Parts Q&A
- Q: How to replace the starter motor on 2004 Scion xA?A: Before starting the starter motor replacement process you must remove the engine under cover LH by unscrewing its 4 bolts and nut. The next step involves removing the engine under cover RH through bolt unscrewing of its 4 fasteners. Begin by elevating the flywheel housing side cover before pulling it out from its place. Begin by detaching the starter assembly through the process of removing its nut and starter wire and disconnecting the starter connector and unscrewing the two bolts. During starter assembly installation both bolts should be tightened to 37 Nm (377 kgf.cm, 27 ft.lbf) and the nut should reach 9.8 Nm (100 kgf.cm, 7 ft.lbf). Secure the flywheel housing side cover by inserting the claw correctly and hearing a click sound; replace the cover in case the claw shows deformations. Irrespective of the torques for the engine under cover bolt and nut of 5.0 Nm (51 kgf.cm, 44 in.lbf), install the RH cover first before moving onto the LH cover installation.
Related 2004 Scion xA Parts
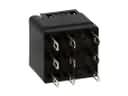 2004 Scion xA ABS Relay
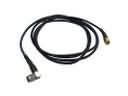 2004 Scion xA Antenna Cable
 2004 Scion xA Crankshaft Position Sensor
 2004 Scion xA Door Jamb Switch
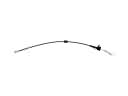 2004 Scion xA Door Latch Cable
 2004 Scion xA Fuel Line Clamps
 2004 Scion xA Headlight Relay
 2004 Scion xA Horn
 2004 Scion xA Knock Sensor
 2004 Scion xA Speedometer
 2004 Scion xA Turn Signal Flasher
 2004 Scion xA Wiper Blade