My Garage
Cart

OEM 2004 Scion xA Camshaft

Cam
  • Select Vehicle by Model
  • Select Vehicle by VIN
Select Vehicle by Model
Make
Model
Year
or
Select Vehicle by VIN
For the most accurate results, select vehicle by your VIN (Vehicle Identification Number).

2 Camshafts found

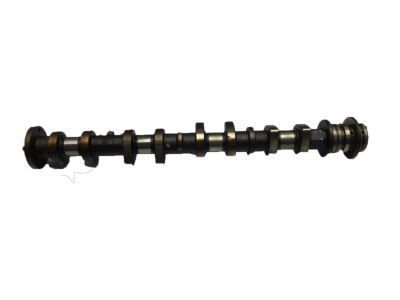
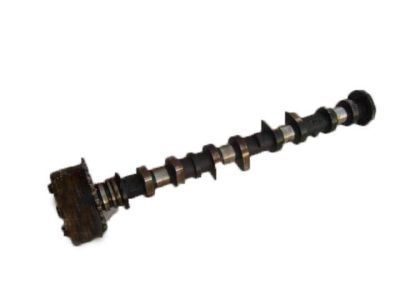
  • 2004 Scion xA Camshaft Diagram - 13501-21030
    View related parts

    2004 Scion xA Camshaft

    Part Number: 13501-21030
    $257.34 MSRP: $367.42
    You Save: $110.08 (30%)
    Ships in 1-3 Business Days
    ADD TO CART
    Product Specifications
    • Other Name: Camshaft Sub-Assembly
    • Part Name Code: 13511
    • Item Weight: 4.50 Pounds
    • Item Dimensions: 20.5 x 3.3 x 2.9 inches
    • Condition: New
    • Fitment Type: Direct Replacement
    • SKU: 13501-21030
    • Warranty: This genuine part is guaranteed by Toyota's factory warranty.
    More Info
    Fits the following 2004 Scion xA Submodels:
    • Base | 4 Cyl 1.5 L GAS
  • 2004 Scion xA Camshaft - 13502-21031
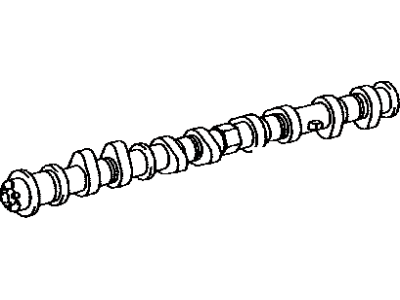
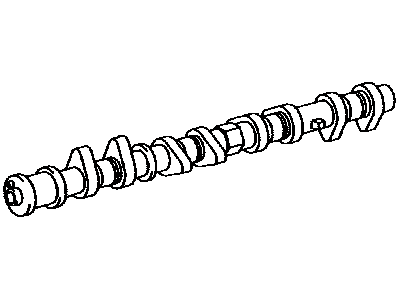
    2004 Scion xA Camshaft Diagram - 13502-21031
    View related parts

    2004 Scion xA Camshaft

    Part Number: 13502-21031
    $266.19 MSRP: $380.06
    You Save: $113.87 (30%)
    Ships in 1-3 Business Days
    ADD TO CART
    Product Specifications
    • Other Name: Camshaft Sub-Assembly
    • Part Name Code: 13512
    • Item Weight: 4.40 Pounds
    • Item Dimensions: 20.9 x 3.2 x 2.9 inches
    • Condition: New
    • Fitment Type: Direct Replacement
    • SKU: 13502-21031
    • Warranty: This genuine part is guaranteed by Toyota's factory warranty.
    More Info
    Fits the following 2004 Scion xA Submodels:
    • Base | 4 Cyl 1.5 L GAS

2004 Scion xA Camshaft

Looking for affordable OEM 2004 Scion xA Camshaft? Explore our comprehensive catalogue of genuine 2004 Scion xA Camshaft. All our parts are covered by the manufacturer's warranty. Plus, our straightforward return policy and speedy delivery service ensure an unparalleled shopping experience. We look forward to your visit!

2004 Scion xA Camshaft Parts Q&A

  • Q: How to replace the camshaft on 2004 Scion xA?
    A: The first step is to remove cylinder head cover No.2 by unfastening its 4 nuts. Unscrewing the 4 bolts from ignition coil No.1 allows its extraction along with the 4 ignition coils. Both ventilation hoses must be detached from the cylinder head cover before removing the total sub-assembly which requires 9 bolts and 2 nuts. Initiate the camshaft replacement after removing the engine under cover RH to proceed with removing No.2 camshaft where proper crankshaft damper rotation must start at a 40 degrees angle below TDC to stop piston-valve interaction. Align the timing marks on No.1 cylinder while placing it at TDC/compression position and mark the timing chain. Begin by removing the screw plug with an 8 mm hexagon wrench then position the screwdriver within the chain tensioner service hole to hold the stopper plate in an upward direction. By turning the camshaft No.2 clockwise the chain tensioner plunger pushes in and a 2 to 3 mm diameter bar needs to be used to keep the stopper plate secure. Use Special Service Tool: 09023-38400 as a wrench to remove the bolt located on the hexagonal lobe while following the instructions. Loosen and remove the 11 bearing cap bolts along with the 5 bearing caps evenly. Taxi the No.2 camshaft into the air before removing it together with its camshaft timing sprocket. When removing the camshaft and camshaft timing gear assembly with its timing chain, tie the chain to a string to prevent items from falling into the timing chain cover while performing the following steps: First loosen the 8 bearing cap bolts and 4 bearing caps uniformly. Then remove the bearing caps after holding the timing chain. You should clamp the camshaft in a vise while applying tape on the 4 oil paths of the cam journal and using punctuations on the tape to mark the advance and retard oil paths. The correct operation with compressed air pressure allows users to check that the camshaft timing gear assembly performs rotational movements during the timing advance phase. Mindfully unscrew the fringe bolt from the camshaft timing gear assembly but maintain the presence of all other 4 bolts and release the lock pin in case of reusable camshaft timing gear use. The camshaft timing gear assembly and camshaft should be installed while rotating the gear clockwise and forcing it toward the camshaft until no gaps exist between the gear fringe and camshaft. Secure the fringe bolt to 64 Nm (653 kgf-cm, 47 ft. lbs.) torque value while verifying that the camshaft timing gear assembly achieves the retard angle with locking at its most advanced position. Start with engine oil on the camshaft journals before placing the timing chain properly on the camshaft timing gear by aligning the paint mark then fully tighten the specified bolt sequence to 13 Nm (129 kgf-cm, 9.4 ft. lbs.) with uniformity maintained. The No.2 camshaft installation requires a timing chain holder to position the paint mark with the timing mark before installing the sprocket and tightening the bolts to equal torque values. You need to apply torque on bearing cap No.1 at 23 Nm (235 kgf-cm, 17 ft. lbs.) while holding the camshaft with a wrench and using Special Service Tool: 09023-38400 to install the bolt to 64 Nm (653 kgf-cm, 47 ft. lbs.). Check the alignment of all timing marks after aligning the crankshaft damper timing notch to timing mark "0" while removing the bar from the timing chain tensioner. Seal packing (Part No. 08833-00070 or equivalent) needs application onto the screw plug end before installing it with 15 Nm (153 kgf-cm, 11 ft. lbs.) torque. The installation requires the cylinder head cover sub-assembly with seal packing (part number 08826-00080 or equivalent) and should be installed within 3 minutes after thoroughly cleaning all contact surfaces of oil. Apply a torque force of 10 Nm (102 kgf-cm, 7.4 ft. lbs.) to fasten the 9 bolts along with 2 seal washers and 2 nuts onto the cylinder head cover. The last procedure includes installing ignition coil No.1 with 9.0 Nm (92 kgf-cm, 80 inch lbs.) torque while tightening nut A, followed by bolt B with 7.0 Nm (71 kgf-cm, 62 inch lbs.) torque until all engine oil leaks are checked.