My Garage
Cart
Make sure this part fits

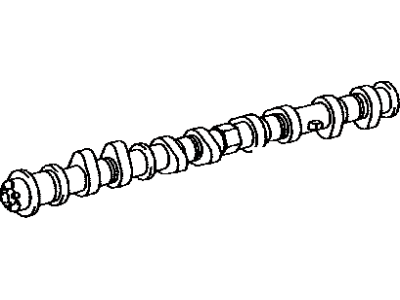
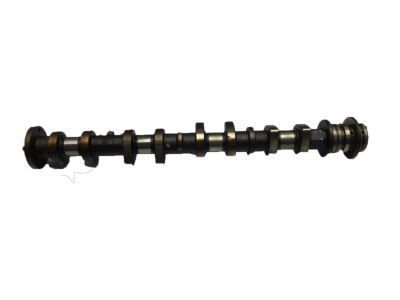
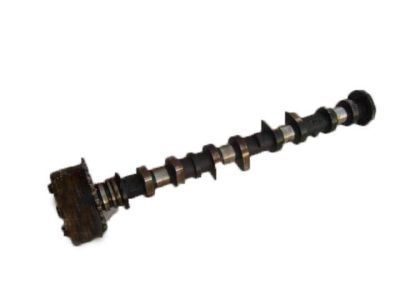
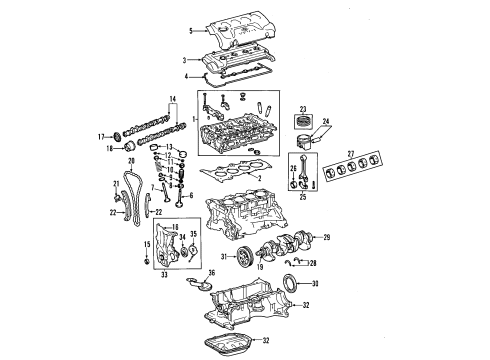
Toyota 13501-21030
Camshaft

2000-2018 Toyota 1350121030

Customer Questions & Expert Answers (9)
Toyota 13501-21030 Camshaft
  • Part Description
    Camshaft Sub-Assembly
  • Part Name Code
    13511
  • Manufacturer
    Toyota
Make sure this part fits
$241.03 MSRP: $344.14
You Save: $103.11 (30%)
Ships in 1-3 Business Days
1
ADD TO CART
  • Related Parts
  • Product Specifications
  • Vehicle Fitment
  • Customer Questions & Expert Answers
  • Product Specifications

    BrandGenuine Toyota
    Part Name Code13511
    Manufacturer Part Number13501-21030
    Part DescriptionCamshaft Sub-Assembly
    Item Dimensions20.5 x 3.3 x 2.9 inches
    Item Weight4.50 Pounds
    ConditionNew
    Fitment TypeDirect Replacement
    ManufacturerToyota
    SKU13501-21030
    WarrantyThis genuine Toyota part is guaranteed by Toyota's factory warranty.
    Shipping & ReturnShipping Policy Return Policy
    Warning: California's Proposition 65
  • Vehicle Fitment

    Year Make Model Trim Engine
    2004-2006 Scion xABase4 Cyl 1.5 L GAS
    2004-2006 Scion xBBase4 Cyl 1.5 L GAS
    2000-2005 Toyota EchoBase4 Cyl 1.5 L GAS
    2007-2018 Toyota YarisBase, L, LE, S, SE4 Cyl 1.5 L GAS
  • Customer Questions & Expert Answers

    Q:
    Is 13501-21030 a good match for my car? Posted by ToyotaPartsNow Specialist
    A:
    Find out if part number 13501-21030 is the right fit for your car by Selecting Your Vehicle model.
    Posted by ToyotaPartsNow Specialist
    Q:
    How to replace the camshaft on Scion xA? Posted by Customer
    A:
    The first step is to remove cylinder head cover No.2 by unfastening its 4 nuts. Unscrewing the 4 bolts from ignition coil No.1 allows its extraction along with the 4 ignition coils. Both ventilation hoses must be detached from the cylinder head cover before removing the total sub-assembly which requires 9 bolts and 2 nuts. Initiate the camshaft replacement after removing the engine under cover RH to proceed with removing No.2 camshaft where proper crankshaft damper rotation must start at a 40 degrees angle below TDC to stop piston-valve interaction. Align the timing marks on No.1 cylinder while placing it at TDC/compression position and mark the timing chain. Begin by removing the screw plug with an 8 mm hexagon wrench then position the screwdriver within the chain tensioner service hole to hold the stopper plate in an upward direction. By turning the camshaft No.2 clockwise the chain tensioner plunger pushes in and a 2 to 3 mm diameter bar needs to be used to keep the stopper plate secure. Use Special Service Tool: 09023-38400 as a wrench to remove the bolt located on the hexagonal lobe while following the instructions. Loosen and remove the 11 bearing cap bolts along with the 5 bearing caps evenly. Taxi the No.2 camshaft into the air before removing it together with its camshaft timing sprocket. When removing the camshaft and camshaft timing gear assembly with its timing chain, tie the chain to a string to prevent items from falling into the timing chain cover while performing the following steps: First loosen the 8 bearing cap bolts and 4 bearing caps uniformly. Then remove the bearing caps after holding the timing chain. You should clamp the camshaft in a vise while applying tape on the 4 oil paths of the cam journal and using punctuations on the tape to mark the advance and retard oil paths. The correct operation with compressed air pressure allows users to check that the camshaft timing gear assembly performs rotational movements during the timing advance phase. Mindfully unscrew the fringe bolt from the camshaft timing gear assembly but maintain the presence of all other 4 bolts and release the lock pin in case of reusable camshaft timing gear use. The camshaft timing gear assembly and camshaft should be installed while rotating the gear clockwise and forcing it toward the camshaft until no gaps exist between the gear fringe and camshaft. Secure the fringe bolt to 64 Nm (653 kgf-cm, 47 ft. lbs.) torque value while verifying that the camshaft timing gear assembly achieves the retard angle with locking at its most advanced position. Start with engine oil on the camshaft journals before placing the timing chain properly on the camshaft timing gear by aligning the paint mark then fully tighten the specified bolt sequence to 13 Nm (129 kgf-cm, 9.4 ft. lbs.) with uniformity maintained. The No.2 camshaft installation requires a timing chain holder to position the paint mark with the timing mark before installing the sprocket and tightening the bolts to equal torque values. You need to apply torque on bearing cap No.1 at 23 Nm (235 kgf-cm, 17 ft. lbs.) while holding the camshaft with a wrench and using Special Service Tool: 09023-38400 to install the bolt to 64 Nm (653 kgf-cm, 47 ft. lbs.). Check the alignment of all timing marks after aligning the crankshaft damper timing notch to timing mark "0" while removing the bar from the timing chain tensioner. Seal packing (Part No. 08833-00070 or equivalent) needs application onto the screw plug end before installing it with 15 Nm (153 kgf-cm, 11 ft. lbs.) torque. The installation requires the cylinder head cover sub-assembly with seal packing (part number 08826-00080 or equivalent) and should be installed within 3 minutes after thoroughly cleaning all contact surfaces of oil. Apply a torque force of 10 Nm (102 kgf-cm, 7.4 ft. lbs.) to fasten the 9 bolts along with 2 seal washers and 2 nuts onto the cylinder head cover. The last procedure includes installing ignition coil No.1 with 9.0 Nm (92 kgf-cm, 80 inch lbs.) torque while tightening nut A, followed by bolt B with 7.0 Nm (71 kgf-cm, 62 inch lbs.) torque until all engine oil leaks are checked.
    Posted by ToyotaPartsNow Specialist
    Q:
    How to replace the camshaft on Scion xA? Posted by Customer
    A:
    Start the camshaft replacement process by removing the four nuts retaining the cylinder head cover No.2. The next step involves removing ignition coil No.1 after unscrewing its 4 bolts and retrieving the 4 ignition coils through the opening. Unplug both ventilation tubes from the cylinder head cover before you can remove the cylinder head sub-assembly which needs its 9 bolts and 2 nuts uninstalled. First remove the engine under cover RH then move onto the removal of No.2 camshaft while turning the crankshaft damper 40 degrees counterclockwise from TDC to prevent piston-valve contact. Before progressing align the TDC/compression timing mark on the No.1 cylinder then note down the timing chain configuration. A 8 mm hexagon wrench should unlatch the screw plug while you must insert a screwdriver into the service opening of the chain tensioner to stabilize the stopper plate. Use a clockwise rotation of camshaft No.2 to make the chain tensioner plunger extend and follow with application of a 2 to 3 mm diameter bar stopper plate installation. A wrench should be used to remove the bolt secured at the hexagonal camshaft lobe before slowly unthreading and removing the 11 bearing cap bolts and subsequent bearing caps. You should detach the No.2 camshaft along with its camshaft timing sprocket once you remove the fringe bolt. Begin by loosening the 8 bearing cap bolts and 4 bearing caps. After picking up the timing chain, remove the camshaft and camshaft timing gear assembly by securing the chain with string to minimize components from entering the timing chain cover. Set the camshaft inside a vise before taping the four oil paths on the cam journal. Mark the tape at both advance and retard oil paths then verify the timing device rotates in the advance direction using pressurized air. The fringe bolt of the camshaft timing gear assembly should be unfastened while keeping the remaining 4 bolts in place. Installation of the camshaft timing gear assembly must be done with proper alignment to the camshaft before torquing the fringe bolt to 64 Nm (653 kgf-cm, 47 ft. lbs.). Add engine oil to each camshaft journal followed by chain installation on the camshaft timing gear and tightening the bolts to a torque of 13 Nm (129 kgf-cm, 9.4 ft. lbs.) with maintenance of camshaft level. To install the No.2 camshaft correctly position its timing marks before tightening bolts to 13 Nm (129 kgf-cm, 9.4 ft. lbs.) then add bearing cap No.1 to 23 Nm (235 kgf-cm, 17 ft. lbs.) and finish with the bolt tightened using Special Service Tool: 09023-38400 at 64 Nm (653 kgf-cm, 47 ft. lbs.). First check the crankshaft damper timing notch against the timing mark "0" position while inspecting every timing mark. First install an 8 mm hexagon wrench to screw plug end tightness of 15 Nm (153 kgf-cm, 11 ft. lbs.), then distribute seal packing across the screw plug end (Part No. 08833-00070 or equivalent). Subsequently apply seal packing (Part No. 08826-00080 or equivalent) to the cylinder head cover sub-assembly and install with 9 bolts alongside two seal washers and two nuts and tighten to 10 Nm (102 kgf-cm, 7.4 ft. lbs.). Use 9.0 Nm torque for Ignition Coil installation before completing the cylinder head cover No.2 installation sequence by tightening A nuts first followed by B bolts to 7.0 Nm. Perform a leak test afterward.
    Posted by ToyotaPartsNow Specialist
    Q:
    How to install the camshaft on Toyota Yaris? Posted by Customer
    A:
    First attach the camshaft timing gear assembly to the camshaft after releasing the lock pin while inserting the straight pin into the groove through counter-clockwise rotation and gentle motion. The gear flange must have no space with the camshaft while technicians apply 64 Nm (653 kgf-cm, 47 ft-lbf) of torque to the flange bolt before releasing the camshaft timing gear lock. The technician applies a thin layer of engine oil to the camshaft before installing the timing chain exactly in line with both paint points and timing marks. Then the bolts on camshaft bearing cap No. 2 should be tightened uniformly to 13 Nm (129 kgf-cm, 9.4 ft-lbf) as the camshaft remains level. Fit camshaft Number 2 which should have its sprocket timing mark aligned with the chain paint mark while tightening bearing cap bolts No. 1 and No. 2 to 23 Nm (235 kgf-cm, 17 ft-lbf) and 13 Nm (129 kgf-cm, 9.4 ft-lbf) respectively. Installed the bolt on camshaft No. 2 with 64 Nm torque (653 kgf-cm, 47 ft-lbf) while removing the bar from the timing chain tensioner and securing all timing marks in proper alignment. The screw plug requires adhesive application to its last two or three threads followed by hexagon wrench installation at 15 Nm (153 kgf-cm, 11 ft-lbf). The process ends with negative terminal connection at 5.4 Nm torque (55 kgf-cm, 48 in-lbf) followed by oil leak inspection before finishing the installation of other components.
    Posted by ToyotaPartsNow Specialist
    Q:
    What is the torque specification for installing ignition coil No. 1 for the 2005 Scion xB? Posted by Customer
    A:
    9.0 Nm (92 kgf-cm, 80 inch lbs.).
    Posted by ToyotaPartsNow Specialist
    See expert answers on similar Camshaft
    Q:
    What should you do after applying air into the broken paths for the 2009 Toyota Yaris? Posted by Customer
    A:
    Confirm that the camshaft timing gear assembly revolves in the timing advance direction when the air pressure on the timing retard path is reduced.
    Posted by ToyotaPartsNow Specialist
    See expert answers on similar Camshaft
    Q:
    How do you tighten the flange bolt for camshaft No. 2 for the 2010 Toyota Yaris? Posted by Customer
    A:
    Hold the hexagonal lobe of camshaft No. 2 while tightening the flange bolt to 64 Nm (653 kgf-cm, 47 ft-lbf).
    Posted by ToyotaPartsNow Specialist
    See expert answers on similar Camshaft
    Q:
    What is the first step to install the camshaft timing gear assembly for the 2008 Toyota Yaris? Posted by Customer
    A:
    Ensure the lock pin is released.
    Posted by ToyotaPartsNow Specialist
    See expert answers on similar Camshaft
    Q:
    How do you remove the camshaft bearing caps for the 2007 Toyota Yaris? Posted by Customer
    A:
    Remove the flange bolt and loosen the 11 bearing cap bolts uniformly to remove camshaft bearing caps No. 1 and No. 2.
    Posted by ToyotaPartsNow Specialist
    See expert answers on similar Camshaft
    If you have any questions about this product, please don't hesitate to ask us. We will be happy to help you!

OEM Toyota 13501-21030, Excellent Performance and Perfect Fitment

To ensure reliability, purchase Toyota part # 13501-21030 Camshaft. It is sometimes referred to as Toyota Camshaft. OEM parts are unrivaled in terms of quality. They go through extensive quality control inspections and are produced in accordance with Toyota's official factory specifications. All of these remove defects and imperfections. So you can relax knowing they promise exceptional lifespan and flawless fitment.

ToyotaPartsNow.com is a leading supplier of genuine Toyota parts such as Toyota 1350121030 Camshaft. At ToyotaPartsNow.com, we have a wide variety of OEM Toyota parts available at competitive prices. Our comprehensive range of genuine Toyota parts come with a manufacturer's warranty for peace of mind. We also prioritize customer satisfaction, providing a hassle-free return policy and expedited delivery for all our parts. For detailed Toyota parts information, click here.
Choose ToyotaPartsNow for discounted prices, exceptional service and fast delivery