×
ToyotaParts- Hello
- Login or Register
- Quick Links
- Live Chat
- Track Order
- Parts Availability
- RMA
- Help Center
- Contact Us
- Shop for
- Toyota Parts
- Scion Parts
My Garage
My Account
Cart
OEM 2002 Toyota Celica Windshield
Glass Windshield- Select Vehicle by Model
- Select Vehicle by VIN
Select Vehicle by Model
orMake
Model
Year
Select Vehicle by VIN
For the most accurate results, select vehicle by your VIN (Vehicle Identification Number).
1 Windshield found

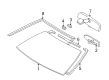
2002 Toyota Celica Windshield, Front
Part Number: 56101-20040$485.88 MSRP: $712.07You Save: $226.19 (32%)Product Specifications- Other Name: Glass Sub-Assembly, Windshield; Windshield Glass, Front; Glass, Windshield
- Manufacturer Note: *TL,T=4.76
- Position: Front
- Part Name Code: 56111
- Condition: New
- Fitment Type: Direct Replacement
- SKU: 56101-20040
- Warranty: This genuine part is guaranteed by Toyota's factory warranty.
2002 Toyota Celica Windshield
Looking for affordable OEM 2002 Toyota Celica Windshield? Explore our comprehensive catalogue of genuine 2002 Toyota Celica Windshield. All our parts are covered by the manufacturer's warranty. Plus, our straightforward return policy and speedy delivery service ensure an unparalleled shopping experience. We look forward to your visit!
2002 Toyota Celica Windshield Parts Q&A
- Q: How to remove and install a windshield on 2002 Toyota Celica?A: To take off the windshield, unscrew the front pillar garnish, map light assembly, sun visors and the rear view mirror. Take off wiper arms/cowl top seal. Trim windshield moulding, remove glass with piano wire and clean up surfaces and replace stoppers. Place adhesive and primer, place glass and glue it with moulding. Lastly, install everything again.
Related 2002 Toyota Celica Parts
 2002 Toyota Celica Emblem
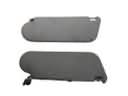 2002 Toyota Celica Sun Visor
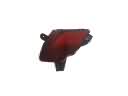 2002 Toyota Celica Bumper Reflector
 2002 Toyota Celica Car Mirror
 2002 Toyota Celica Grille
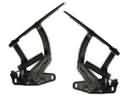 2002 Toyota Celica Hood Hinge
 2002 Toyota Celica Tailgate Handle
 2002 Toyota Celica Washer Pump
 2002 Toyota Celica Washer Reservoir
 2002 Toyota Celica Windshield Wiper
 2002 Toyota Celica Wiper Arm
 2002 Toyota Celica Wiper Motor