×
ToyotaParts- Hello
- Login or Register
- Quick Links
- Live Chat
- Track Order
- Parts Availability
- RMA
- Help Center
- Contact Us
- Shop for
- Toyota Parts
- Scion Parts
My Garage
My Account
Cart
OEM 2003 Toyota Celica Windshield
Glass Windshield- Select Vehicle by Model
- Select Vehicle by VIN
Select Vehicle by Model
orMake
Model
Year
Select Vehicle by VIN
For the most accurate results, select vehicle by your VIN (Vehicle Identification Number).
1 Windshield found

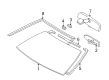 Product Specifications
- Other Name: Glass Sub-Assembly, Windshield; Windshield Glass, Front; Glass, Windshield
- Manufacturer Note: *TL,T=4.76
- Position: Front
- Part Name Code: 56111
- Condition: New
- Fitment Type: Direct Replacement
- SKU: 56101-20070
- Warranty: This genuine part is guaranteed by Toyota's factory warranty.
2003 Toyota Celica Windshield
Looking for affordable OEM 2003 Toyota Celica Windshield? Explore our comprehensive catalogue of genuine 2003 Toyota Celica Windshield. All our parts are covered by the manufacturer's warranty. Plus, our straightforward return policy and speedy delivery service ensure an unparalleled shopping experience. We look forward to your visit!
2003 Toyota Celica Windshield Parts Q&A
- Q: How to remove and install a windshield on 2003 Toyota Celica?A: Begin the windshield removal process by taking off front pillar garnish with a screwdriver then protect the shards with taped screwdriver tip. The map light assembly should be removed from both standard roof types through first the lens removal and next the screw unfastening and connector detachment. The removal of the map light assembly for vehicles with sliding roofs involves unscrewing the screw followed by applying a moulding remover tool to remove the cover and completing the disconnection process of the connector. Move on to the removal of sun visors combined with sun visor holders and inner rear view mirror. Begin by removing the wiper arms through the process of removing their two head caps and nuts. Unscrew four screws along with six clips from both the hood to cowl top seal and cowl top ventilator louver to disconnect the washer hoses. First remove the sliding roof opening trim and pull down the front portion of the roof headlining before using a knife to carefully eliminate the windshield outside moulding without damaging the body. When removing windshield glass you should insert a piano wire between the body and glass attachment points and tie both ends to wooden blocks while also unplugging the front-window defogger connector if it exists. Then cut the adhesive leaving behind no damage to body paint or exterior ornamentation. Clean and shape the contact surface of the body after glass removal while keeping maximum adhesive attached and wipe the removed glass without creating damage. New stoppers can be applied after first removing old No. 1 stoppers and clearing their mounting location then attaching the new stoppers to the notches. Fit new No. 2 stoppers to the glass implements by setting them correctly to ceramic notches and attach new dams through double-sided tape. Examine the glass placement and uniform contact while making reference marks before you perform surface cleaning on the contact region of the glass. Apply Primer "M" to the body contact surface before letting it dry for three minutes, follow by applying Primer "G" to the glass edge with quick removal of excess before final drying. Use cartridge Part No. 08850-00801 adhesive while working within the expiration time to properly coat the glass surface according to specified directions. Stage the windshield glass while ensuring proper alignment and make soft contact followed by spatula use to address adhesive problems. A new windshield moulding must be installed when the adhesive reaches the solid state after checking for remaining adhesive and fastening the glass and moulding using protective tape until the adhesive stabilizes. After the set time check for leaks to identify and perform needed repairs. Last step includes the reinstallation of the roof headlining front side alongside cowl top ventilator louver, hood to cowl top seal, wiper arms, inner rear view mirror, sun visor holders, sun visors, map light assembly, and front pillar garnish.
Related 2003 Toyota Celica Parts
 2003 Toyota Celica Emblem
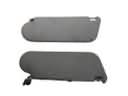 2003 Toyota Celica Sun Visor
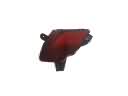 2003 Toyota Celica Bumper Reflector
 2003 Toyota Celica Car Mirror
 2003 Toyota Celica Grille
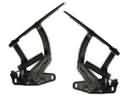 2003 Toyota Celica Hood Hinge
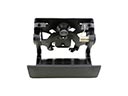 2003 Toyota Celica Tailgate Handle
 2003 Toyota Celica Washer Pump
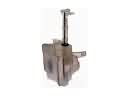 2003 Toyota Celica Washer Reservoir
 2003 Toyota Celica Windshield Wiper
 2003 Toyota Celica Wiper Arm
 2003 Toyota Celica Wiper Motor