My Garage
Cart
Make sure this part fits

Toyota 48068-59065
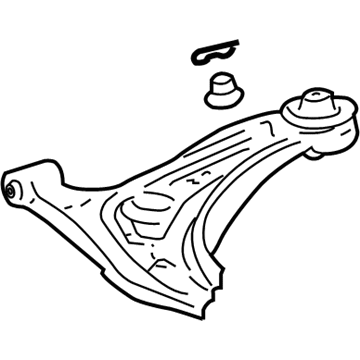
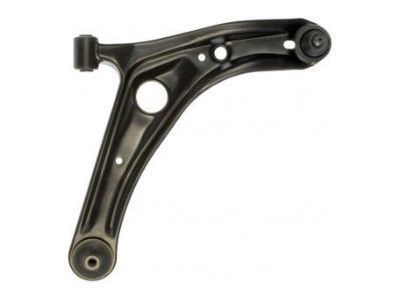
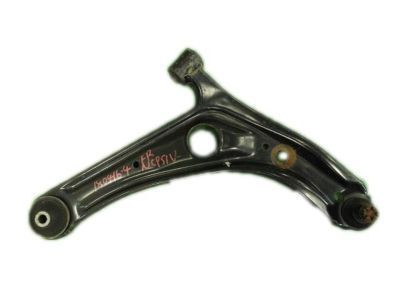
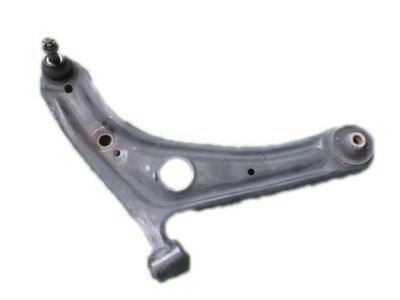
Lower Control Arm, Passenger Side

2004-2006 Toyota 4806859065

Customer Questions & Expert Answers (12)
Toyota 48068-59065 Lower Control Arm, Passenger Side
  • Part Description
    Arm Sub-Assembly, Suspension; Suspension Control Arm, Front Right; Control Arm Assembly
  • Part Name Code
    48068
  • Position
    Passenger Side
  • Manufacturer
    Toyota
Make sure this part fits
$251.28 MSRP: $358.77
You Save: $107.49 (30%)
Ships in 1-3 Business Days
1
ADD TO CART
  • Related Parts
  • Product Specifications
  • Vehicle Fitment
  • Customer Questions & Expert Answers
  • Product Specifications

    BrandGenuine Toyota
    Part Name Code48068
    Manufacturer Part Number48068-59065
    Part DescriptionArm Sub-Assembly, Suspension; Suspension Control Arm, Front Right; Control Arm Assembly
    Other NamesArm Sub-Assembly, Front Suspension, Lower Passenger Side; Control Arm
    Item Dimensions17.7 x 4.9 x 16.9 inches
    Item Weight6.00 Pounds
    PositionPassenger Side
    ConditionNew
    Fitment TypeDirect Replacement
    ManufacturerToyota
    SKU48068-59065
    WarrantyThis genuine Toyota part is guaranteed by Toyota's factory warranty.
    Shipping & ReturnShipping Policy Return Policy
    Warning: California's Proposition 65
  • Vehicle Fitment

    Year Make Model Trim Engine
    2004-2006 Scion xABase4 Cyl 1.5 L GAS
    2004-2006 Scion xBBase4 Cyl 1.5 L GAS
  • Customer Questions & Expert Answers

    Q:
    Will 48068-59065 fit my vehicle? Posted by ToyotaPartsNow Specialist
    A:
    Find out if part number 48068-59065 is the right fit for your car by Selecting Your Vehicle model.
    Posted by ToyotaPartsNow Specialist
    Q:
    How to service and repair the Control Arm for the Automatic Transaxle on Scion xA? Posted by Customer
    A:
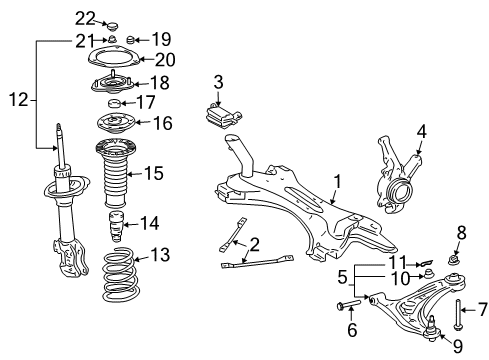
    Service engineers should start FRONT SUSPENSION NO. 1 LOWER ARM repair by removing both front wheels and hood sub-assemblies to suspend the engine assembly. You can disconnect the FRONT SUSPENSION NO. 1 LOWER ARM SUB-ASSEMBLY LH by removing the clip along with the nut while using Special Service Tool: 09628-00011 to separate the lower arm from the steering knuckle. Perform the same steps to disconnect the FRONT SUSPENSION NO. 1 LOWER ARM SUB-ASSEMBLY RH. To disconnect the FRONT STABILIZER BAR begin by securing the stabilizer bolt with a wrench to remove the nut followed by taking off the 2 retainers and the cushion then the stabilizer bolt while repeating on the opposite side. First disconnect the POWER STEERING LINK ASSEMBLY by taking out the 4 bolts and nuts and suspending the steering link while doing so before disconnecting the PRESSURE FEED TUBE ASSEMBLY through bolt removal. Remove the FRONT SUSPENSION MEMBER REINFORCEMENT LH and RH by extracting both their 2 bolts. Start by detaching the FRONT SUSPENSION CROSSMEMBER SUB-ASSEMBLY after removing its bolt and 2 nuts then set the crossmember on a jack after which remove the remaining 4 bolts. Mucho Workshop will disconnect the FRONT SUSPENSION NO. 1 LOWER ARM SUB-ASSEMBLY LH by extracting all its 2 bolts, the nut, and the lower arm without spinning the nut. Before attaching the nut to the FRONT SUSPENSION NO. 1 LOWER ARM SUB-ASSEMBLY LH you must pivot the ball joint stud 5 times in each direction. You should then use a torque wrench to turn the nut steadily at a pace of 2 to 4 seconds per turn and read the torque on the fifth rotation. The FRONT SUSPENSION NO. 1 LOWER ARM SUB-ASSEMBLY LH must be preliminarily installed with 2 nuts and 1 bolt before connecting the FRONT SUSPENSION CROSSMEMBER SUB-ASSEMBLY through alignment using Special Service Tool: 09670-00010 followed by bolt A installation at 70 Nm then bolt B installation at 116 Nm and completing the installation with a bolt and 2 nuts torqued to 80 Nm. Secure the FRONT SUSPENSION MEMBER REINFORCEMENT LH and RH with two bolts that reach 47 Nm torque. First bolt together the PRESSURE FEED TUBE ASSEMBLY with the bolt requiring 7.8 Nm torque strength and then attach the POWER STEERING LINK ASSEMBLY using four nuts along with four bolts at a torque strength of 74 Nm. Install the 2 retainers along with cushion before applying a wrench to the stabilizer bolt to secure its nut (Torque: 18 Nm). The FRONT SUSPENSION NO. 1 LOWER ARM SUB-ASSEMBLY LH must connect to the steering knuckle with a nut that reaches 98 Nm torque value while a new clip needs installation before increasing the nut torque an additional 60 degrees when the clip holes are misaligned. Install the front wheel on both sides by following the specified torque of 103 Nm. Fasten both bolts on the FRONT SUSPENSION NO. 1 LOWER ARM SUB-ASSEMBLY LH with a torque of 88 Nm for bolt A and 132 Nm for bolt B and avoid rotating the nut during installation. Check and modify both the hood sub-assembly and front wheel alignment before concluding.
    Posted by ToyotaPartsNow Specialist
    Q:
    How to Service and Repair the Control Arm in the Front Suspension on Scion xA? Posted by Customer
    A:
    The first task to replace the Lower FRONT SUSPENSION ARM SUB-ASSEMBLY LOWER NO.1 LH (MTM) involves wheel removal. Use Special Service Tool: 09628-00011 to disassemble the front suspension arm sub-assembly lower No.1 LH before proceeding to remove the stabilizer bar front. The front suspension arm sub-assembly lower No.1 LH requires removal through a two-bolt and nut procedure but never wrench the nut. The front suspension arm sub-assembly lower No.1 LH requires a 5-round ball joint stud flipping and nut installing procedure before using a torque wrench to apply continuous torque at a 2 to 4 second per turn rate, recording the 5th turn torque which should measure below 5.0 Nm (51 kgf-cm, 44 inch lbs.). First, loosely fasten the two bolts and nut onto the front suspension arm sub-assembly lower No.1 LH before joining it to the stabilizer bar front along with reinstallation of the front wheels at 103 Nm (1,050 kgf-cm, 76 ft. lbs.) torque. For the front suspension arm sub-assembly lower No.1 LH complete the installation by using two bolts which require torques of 88 Nm for Bolt A and 132 Nm for Bolt B but never turn the nut and end with wheel alignment inspection.
    Posted by ToyotaPartsNow Specialist
    Q:
    What is the inspection process for the front suspension arm sub-assembly lower No.1 LH for the 2004 Scion xA? Posted by Customer
    A:
    Flip the ball joint stud back and forth 5 times before installing the nut.
    Posted by ToyotaPartsNow Specialist
    See expert answers on similar Control Arm
    Q:
    How do you remove the front suspension member reinforcement LH and RH for the 2005 Scion xB? Posted by Customer
    A:
    Take out 2 bolts each.
    Posted by ToyotaPartsNow Specialist
    See expert answers on similar Control Arm
    Q:
    How do you remove the front suspension arm sub-assembly lower No.1 LH for the 2004 Scion xB? Posted by Customer
    A:
    Remove it by taking out the 2 bolts and nut, ensuring not to turn the nut.
    Posted by ToyotaPartsNow Specialist
    See expert answers on similar Control Arm
    Q:
    How do you remove the front suspension arm sub-assembly lower No.1 LH for the 2004 Scion xA? Posted by Customer
    A:
    Take out 2 bolts and a nut, ensuring not to turn the nut.
    Posted by ToyotaPartsNow Specialist
    See expert answers on similar Control Arm
    Q:
    How do you fully tighten the Front Suspension No. 1 Lower Arm Sub-Assembly LH for the 2006 Scion xB? Posted by Customer
    A:
    Install the lower suspension arm with the 2 bolts, using a torque of 88 Nm (900 kgf-cm, 65 ft. lbs.) for bolt A and 132 Nm (1,350 kgf-cm, 97 ft. lbs.) for bolt B, ensuring not to turn the nut.
    Posted by ToyotaPartsNow Specialist
    See expert answers on similar Control Arm
    Q:
    What is the final step after completing the installation for the 2006 Scion xA? Posted by Customer
    A:
    Inspect and adjust the front wheel alignment.
    Posted by ToyotaPartsNow Specialist
    See expert answers on similar Control Arm
    Q:
    What tool is used to separate the front suspension arm sub-assembly lower No.1 LH for the 2005 Scion xB? Posted by Customer
    A:
    Use Special Service Tool: 09628-00011.
    Posted by ToyotaPartsNow Specialist
    See expert answers on similar Control Arm
    Q:
    What is the procedure for separating the front stabilizer bar for the 2005 Scion xA? Posted by Customer
    A:
    Hold the front stabilizer bolt with a spanner to remove the nut, then take out the retainers and cushion, and repeat on the other side.
    Posted by ToyotaPartsNow Specialist
    See expert answers on similar Control Arm
    Q:
    What are the torque specifications for installing bolt A and bolt B for the 2006 Scion xB? Posted by Customer
    A:
    Torque bolt A to 70 Nm and bolt B to 116 Nm.
    Posted by ToyotaPartsNow Specialist
    See expert answers on similar Control Arm
    If you have any questions about this product, please don't hesitate to ask us. We will be happy to help you!

OEM Toyota 48068-59065, Excellent Performance and Perfect Fitment

To ensure reliability, purchase Toyota part # 48068-59065 Lower Control Arm, Passenger Side. It is sometimes referred to as Toyota Control Arm. OEM parts are unrivaled in terms of quality. They go through extensive quality control inspections and are produced in accordance with Toyota's official factory specifications. All of these remove defects and imperfections. So you can relax knowing they promise exceptional lifespan and flawless fitment.

ToyotaPartsNow.com is a leading supplier of genuine Toyota parts such as Toyota 4806859065 Lower Control Arm, Passenger Side. At ToyotaPartsNow.com, we have a wide variety of OEM Toyota parts available at competitive prices. Our comprehensive range of genuine Toyota parts come with a manufacturer's warranty for peace of mind. We also prioritize customer satisfaction, providing a hassle-free return policy and expedited delivery for all our parts. For detailed Scion parts information, click here.
Choose ToyotaPartsNow for discounted prices, exceptional service and fast delivery