My Garage
Cart
Make sure this part fits

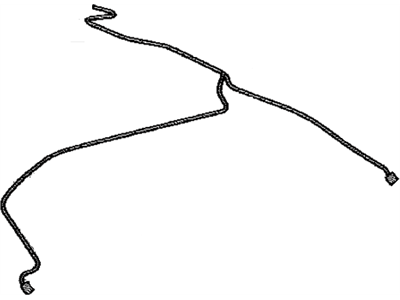
Toyota 86101-06150
Antenna Cable

2007-2009 Toyota Camry 8610106150

Customer Questions & Expert Answers (6)
Toyota 86101-06150 Antenna Cable
  • Part Description
    Cord Sub-Assembly, Antenna
  • Part Name Code
    86101
  • Replaces
    86101-33540
  • Manufacturer
    Toyota
Make sure this part fits
$96.76 MSRP: $135.82
You Save: $39.06 (29%)
Ships in 1-3 Business Days
1
ADD TO CART
  • Related Parts
  • Product Specifications
  • Vehicle Fitment
  • Customer Questions & Expert Answers
  • Product Specifications

    BrandGenuine Toyota
    Part Name Code86101
    Manufacturer Part Number86101-06150
    Part DescriptionCord Sub-Assembly, Antenna
    Manufacturer NoteMOON ROOF-WITH
    Item Dimensions15.3 x 6.0 x 2.1 inches
    Item Weight1.10 Pounds
    ConditionNew
    Fitment TypeDirect Replacement
    Replaces86101-33540
    ManufacturerToyota
    SKU86101-06150
    WarrantyThis genuine Toyota part is guaranteed by Toyota's factory warranty.
    Shipping & ReturnShipping Policy Return Policy
    Warning: California's Proposition 65
  • Vehicle Fitment

    Year Make Model Trim Engine
    2007-2009 Toyota CamryBase, CE, LE, SE, XLE4 Cyl 2.4 L GAS, 6 Cyl 3.5 L GAS
  • Customer Questions & Expert Answers

    Q:
    Can you provide the right 86101-06150 for my car? Posted by ToyotaPartsNow Specialist
    A:
    Find out if part number 86101-06150 is the right fit for your car by Selecting Your Vehicle model.
    Posted by ToyotaPartsNow Specialist
    Q:
    How to remove the antenna cable and associated components on Toyota Camry? Posted by Customer
    A:
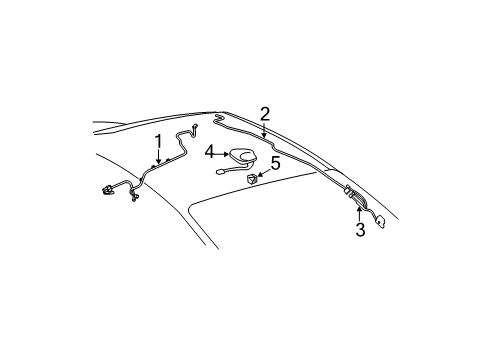
    One should start antenna cable removal by facing the front wheels straight ahead then discharging the battery cable from the terminal's negative end to wait for ninety seconds before the Air Bags can activate. The technician should begin by taking out the lower No. 3 steering wheel cover, lower No. 2 steering wheel cover, steering pad and steering wheel assembly. Proceed to remove the front door scuff plate LH, cowl side trim sub-assembly LH, lower instrument panel finish panel LH (for TMC Made), lower instrument panel finish panel LH (for TMMK Made), steering column cover (for TMC Made), steering column cover (for TMMK Made), turn signal switch assembly with spiral cable sub-assembly, No. 1 instrument panel sub-assembly, lower instrument panel finish panel (w/o Smart Key System), lower instrument panel finish panel (w/ Smart Key System), instrument cluster finish No.1 panel, combination meter assembly (for TMC Made), combination meter assembly (for TMMK Made), front door scuff plate RH, cowl side trim sub-assembly RH, instrument panel No. 2 under cover sub-assembly, lower instrument panel sub-assembly (for TMC Made), lower instrument panel sub-assembly (for TMMK Made), shift lever knob sub-assembly (for Automatic Transaxle), shift lever knob sub-assembly (for Manual Transaxle), No. 1 instrument cluster finish panel garnish, No. 2 instrument cluster finish panel garnish, floor shift position indicator housing sub-assembly (for Automatic Transaxle), upper console panel (for Manual Transaxle), upper console rear panel sub-assembly (for Automatic Transaxle), upper console rear panel sub-assembly (for Manual Transaxle), upper console panel sub-assembly (for TMC Made), upper console panel sub-assembly (for TMMK Made), instrument panel No. 2 register assembly, radio receiver with heater control panel assembly (w/o Navigation System), navigation receiver with heater control panel assembly, console box pocket, console box carpet, console box assembly (for TMC Made), console box assembly (for TMMK Made), No. 2 console box insert front (for TMC Made), No. 2 console box insert front (for TMMK Made), No. 1 console box insert front (for TMC Made), No. 1 console box insert front (for TMMK Made), front pillar garnish LH, instrument panel No. 1 register assembly, instrument panel No. 1 speaker panel sub-assembly, front No. 2 speaker assembly (for LH Side), front pillar garnish RH, instrument panel No. 3 register assembly, instrument panel No. 2 speaker panel sub-assembly, front No. 2 speaker assembly (for RH Side), No. 1 defroster nozzle garnish, instrument panel safety pad assembly (for TMC Made), instrument panel safety pad assembly (for TMMK Made), No. 3 instrument panel stay, side No. 1 defroster nozzle duct (for TMC Made), side No. 1 defroster nozzle duct (for TMMK Made), side No. 2 defroster nozzle duct (for TMC Made), side No. 2 defroster nozzle duct (for TMMK Made), defroster nozzle assembly (for TMC Made), defroster nozzle assembly (for TMMK Made), No. 1 heater to register duct (for TMC Made), No. 1 heater to register duct (for TMMK Made), No. 3 heater to register duct (for TMC Made), No. 3 heater to register duct (for TMMK Made), No. 2 heater to register duct (for TMC Made), and No. 2 heater to register duct (for TMMK Made). Detach the six clamps along with the clip to take off the No. 2 antenna cord sub-assembly. The front seat requires removal of the headrest assembly (Manual Seat) combined with seat track cover LH (Manual Seat), inner seat track bracket cover LH (Manual Seat) and front seat assembly LH (Manual Seat). Perform the same operations for the Power Seat. Proceed with the removal of all rear seat parts which includes the rear seat cushion assembly and both headrest assemblies together with back assemblies of fixed and fold-down types. The technician should remove both front door components collectively with their scuff plates, Weather Strips, trim boards and front door components as well as center pillar garnishes and roof side inner garnishes from the rear door. Finish up the operation by removing the antenna cord assembly but peel off only the tape that needs removal to separate it and preserve as much headliner tape for future reuse.
    Posted by ToyotaPartsNow Specialist
    Q:
    How to remove the antenna cable and associated components on Toyota Camry? Posted by Customer
    A:
    The procedure for antenna cable removal starts with aligning wheels straight ahead followed by disconnecting the cable from the negative terminal then waiting 90 seconds to avoid Air Bag deployment. The procedure starts with a sequential removal of the lower No. 3 steering wheel cover second followed by the lower No. 2 steering wheel cover and next the steering pad after which the steering wheel assembly must be taken off. The procedure includes taking out the front door scuff plate LH together with cowl side trim sub-assembly LH and lower instrument panel finish panel LH (for TMC Made and TMMK Made) as well as the steering column cover (for TMC Made and TMMK Made) and turn signal switch assembly with spiral cable sub-assembly and No. 1 instrument panel sub-assembly and lower instrument panel finish panel (with and without Smart Key System). Continue by removing the instrument cluster finish panel, combination meter assembly (for TMC Made and TMMK Made), front door scuff plate RH, cowl side trim sub-assembly RH, instrument panel No. 2 under cover sub-assembly, lower instrument panel sub-assembly (for TMC Made and TMMK Made), shift lever knob sub-assembly (for both Automatic and Manual Transaxle), instrument cluster finish panel garnishes, floor shift position indicator housing sub-assembly (for Automatic Transaxle), upper console panel (for Manual Transaxle), upper console rear panel sub-assemblies (for both Automatic and Manual Transaxle), upper console panel sub-assemblies (for TMC Made and TMMK Made), instrument panel No. 2 register assembly, radio receiver with heater control panel assembly (without Navigation System), navigation receiver with heater control panel assembly, console box pocket, console box carpet, console box assemblies (for TMC Made and TMMK Made), console box insert fronts (for TMC Made and TMMK Made), front pillar garnishes, instrument panel No. 1 register assembly, instrument panel No. 1 speaker panel sub-assembly, front No. 2 speaker assemblies (for both LH and RH sides), defroster nozzle garnishes, instrument panel safety pad assemblies (for TMC Made and TMMK Made), defroster nozzle ducts (for TMC Made and TMMK Made), defroster nozzle assemblies (for TMC Made and TMMK Made), heater to register ducts (for TMC Made and TMMK Made), and No. 2 antenna cord sub-assembly by disengaging the 6 clamps and clip. Separate and remove the front seat headrest assembly components combined with seat track covers, inner seat track bracket covers and both Manual and Power Seats' front seat assemblies. Draw the operation sequence to dismantled rear seat components which includes rear seat cushion assembly and headrest assemblies and back assemblies (both Fixed and Fold Down Seat Types). Remove the components including rear door scuff plates together with opening trim Weather Strips, reclining remote control lever sub-assemblies, rear door inside handle bezel plugs, door assist grip covers, rear door trim board sub-assemblies, and inner glass Weather Strips from the vehicle. The necessary steps to remove the front seat outer belt assemblies for both left and right sides include dismantling the center pillar garnishes, roof side inner garnishes, front pillar garnishes, roof console box assembly, visor assemblies, visor holder, assist grip sub-assemblies, room light assembly without Sliding Roof, spot light assembly with Sliding Roof, sun roof opening trim moulding with Sliding Roof, sunshade trim holder with Rear Sunshade, and roof headlining assemblies both with and without Sliding Roof. After peeling open the tape which secures the antenna cord sub-assembly enough to extract it remove this assembly while keeping as much tape on the roof headlining for future use.
    Posted by ToyotaPartsNow Specialist
    Q:
    What final checks and connections are needed for the 2007 Toyota Camry? Posted by Customer
    A:
    Connect cable to negative battery terminal (for Manual Seat), inspect slide adjuster lock (for Manual Seat), inspect front seat assembly (for Power Seat), perform zero point calibration and sensitivity check (for Front Passenger Seat), inspect steering pad, and inspect SRS warning light.
    Posted by ToyotaPartsNow Specialist
    See expert answers on similar Antenna Cable
    Q:
    What components should be installed after the antenna cord for the 2009 Toyota Camry? Posted by Customer
    A:
    Install the roof headlining assembly (w/o Sliding Roof), followed by the roof headlining assembly (w/ Sliding Roof), sunshade trim holder, sunroof opening trim moulding, and various light assemblies.
    Posted by ToyotaPartsNow Specialist
    See expert answers on similar Antenna Cable
    Q:
    What is the role of the navigation antenna cord for the 2008 Toyota Camry? Posted by Customer
    A:
    The navigation antenna cord is responsible for receiving signals to ensure accurate location tracking and navigation functionality.
    Posted by ToyotaPartsNow Specialist
    See expert answers on similar Antenna Cable
    If you have any questions about this product, please don't hesitate to ask us. We will be happy to help you!

OEM Toyota 86101-06150, Excellent Performance and Perfect Fitment

To ensure reliability, purchase Toyota part # 86101-06150 Antenna Cable. It is sometimes referred to as Toyota Antenna Cable. OEM parts are unrivaled in terms of quality. They go through extensive quality control inspections and are produced in accordance with Toyota's official factory specifications. All of these remove defects and imperfections. So you can relax knowing they promise exceptional lifespan and flawless fitment.

ToyotaPartsNow.com is a leading supplier of genuine Toyota parts such as Toyota 8610106150 Antenna Cable. At ToyotaPartsNow.com, we have a wide variety of OEM Toyota parts available at competitive prices. Our comprehensive range of genuine Toyota parts come with a manufacturer's warranty for peace of mind. We also prioritize customer satisfaction, providing a hassle-free return policy and expedited delivery for all our parts. For detailed Toyota parts information, click here.
Choose ToyotaPartsNow for discounted prices, exceptional service and fast delivery