×
ToyotaParts- Hello
- Login or Register
- Quick Links
- Live Chat
- Track Order
- Parts Availability
- RMA
- Help Center
- Contact Us
- Shop for
- Toyota Parts
- Scion Parts
My Garage
My Account
Cart
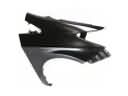
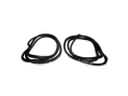
OEM Scion xD Windshield
Glass Windshield- Select Vehicle by Model
- Select Vehicle by VIN
Select Vehicle by Model
orMake
Model
Year
Select Vehicle by VIN
For the most accurate results, select vehicle by your VIN (Vehicle Identification Number).
1 Windshield found

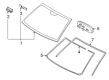
Scion xD Windshield, Front Part Number: 56101-52370
$379.99 MSRP: $556.87You Save: $176.88 (32%)Ships in 1-3 Business Days
Scion xD Windshield
Choose genuine Windshield that pass strict quality control tests. You can trust the top quality and lasting durability. Shopping for OEM Windshield for your Scion xD? Our website is your one-stop destination. We stock an extensive selection of genuine Scion xD parts. The price is affordable so you can save more. It only takes minutes to browse and find the exact fit. Easily add to cart and check out fast. Our hassle-free return policy will keep you stress-free. We process orders quickly for swift delivery. Your parts will arrive faster, so you can get back on the road sooner.
Scion xD Windshield Parts and Q&A
- Q: How to install windshield glass on Scion xD?A:You start windshield glass installation by cleaning the glass with a scraper to remove damaged stoppers and adhesive as well as the dam before you take preventive measures to protect the glass from breaking. Afterward use a non-residue solvent to wipe the edge of the glass then stop before the surface contact point. You should clean the vehicle body while using the knife to shape the contact surface then remove rough adhesive without damaging the body while finishing with a cloth or shop rag as a cleaner. Apply Primer G on the application area and wait for a minimum dry time of 3 minutes before putting on new No. 2 stoppers to the windshield glass. The installation process requires two new No. 1 stoppers to be placed on the vehicle body. The application area of the windshield outside moulding and adhesive dam requires two coats of Primer G that must dry before installing the materials. Position the windshield glass using suction cups by applying an even pressure to the contact surface while keeping matchmarks properly aligned before applying Primer M to the installation area of the vehicle body away from the adhesive. Position the glass next to surface areas with adhesive before cutting the cartridge nozzle to apply Toyota Genuine Windshield Glass Adhesive or equivalent to the glass. Place the windshield glass properly into position while gently pressing the material at the rim to verify that both stoppers are securely fastened along with the desired clearance amount. Lightly push the front area to create a proper seal while using a scraper to modify the adhesive if needed. Before driving your vehicle you should maintain the glass with protective tape until the adhesive becomes hard and follow all minimum waiting times. To detect leaks in the adhesive-operated unit you should apply exterior water before the adhesive curing process ends. Detecting any leaks will require waiting for additional adhesive application if necessary. Finally, remove the protective tape and proceed to install the inner rear view mirror assembly, roof headlining assembly, room light assembly, personal light assembly, visor holder, visor assemblies, assist grip, front pillar garnishes, front door opening trim Weather Strips, cowl side trim boards, instrument panel under cover sub-assemblies, front door scuff plates, cowl top ventilator louver assemblies, hood to cowl top seal, front wiper arm and blade assemblies, and connect the cable to the negative battery terminal with a torque of 5.4 Nm (55 kgf-cm, 48 in-lbf), followed by inspecting the SRS warning light.