×
ToyotaParts- Hello
- Login or Register
- Quick Links
- Live Chat
- Track Order
- Parts Availability
- RMA
- Help Center
- Contact Us
- Shop for
- Toyota Parts
- Scion Parts
My Garage
My Account
Cart
OEM 2009 Toyota Matrix Fuel Door Release Cable
Gas Door Safety Release Cable- Select Vehicle by Model
- Select Vehicle by VIN
Select Vehicle by Model
orMake
Model
Year
Select Vehicle by VIN
For the most accurate results, select vehicle by your VIN (Vehicle Identification Number).
1 Fuel Door Release Cable found

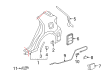
2009 Toyota Matrix Release Cable, Rear
Part Number: 77035-02210$35.48 MSRP: $49.39You Save: $13.91 (29%)Ships in 1-3 Business DaysProduct Specifications- Other Name: Cable Sub-Assembly, Fuel Lid Lock Control; Fuel Filler Door Release Cable, Rear; Fuel Door Release Cable
- Position: Rear
- Part Name Code: 77035
- Item Weight: 0.90 Pounds
- Item Dimensions: 15.3 x 12.1 x 1.1 inches
- Condition: New
- Fitment Type: Direct Replacement
- SKU: 77035-02210
- Warranty: This genuine part is guaranteed by Toyota's factory warranty.
2009 Toyota Matrix Fuel Door Release Cable
Looking for affordable OEM 2009 Toyota Matrix Fuel Door Release Cable? Explore our comprehensive catalogue of genuine 2009 Toyota Matrix Fuel Door Release Cable. All our parts are covered by the manufacturer's warranty. Plus, our straightforward return policy and speedy delivery service ensure an unparalleled shopping experience. We look forward to your visit!
2009 Toyota Matrix Fuel Door Release Cable Parts Q&A
- Q: How to install the fuel door release cable sub-assembly and related components on 2009 Toyota Matrix?A: Install the fuel lid lock control cable sub-assembly by engaging eight clamps followed by connecting the two claws as shown in the illustration. The installation of the fuel lid lock open lever sub-assembly requires you to use a bolt with 5.5 Nm (56 kgf-cm, 49 in-lbf) torque specification. First install the side deck trim panel assembly LH, then add the rear combination light service cover LH and the No. 1 luggage compartment trim hook before putting in the luggage hold belt striker assembly and connecting the rear seat 3 point type belt assembly LH. Continue with the installation of the rear seat side garnish LH, rear seatback hinge sub-assembly, rear deck trim cover, luggage compartment tray, child restraint seat tether anchor, deck floor box RH, deck floor box LH, jack assembly, jack carrier assembly, No. 2 deck board, deck board assembly, tonneau cover assembly (w/ Tonneau Cover), rear seatback assembly LH, rear seatback inner hinge cover, rear seatback outer hinge cover, rear seat headrest assembly, rear seat cushion assembly, lower center pillar garnish LH, connect the front seat outer belt assembly LH, install the lap belt outer anchor cover, rear door opening trim Weather Strip LH, rear door scuff plate LH, front door opening trim Weather Strip LH, front door scuff plate LH, front seat assembly, inspect the front seat slide adjuster lock, install the inner seat track cover, outer seat track cover, front seat headrest assembly, connect the cable to the negative battery terminal (w/ Front Seat Side Air Bag), and inspect the SRS warning light (w/ Front Seat Side Air Bag).
Related 2009 Toyota Matrix Parts
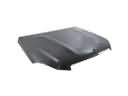 2009 Toyota Matrix Hood
 2009 Toyota Matrix Emblem
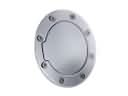 2009 Toyota Matrix Fuel Door
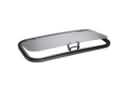 2009 Toyota Matrix Sunroof
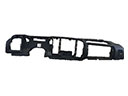 2009 Toyota Matrix Dash Panel Vent Portion Covers
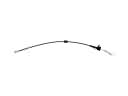 2009 Toyota Matrix Door Latch Cable
 2009 Toyota Matrix Door Lock Cylinder
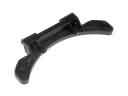 2009 Toyota Matrix Fuel Door Hinge
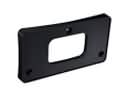 2009 Toyota Matrix License Plate
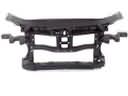 2009 Toyota Matrix Radiator Support
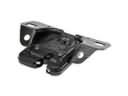 2009 Toyota Matrix Trunk Lid Latch
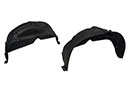 2009 Toyota Matrix Wheelhouse