×
ToyotaParts- Hello
- Login or Register
- Quick Links
- Live Chat
- Track Order
- Parts Availability
- RMA
- Help Center
- Contact Us
- Shop for
- Toyota Parts
- Scion Parts
My Garage
My Account
Cart
OEM 2007 Toyota Land Cruiser Timing Belt
Engine Timing Belt- Select Vehicle by Model
- Select Vehicle by VIN
Select Vehicle by Model
orMake
Model
Year
Select Vehicle by VIN
For the most accurate results, select vehicle by your VIN (Vehicle Identification Number).
1 Timing Belt found


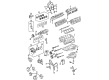
2007 Toyota Land Cruiser Belt, Timing
Part Number: 13568-09070$61.13 MSRP: $85.81You Save: $24.68 (29%)Ships in 1-3 Business DaysProduct Specifications- Other Name: Engine Timing Belt; Timing Belt Kit; Timing Belt
- Manufacturer Note: (L)
- Replaces: 13568-59095
- Part Name Code: 13568
- Item Weight: 2.40 Pounds
- Item Dimensions: 13.4 x 11.6 x 2.2 inches
- Condition: New
- Fitment Type: Direct Replacement
- SKU: 13568-09070
- Warranty: This genuine part is guaranteed by Toyota's factory warranty.
2007 Toyota Land Cruiser Timing Belt
Looking for affordable OEM 2007 Toyota Land Cruiser Timing Belt? Explore our comprehensive catalogue of genuine 2007 Toyota Land Cruiser Timing Belt. All our parts are covered by the manufacturer's warranty. Plus, our straightforward return policy and speedy delivery service ensure an unparalleled shopping experience. We look forward to your visit!
2007 Toyota Land Cruiser Timing Belt Parts Q&A
- Q: How to service and repair the timing belt on 2007 Toyota Land Cruiser?A: A correct procedure to service the timing belt starts with disconnecting the negative battery cable along with a minimum 90-second wait before Air Bag activation. You should remove 8 under cover rear engine bolts first then proceed to the No. 1 engine under cover bolts removal using 5 bolts. Start by emptying engine coolant which will enable technicians to remove the V-bank cover followed by air cleaner hose assembly then air cleaner assembly after disconnecting MAF meter connector to reveal the air cleaner cap element and three bolts from air cleaner case assembly. The service technician needs to disconnect the No. 1 and No. 2 radiator hoses together with the No. 1 oil cooler inlet and outlet tubes. The technician must also remove the drive belt and radiator assembly. Users must disconnect the vane pump assembly with all components of the generator assembly and compressor assembly. Seamlessly remove the No. 3 timing belt cover sub-assembly RH by dissolving the cap nut and 3 bolts and proceed to disconnect the oil cooler pipe using its cap nut and bolt along with the removal of 3 water by-pass hoses. To remove the No. 3 timing belt cover sub-assembly LH users must firstly disconnect three components including engine wire from wire clamps and the camshaft position sensor connector and timing belt cover wire clamp before unbolting the four screws and removing the cover. Start by removing the No. 2 idler pulley sub-assembly when you take out its pulley bolt alongside the cover plate and idler pulley then proceed with the No. 2 timing belt cover sub-assembly removal after taking out 2 bolts. Unscrew the two nuts and bolt from the drive belt tensioner assembly before proceeding to remove the idler pulley assembly with its two bolts and two nuts. To remove the damper bolt from the crankshaft damper sub-assembly technicians should use Special Service Tool: 09213-70011 (09213-70020), 09330-00021 while the Special Service Tool: 09950-50013 (09951-05010, 09952-05010, 09953-05010, 09953-05020, 09954-05021) is required to remove the damper itself. To access the timing belt you need to remove four bolts from the No.1 timing belt cover before taking out the crankshaft position sensor plate and finally extracting the belt while positioning the No.1 cylinder approximately 45 degrees BTDC/compression. Set the No. 1 cylinder to 45 degrees BTDC/compression while maintaining alignment of the timing marks before you remove the belt. Record any defects found on the timing belt which should not interface with oil water or steam and check for oil leakage and frictionless operation of the tensioner and idler. Installation starts with inspecting the No. 1 and No. 2 belt idlers alongside the water pump for smooth operation and leakage before pulley cleaning occurs. Next, set the No. 1 cylinder at TDC/compression and carefully install the timing belt with precise alignment of all installation marks. First secure the push rod as you ensure compression on the tensioner rod and follow with hexagon wrench usage then proceed with tensioner belt mounting to validate proper valve timing. The installation requires using the Special Service Tool: 09223-46011 to assemble components in the following order: crankshaft position sensor plate then No. 1 timing belt cover followed by crankshaft damper sub-assembly and finally fan bracket sub-assembly and drive belt tensioner assembly with No. 2 timing belt cover sub-assembly and No. 2 idler pulley sub-assembly and No. 3 timing belt covers. After reconnecting the compressor assembly, generator assembly, vane pump assembly, drive belt and radiator assembly the technician must reconnect oil cooler tubes followed by radiator hoses. The process for completing the repair involves reattaching the air cleaner assembly with its hose assembly followed by V-bank cover replacement and negative battery terminal reconnection. Then initialization and engine coolant addition must be performed along with leak testing before securely re-installing engine under covers.
Related 2007 Toyota Land Cruiser Parts
 2007 Toyota Land Cruiser Oil Filter
 2007 Toyota Land Cruiser Camshaft
 2007 Toyota Land Cruiser Crankshaft Gear
 2007 Toyota Land Cruiser Dipstick
 2007 Toyota Land Cruiser Dipstick Tube
 2007 Toyota Land Cruiser Engine Mount
 2007 Toyota Land Cruiser Harmonic Balancer
 2007 Toyota Land Cruiser Oil Pump
 2007 Toyota Land Cruiser Timing Chain Tensioner
 2007 Toyota Land Cruiser Timing Cover
 2007 Toyota Land Cruiser Timing Cover Gasket
 2007 Toyota Land Cruiser Valve Cover Gasket