×
ToyotaParts- Hello
- Login or Register
- Quick Links
- Live Chat
- Track Order
- Parts Availability
- RMA
- Help Center
- Contact Us
- Shop for
- Toyota Parts
- Scion Parts
My Garage
My Account
Cart
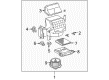
OEM 2005 Toyota Sienna Blower Motor
A/C Heater Blower Motor- Select Vehicle by Model
- Select Vehicle by VIN
Select Vehicle by Model
orMake
Model
Year
Select Vehicle by VIN
For the most accurate results, select vehicle by your VIN (Vehicle Identification Number).
2 Blower Motors found


2005 Toyota Sienna Blower Motor, Rear
Part Number: 87103-08070$156.38 MSRP: $221.38You Save: $65.00 (30%)Ships in 1-3 Business DaysProduct Specifications- Other Name: Motor Sub-Assembly, Blower; HVAC Blower Motor Assembly, Rear; Blower Assembly; Motor Sub-Assembly, Cooling Unit, W/Fan; HVAC Blower Motor
- Position: Rear
- Part Name Code: 87103A
- Item Weight: 3.30 Pounds
- Item Dimensions: 10.5 x 9.5 x 7.8 inches
- Condition: New
- Fitment Type: Direct Replacement
- SKU: 87103-08070
- Warranty: This genuine part is guaranteed by Toyota's factory warranty.

2005 Toyota Sienna Blower Motor, Front
Part Number: 87103-08051$198.50 MSRP: $283.42You Save: $84.92 (30%)Product Specifications- Other Name: Motor Sub-Assembly, Blower; HVAC Blower Motor Assembly, Front; Blower Assembly; Fan & Motor; Motor Sub-Assembly, Blower W/Fan; HVAC Blower Motor
- Position: Front
- Replaces: 87103-08050
- Part Name Code: 87103B
- Item Weight: 3.50 Pounds
- Item Dimensions: 10.2 x 9.1 x 7.6 inches
- Condition: New
- Fitment Type: Direct Replacement
- SKU: 87103-08051
- Warranty: This genuine part is guaranteed by Toyota's factory warranty.
2005 Toyota Sienna Blower Motor
Looking for affordable OEM 2005 Toyota Sienna Blower Motor? Explore our comprehensive catalogue of genuine 2005 Toyota Sienna Blower Motor. All our parts are covered by the manufacturer's warranty. Plus, our straightforward return policy and speedy delivery service ensure an unparalleled shopping experience. We look forward to your visit!
2005 Toyota Sienna Blower Motor Parts Q&A
- Q: How to Service and Repair the Blower Motor Assembly on 2005 Toyota Sienna?A: The service process for the rear blower assembly begins with refrigerant discharge using Special Service Tool: 07110-58060 (07117-58080, 07117-58090, 07117-78050, 07117-88060, 07117-88070, 07117-88080). The service begins by disconnecting the rear door scuff plate RH, back door scuff plate and quarter trim panel assembly front RH, roof headlining garnish rear and RR window side garnish assembly No.2 RH. After separating the 2 clips from the air duct assembly users should proceed to the cover sub-assembly by releasing the 2 claw fittings. Remove the heater hose after loosening its claw fittings and clamp and using pliers to detach the 2 heater hose clips. Remove the two bolts securing the accessory assembly of the air conditioning tube for disconnect. To remove the air conditioning blower assembly first disconnect the five connectors and free three clamps before separate the wire harness and then take out the three bolts. Remove cooler thermistor No.1 by unscrewing both of its clamp fittings and its holding clamp. The cooling unit motor sub-assembly with fan requires removal after screwing out the 3 screws followed by removing the blower resistor transistor assembly through screwing out the 2 screws. The heater radiator unit sub-assembly requires the removal of a claw fitting followed by all 3 screws for the blower case then 2 screws and 2 clamps before removing 3 heater water valve assembly screws and removing the 2 O-rings from this component. Set the air conditioning blower assembly into place by working with the 3 bolts with 5.4 N-m (55 kgf-cm, 48 in.-lbf) torque force but tighten the bolts according to the correct sequence. Install two bolts into the air conditioning tube & accessory assembly while applying compressor oil (ND-OIL 8 or equivalent) to 2 new O-rings and the fitting surface of the air conditioning tube & accessory assembly. Also use 3.5 N-m (36 kgf-cm, 31 in.-lbf) torque for this step. The service technician must perform the following steps: add coolant and charge the refrigerant through Special Service Tool: 07110-58060 (07117-58060, 07117-58070, 07117-58080, 07117-58090, 07117-78050, 07117-88060, 07117-88070, 07117-88080). Following the engine warming and coolant leak evaluation and refrigerant leak investigation.
Related 2005 Toyota Sienna Parts
 2005 Toyota Sienna Cabin Air Filter
 2005 Toyota Sienna A/C Compressor
 2005 Toyota Sienna Blend Door Actuator
 2005 Toyota Sienna Blower Motor Resistor
 2005 Toyota Sienna Heater Core
 2005 Toyota Sienna A/C Accumulator
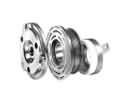 2005 Toyota Sienna A/C Clutch
 2005 Toyota Sienna A/C Expansion Valve
 2005 Toyota Sienna A/C Hose
 2005 Toyota Sienna A/C Switch
 2005 Toyota Sienna Ambient Temperature Sensor
 2005 Toyota Sienna Blower Control Switches