×
ToyotaParts- Hello
- Login or Register
- Quick Links
- Live Chat
- Track Order
- Parts Availability
- RMA
- Help Center
- Contact Us
- Shop for
- Toyota Parts
- Scion Parts
My Garage
My Account
Cart
OEM 2005 Toyota Sequoia Fuel Injector
Gas Injector- Select Vehicle by Model
- Select Vehicle by VIN
Select Vehicle by Model
orMake
Model
Year
Select Vehicle by VIN
For the most accurate results, select vehicle by your VIN (Vehicle Identification Number).
1 Fuel Injector found
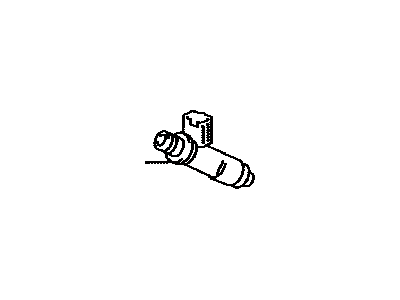
2005 Toyota Sequoia Injector Assembly, Fuel
Part Number: 23209-0F020$177.07 MSRP: $252.81You Save: $75.74 (30%)Ships in 1-3 Business DaysProduct Specifications- Other Name: Injector Set, Fuel; Fuel Injector
- Manufacturer Note: (L)
- Replaces: 23209-50080
- Part Name Code: 23250
- Item Weight: 0.50 Pounds
- Item Dimensions: 3.7 x 2.7 x 1.5 inches
- Condition: New
- Fitment Type: Direct Replacement
- Require Quantity: 8
- SKU: 23209-0F020
- Warranty: This genuine part is guaranteed by Toyota's factory warranty.
2005 Toyota Sequoia Fuel Injector
Looking for affordable OEM 2005 Toyota Sequoia Fuel Injector? Explore our comprehensive catalogue of genuine 2005 Toyota Sequoia Fuel Injector. All our parts are covered by the manufacturer's warranty. Plus, our straightforward return policy and speedy delivery service ensure an unparalleled shopping experience. We look forward to your visit!
2005 Toyota Sequoia Fuel Injector Parts Q&A
- Q: How to service and repair the fuel injector on 2005 Toyota Sequoia?A: Service and repair of the fuel injector requires customers to begin by releasing fuel system pressure and then removing the throttle body cover along with intake air connector and fuel pressure pulsation damper while maintaining placement of a shop rag under the delivery pipe when loosening the pulsation damper. Begin by breaking the connections of the PCV hose from the PCV valve while also separating the VSV connector for EVAP and EVAP hose. Then remove the VSV for EVAP component from the intake manifold. The technician should start by unscrewing the throttle body cover bracket bolt then unplug the engine wire clamps attached to both the No.1 engine hanger and engine wire bracket along with the two clips securing the engine wire to the delivery pipe brackets. Carefully remove the delivery pipes and injectors, ensuring not to drop the injectors or apply any load to them horizontally, by first removing the bolt holding the clamp on the fuel return pipe to the LH delivery pipe, then the bolt, two union bolts, four gaskets, and front fuel pipe, followed by disconnecting the eight injector connectors and removing the four nuts holding the delivery pipes to the lower intake manifold, ultimately taking out the two delivery pipes, eight injectors, and eight insulators, and removing the O-ring and grommet from each injector. Before mounting the delivery pipes install new grommets before adding gasoline to an O-ring, proceed to put the injectors into position with the connectors turned outward as you twist each injector. Install the eight new insulators onto the intake manifold followed by placement of the two delivery pipes and injector assemblies at the lower intake manifold. Briefly secure the four nuts and fasten the front fuel pipe while using the bolt along with four new gaskets and two union bolts. Torque the union bolts to 39 N.m (400 kgf.cm, 29 ft.lbf) and bolt to 7.5 N.m (76 kgf.cm, 66 in.lbf). Secure the bolt which clamps the fuel return pipe onto the LH delivery pipe and tighten to 7.5 N.m (76 kgf.cm, 66 in.lbf) followed by a smooth operation check on the injectors before replacement of faulty O-rings. Connect eight injector connectors after tightening four nuts which keep delivery pipes attached to the lower intake manifold at 21 N.m (214 kgf.cm, 15 ft.lbf) torque. The installation requires attaching two wire clamps onto the engine wire to its brackets on the RH delivery pipe and securing the engine wire clamps to the No.1 engine hanger and engine wire bracket before installing the engine wire protector with two bolts. Begin by attaching the PCV hose to the PCV valve before installing the VSV for EVAP to the upper intake manifold while connecting both the EVAP hose and VSV connector for the EVAP. Proceed by installing the throttle body cover bracket with its bolt followed by the fuel pressure pulsation damper and the intake air connector and throttle body cover.


