×
ToyotaParts- Hello
- Login or Register
- Quick Links
- Live Chat
- Track Order
- Parts Availability
- RMA
- Help Center
- Contact Us
- Shop for
- Toyota Parts
- Scion Parts
My Garage
My Account
Cart
OEM 2005 Toyota Land Cruiser Timing Belt
Engine Timing Belt- Select Vehicle by Model
- Select Vehicle by VIN
Select Vehicle by Model
orMake
Model
Year
Select Vehicle by VIN
For the most accurate results, select vehicle by your VIN (Vehicle Identification Number).
1 Timing Belt found


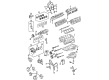
2005 Toyota Land Cruiser Belt, Timing
Part Number: 13568-09070$61.13 MSRP: $85.81You Save: $24.68 (29%)Ships in 1-3 Business DaysProduct Specifications- Other Name: Engine Timing Belt; Timing Belt Kit; Timing Belt
- Manufacturer Note: (L)
- Replaces: 13568-59095
- Part Name Code: 13568
- Item Weight: 2.40 Pounds
- Item Dimensions: 13.4 x 11.6 x 2.2 inches
- Condition: New
- Fitment Type: Direct Replacement
- SKU: 13568-09070
- Warranty: This genuine part is guaranteed by Toyota's factory warranty.
2005 Toyota Land Cruiser Timing Belt
Looking for affordable OEM 2005 Toyota Land Cruiser Timing Belt? Explore our comprehensive catalogue of genuine 2005 Toyota Land Cruiser Timing Belt. All our parts are covered by the manufacturer's warranty. Plus, our straightforward return policy and speedy delivery service ensure an unparalleled shopping experience. We look forward to your visit!
2005 Toyota Land Cruiser Timing Belt Parts Q&A
- Q: How to remove the timing belt on 2005 Toyota Land Cruiser?A: The first step for timing belt removal includes removing the oil pan protector and engine under cover while draining the engine coolant. The installation process begins by disassembling several components such as removing the fuel return hose together with the 2 bolts and 2 cap nuts then exposing the battery clamp cover and V-bank cover. Starting with the air cleaner and intake air connector assembly removal, proceed to disconnect the drive belt and handle the fan and fluid coupling and fan pulley while removing the 4 nuts from the fluid coupling assembly. To begin the process remove the drive belt idler pulley by removing its bolts then cover plate followed by the pulley bolt. After removing the RH No.3 timing belt cover by taking out 3 bolts and a nut, proceed to disconnect the engine wire, remove 4 bolts and a nut, and disconnect the camshaft position sensor wire and connector to access the LH No.3 timing belt cover. The technician must use a 2-bolt removal to take off the No.2 timing belt cover, then disconnect the A/C compressor from the engine and extract the fan bracket by uninstalling 2 bolts and 2 nuts. On reused belts, check for three installation markings which should be marked before belt removal in case any markers are missing. Use SST 09213-70011 (90100-70020), 09330-00021 while loosing the crankshaft pulley bolt to reach TDC/compression position on cylinder No.1 through crane pulley alignment with the timing mark "0" while verifying camshaft timing pulleys match up. Use SST 09213-70011 (90100-70020) along with 09330-00021 to remove the crankshaft pulley bolt when the pulley remains stationary. The technician should detach the timing belt tensioner and note installation points for reusing the belt before releasing the pulley tension spring with SST 09960-10010 (09962-01000, 09963-01000) to disconnect the timing belt from camshaft timing pulleys. Remove the camshaft timing pulleys using SST 09960-10010 (09962-01000, 09963-01000). After that, remove the generator together with the drive belt tensioner and crankshaft pulley using SST 09950-50013 (09951-05010, 09952-05010, 09953-05010, 09954-05011, 09953-05020, 09954-05021). Uncorrect any movement of the crankshaft pulley. Extract the No.1 timing belt cover along with timing belt guide and timing belt before applying a new installation indication when using the same components. Use a 10 mm hexagon wrench to uninstall both No.1 and No.2 idler pulleys before using SST 09950-50013 (09951-05010, 09952-05010, 09953-05010, 09953-05020, 09950-05011, 09954-05021) to eliminate the crankshaft timing pulley without rotating this component. The inspection of the timing belt should reveal no bending, twisting or oil, water or steam interaction and both idler pulleys along with the timing belt tensioner need inspection for oil leaks while maintaining smooth motion. Affix the crankshaft timing pulley to its correct position while inserting the key set into the key groove with SST 09223-06011. Adhere the pivot bolts of the No.1 and No.2 idler pulleys with the right adhesive then move them seamlessly. Associate the installation mark with the timing mark on the crankshaft timing pulley before placing the timing belt while installing the timing belt cover spacer and guide first. Prosperously torque to specifications each component from the No.1 timing belt cover and crankshaft pulley and drive belt tensioner upon installation. The next steps require checking the crankshaft pulley position then installing each camshaft timing pulley before connecting the timing belt to both pulleys. Set the timing belt tensioner before installing it with required torque specifications while checking the valves using the crankshaft pulley and verifying timing mark alignment. Use SST tools 09213-70011 (90100-70020) together with 09330-00021 to tighten the crankshaft pulley bolt and add the fan bracket along with the A/C compressor and No.2 and RH & LH No.3 timing belt covers and drive belt idler pulley while maintaining all required torque values. Finish the procedure by repositioning the radiator assembly, fan parts and air cleaner together with the V-bank cover followed by engine coolant addition and engine start to inspect fluid leaks then verify the coolant amount and finally replace the battery clamp cover with engineer under cover installation and oil pan protector replacement.
Related 2005 Toyota Land Cruiser Parts
 2005 Toyota Land Cruiser Oil Filter
 2005 Toyota Land Cruiser Camshaft
 2005 Toyota Land Cruiser Crankshaft Gear
 2005 Toyota Land Cruiser Dipstick
 2005 Toyota Land Cruiser Dipstick Tube
 2005 Toyota Land Cruiser Engine Mount
 2005 Toyota Land Cruiser Harmonic Balancer
 2005 Toyota Land Cruiser Oil Pump
 2005 Toyota Land Cruiser Timing Chain Tensioner
 2005 Toyota Land Cruiser Timing Cover
 2005 Toyota Land Cruiser Timing Cover Gasket
 2005 Toyota Land Cruiser Valve Cover Gasket