×
ToyotaParts- Hello
- Login or Register
- Quick Links
- Live Chat
- Track Order
- Parts Availability
- RMA
- Help Center
- Contact Us
- Shop for
- Toyota Parts
- Scion Parts
My Garage
My Account
Cart
OEM 2004 Toyota Sequoia Windshield
Glass Windshield- Select Vehicle by Model
- Select Vehicle by VIN
Select Vehicle by Model
orMake
Model
Year
Select Vehicle by VIN
For the most accurate results, select vehicle by your VIN (Vehicle Identification Number).
1 Windshield found

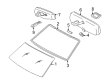 Product Specifications
- Other Name: Glass Sub-Assembly, Windshield; Windshield Glass, Front; Glass, Windshield
- Manufacturer Note: *LAM,T=5.3,GREEN
- Position: Front
- Part Name Code: 56111
- Condition: New
- Fitment Type: Direct Replacement
- SKU: 56101-0C031
- Warranty: This genuine part is guaranteed by Toyota's factory warranty.
2004 Toyota Sequoia Windshield
Looking for affordable OEM 2004 Toyota Sequoia Windshield? Explore our comprehensive catalogue of genuine 2004 Toyota Sequoia Windshield. All our parts are covered by the manufacturer's warranty. Plus, our straightforward return policy and speedy delivery service ensure an unparalleled shopping experience. We look forward to your visit!
2004 Toyota Sequoia Windshield Parts Q&A
- Q: How to remove and install a windshield on 2004 Toyota Sequoia?A: The windshield removal process begins with stripping off the front door Weather Strips followed by dismantling the front pillar garnish by first unclipping the assist grip with a screwdriver to expose its plugs and screws. Sun visors must be taken out followed by their accompanying holders. The procedure for windshield replacement starts by taking out two screws to disconnect the roof console box connectors on sliding roof vehicles; without this option, use a screwdriver to remove four screws before disconnecting their connectors. The removal process of the electro chromic inner rear view mirror includes removing its cover and connector before taking out the torx screw and mirror; non-equip models require simple torx screw and mirror removal. To access the wiper arms you must first eliminate two caps combined with nuts and eventually remove the arms. Start by disconnecting the hood to cowl top seal as well as separating 6 clips and removing eight screws from the cowl top ventilator louver. SST 09806-30010 should be employed to separate the front roof side rail Weather Strip from the front before extracting the 8 screws holding the windshield outside mouldings. Use a knife to trim the windshield outside upper moulding but protect the body surface from damage during the process. The windshield glass removal process starts by inserting piano wire through the body-glass crevice from inside then affixing the wire ends to wooden blocks while using protective tape to prevent body scratches before cutting the adhesive with the piano wire and retaining maximum adhesive on the body surface. Before application start by cleaning both body surfaces and eliminate rough areas until the adhesive achieves proper contact on cleaned surfaces using a shop rag. Clean the glass surface by removing No. 2 stoppers and dams together with their adhesive then cleanse the glass area without touching its front section. The process includes replacing No. 1 stoppers by firstly eliminating old adhesives from the areas before alignment of new stoppers with the body notches. Mount the new No. 2 stoppers on glass notches in ceramics before applying new dams with adhesive tape. First position the glass correctly then confirm equal contact between glass and body and mark reference marks before cleaning the black surface of the glass rim. Apply Primer M to the exposed body sections followed by a drying time exceeding 3 minutes and apply Primer G to the glass borders which need to be wiped clean before drying. Install the windshield glass according to reference marks while applying Part No. 08850-00801 adhesive or equivalent until contact is achieved with gentle force and any adhesive problems require resolving. The installation of the new exterior windshield moldings should proceed before adhesive hardness forms. Subsequently remove extra adhesive then protect the glass and molding with tape until the mounting adhesive cures. Perform leak checks on the glass following the adhesive hardening period then handle any needed repairs. The last steps include fitting the roof side rail Weather Strip together with cowl top ventilator louver and wiper arms followed by an inner rear view mirror installation ( elektro chromic included if requested) and placing a roof console box along with sun visor accessories and front door opening trim Weather Strips and front pillar garnishments.
Related 2004 Toyota Sequoia Parts
 2004 Toyota Sequoia Car Mirror
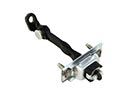 2004 Toyota Sequoia Door Check
 2004 Toyota Sequoia Lift Support
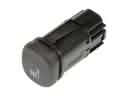 2004 Toyota Sequoia Seat Heater Switch
 2004 Toyota Sequoia Washer Pump
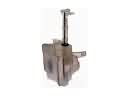 2004 Toyota Sequoia Washer Reservoir
 2004 Toyota Sequoia Windshield Washer Nozzle
 2004 Toyota Sequoia Windshield Wiper
 2004 Toyota Sequoia Wiper Arm
 2004 Toyota Sequoia Wiper Blade
 2004 Toyota Sequoia Wiper Linkage
 2004 Toyota Sequoia Wiper Motor