×
ToyotaParts- Hello
- Login or Register
- Quick Links
- Live Chat
- Track Order
- Parts Availability
- RMA
- Help Center
- Contact Us
- Shop for
- Toyota Parts
- Scion Parts
My Garage
My Account
Cart
OEM 2004 Toyota Land Cruiser Windshield
Glass Windshield- Select Vehicle by Model
- Select Vehicle by VIN
Select Vehicle by Model
orMake
Model
Year
Select Vehicle by VIN
For the most accurate results, select vehicle by your VIN (Vehicle Identification Number).
1 Windshield found

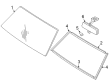
2004 Toyota Land Cruiser Windshield, Green, Front
Part Number: 56111-60292-8N$519.48 MSRP: $761.30You Save: $241.82 (32%)Product Specifications- Other Name: Glass, Windshield; Windshield Glass, Front
- Position: Front
- Replaces: 56111-60290, 56111-60292
- Item Weight: 29.90 Pounds
- Condition: New
- SKU: 56111-60292-8N
- Warranty: This genuine part is guaranteed by Toyota's factory warranty.
2004 Toyota Land Cruiser Windshield
Looking for affordable OEM 2004 Toyota Land Cruiser Windshield? Explore our comprehensive catalogue of genuine 2004 Toyota Land Cruiser Windshield. All our parts are covered by the manufacturer's warranty. Plus, our straightforward return policy and speedy delivery service ensure an unparalleled shopping experience. We look forward to your visit!
2004 Toyota Land Cruiser Windshield Parts Q&A
- Q: How to remove and install a windshield on 2004 Toyota Land Cruiser?A: The process to remove the windshield begins with removing the front door opening trims followed by unscrewing the 2 assist grip plugs and screws from the front assist grip. This procedure should be repeated for the other side. Before proceeding you should remove the front pillar garnish with a screwdriver then extract the sun visor after removing its caps and screws along with connector disconnection. Following safety precautions detach both the double visors and holders by unscrewing their screws before unfastening the overhead console box using a bolt and disconnecting the connector. Start by pulling the front side down of the roof headliner then remove the inner rear view mirror after disconnecting its connector and unfastening the screws. Start by disassembling the wiper arms through removal of their two head caps and nuts before proceeding to the hood to cowl top seal and cowl top ventilator louvers on both sides. Apply a screwdriver to remove outside No. 2 moulding followed by hole drilling of rivet flanges and heating the moulding to 20 - 30 degrees C (68 - 86 degrees F). Finish the task by cutting adhesive tape with piano wire secured to wooden blocks. Insert a knife through the outside upper moulding to remove it while ensuring body protection before inserting a piano wire into the interior between glass and body which must fasten to wooden blocks and finally cutting the adhesive with precautions for paint and ornaments. Clean and form the body's contact surfaces thoroughly while keeping as much adhesive present on the surface. During installation replace the stoppers and dams along with glass cleaning. Correctly position the glass while cleaning its contact surface and applying Primer M to the body and Primer G to the glass edge before allowing the primer to dry. Attach adhesive from cartridge Part No. 08850-00801 before glass installation on the windshield while fixing it with protective tape during adhesive hardening. Determine for leaks using a leak test before treating them with sealant Part No. 08833-00030 and applying adhesive to the moulding attachment area. Then install the upper outside moulding. The air riveter with nose piece No. 4 must be used for outside No. 2 moulding installation while following proper installment techniques to prevent damages. Secure the wiper arms at proper positions and tighten their nuts to 20 N.m (204 kgf.cm, 15 ft.lbf). Also install hood to cowl top seal, cowl top ventilator louvers, adjust their alignment before torquing the nuts. Re-installation of inner rear view mirror and front side of roof headlining together with assist grips and overhead console box, holders, double visor, sun visor, front pillar garnish, front assist grip, and front door opening trims should be executed last.
Related 2004 Toyota Land Cruiser Parts
 2004 Toyota Land Cruiser Emblem
 2004 Toyota Land Cruiser Mud Flaps
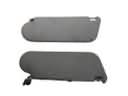 2004 Toyota Land Cruiser Sun Visor
 2004 Toyota Land Cruiser Wiper Motor
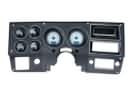 2004 Toyota Land Cruiser Dash Panels
 2004 Toyota Land Cruiser Floor Pan
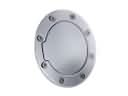 2004 Toyota Land Cruiser Fuel Door
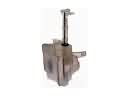 2004 Toyota Land Cruiser Washer Reservoir
 2004 Toyota Land Cruiser Weather Strip
 2004 Toyota Land Cruiser Windshield Washer Nozzle
 2004 Toyota Land Cruiser Windshield Wiper
 2004 Toyota Land Cruiser Wiper Arm