×
ToyotaParts- Hello
- Login or Register
- Quick Links
- Live Chat
- Track Order
- Parts Availability
- RMA
- Help Center
- Contact Us
- Shop for
- Toyota Parts
- Scion Parts
My Garage
My Account
Cart
OEM 2003 Toyota Prius Windshield
Glass Windshield- Select Vehicle by Model
- Select Vehicle by VIN
Select Vehicle by Model
orMake
Model
Year
Select Vehicle by VIN
For the most accurate results, select vehicle by your VIN (Vehicle Identification Number).
1 Windshield found

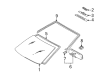
2003 Toyota Prius Windshield, Front
Part Number: 56111-47020$555.46 MSRP: $814.03You Save: $258.57 (32%)Ships in 1-3 Business DaysProduct Specifications- Other Name: Glass, Windshield; Windshield Glass, Front
- Manufacturer Note: *LAM,T=4.76,GREEN
- Position: Front
- Part Name Code: 56111
- Condition: New
- Fitment Type: Direct Replacement
- SKU: 56111-47020
- Warranty: This genuine part is guaranteed by Toyota's factory warranty.
2003 Toyota Prius Windshield
Looking for affordable OEM 2003 Toyota Prius Windshield? Explore our comprehensive catalogue of genuine 2003 Toyota Prius Windshield. All our parts are covered by the manufacturer's warranty. Plus, our straightforward return policy and speedy delivery service ensure an unparalleled shopping experience. We look forward to your visit!
2003 Toyota Prius Windshield Parts Q&A
- Q: How to remove and reinstall a windshield on 2003 Toyota Prius?A: The windshield removal requires removing the front pillar garnish with a screwdriver after taping its tip followed by unscrewing four pieces and removing the two No. 1 front pillar spacers. Repeat this same procedure on the opposite side. Detach the inner rear view mirror after using a moulding remover to remove its cover and unfastening both mirror screws. The map lamp can be removed with a screwdriver while its connector gets disconnected after which the installation of 2 sun visors becomes possible through screw removal. Use a screwdriver to first remove assist grip by taking off its caps and screws before splitting apart its holders and their two screws. Start by pulling down the front section of roof headlining and proceed to remove the wiper arm head cap together with three nuts and two wiper arms. Remove the hood to cowl top seal before taking out the two screws to detach the cowl top ventilator louver from each side. Use a knife to cut off windshield moulding while paying attention to body integrity before removing the remainder of the components. When detaching windshield glass use piano wire between the body and glass from inside before tying wood blocks to both wire ends while using protective tape on exterior surfaces to stop scratches. The contact surface of the body requires preparation through rough area reduction followed by adhesive cleaning with a shop rag. The cleaned glass requires installation of new stoppers measuring 9.5 mm (Part No.) and a new adhesive tape measuring 7.0 mm (Part No.). Use a suction rubber to position the glass so that all points of contact are even before cleaning the black-colored edge area surrounding the glass cup. The end user must coat the visible parts of the body so the Primer "M" becomes dry for at least three minutes and coat the glass edges using Primer "G" before wiping away excess before the drying process starts. A sealer gun should receive the adhesive (Part No. 08850-00801 or equivalent) by clipping the cartridge nozzle tip followed by loading the material and applying the specified glass coating. Use reference marks to install the windshield glass then apply front surface pressure while using a spatula to fix any adhesive problems. The windshield moulding should be installed before the adhesive cures completely. You must then clean away extra adhesive and wrap protective tape on the glass and moulding combination to allow the adhesive to set. Perform a leak test when the adhesive achieves its hardening stage before using two screws to install the cowl top ventilator louvers and the hood to cowl top seal along with securing the wiper arms by torquing their three nuts to 26 N.m. The replacement process continues by reinstalling the front side of the roof headlining with assist grip and sun visor holders and sun visors and map lamp and inner rear view mirror (torque to 2.9 N.m) before installing front pillar garnish with 2 No. 1 front pillar spacers and 4 screws respectively for both sides.
Related 2003 Toyota Prius Parts
 2003 Toyota Prius Wiper Motor
 2003 Toyota Prius Wiper Blade
 2003 Toyota Prius Car Mirror
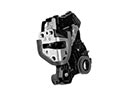 2003 Toyota Prius Door Lock
 2003 Toyota Prius Door Lock Cylinder
 2003 Toyota Prius Grille
 2003 Toyota Prius Washer Pump
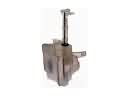 2003 Toyota Prius Washer Reservoir
 2003 Toyota Prius Windshield Washer Nozzle
 2003 Toyota Prius Windshield Wiper
 2003 Toyota Prius Wiper Arm
 2003 Toyota Prius Wiper Linkage