×
ToyotaParts- Hello
- Login or Register
- Quick Links
- Live Chat
- Track Order
- Parts Availability
- RMA
- Help Center
- Contact Us
- Shop for
- Toyota Parts
- Scion Parts
My Garage
My Account
Cart
OEM 2002 Toyota Land Cruiser Timing Belt
Engine Timing Belt- Select Vehicle by Model
- Select Vehicle by VIN
Select Vehicle by Model
orMake
Model
Year
Select Vehicle by VIN
For the most accurate results, select vehicle by your VIN (Vehicle Identification Number).
1 Timing Belt found


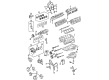
2002 Toyota Land Cruiser Belt, Timing
Part Number: 13568-09070$61.13 MSRP: $85.81You Save: $24.68 (29%)Ships in 1-3 Business DaysProduct Specifications- Other Name: Engine Timing Belt; Timing Belt Kit; Timing Belt
- Manufacturer Note: (L)
- Replaces: 13568-59095
- Part Name Code: 13568
- Item Weight: 2.40 Pounds
- Item Dimensions: 13.4 x 11.6 x 2.2 inches
- Condition: New
- Fitment Type: Direct Replacement
- SKU: 13568-09070
- Warranty: This genuine part is guaranteed by Toyota's factory warranty.
2002 Toyota Land Cruiser Timing Belt
Looking for affordable OEM 2002 Toyota Land Cruiser Timing Belt? Explore our comprehensive catalogue of genuine 2002 Toyota Land Cruiser Timing Belt. All our parts are covered by the manufacturer's warranty. Plus, our straightforward return policy and speedy delivery service ensure an unparalleled shopping experience. We look forward to your visit!
2002 Toyota Land Cruiser Timing Belt Parts Q&A
- Q: How to remove and install the timing belt on 2002 Toyota Land Cruiser?A: You must start by removing the oil pan protector followed by the engine under cover before draining the engine coolant but keeping the battery clamp cover and V-bank cover in place while detaching the fuel return hose and unfastening the 2 bolts and 2 cap nuts. The sequence begins with uninstalling the air cleaner assembly and its intake components. This must be followed by unbolted operation of the drive belt and fan components along with the fluid coupling and fan pulley. Begin dissolution of the drive belt idler pulley assembly following the removal of its bolt and two associated components. Start by removing the RH No.3 timing belt cover by unfastening the 3 bolts and nut followed by engine wire disconnection to take out the LH No.3 timing belt cover after removing its camshaft position sensor wire and the 4 bolts and nut and oil cooler pipe. Start by removing the 2 bolts securing the No.2 timing belt cover followed by disconnecting the A/C compressor from the engine and removing the fan bracket through the process of removing its 2 bolts along with the 2 nuts. Before using a reused timing belt look for three installation references by rotating the crankshaft pulley. The absence of these marks requires making new markings for future reference. The Special Service Tools 09213-70011 (90105-08076) and 09330-00021 are required to loosen the crankshaft pulley bolt while positioning the No.1 cylinder at approximately 50 degres ATDC/compression. Use the 2 measurements of ATDC/compression on the crankshaft to set its position at 50 degrees. Then remove the crankshaft bolt without rotating the pulley. Disassemblies must start with removing the timing belt tensioner. When keeping the timing belt, establish fresh placement marks on it, after that use Special Service Tool: 09960-10010 (09962-01000, 09963-01000) to separate the timing belt from the camshaft timing pulleys. The technician should first remove the camshaft timing pulleys with Special Service Tool: 09950-50012 (09951-05010, 09952-05010, 09953-05010, 09953-05020, 09954-05010). Following pulley removal, it is necessary to remove the generator and drive belt tensioner and crankshaft pulley with the same tool. Start by removing the No.1 timing belt cover and timing belt guide before taking away the timing belt while writing new marks for belt reuse when possible. Remove the No.1 idler pulley and No.2 idler pulley by utilizing a 10 mm hexagon wrench then proceed to take off the crankshaft timing pulley without rotating it. The timing belt inspection must rule out any defects while preventing contact with oil and water and steam. Also check for oil leakage and smooth operation of both idler pulleys along with the timing belt tensioner. The first step of installation involves the crankshaft timing pulley where you should align the timing pulley set key while you should also apply adhesive to the pivot bolt of the No.1 and No.2 idler pulleys. The procedure starts with timing belt installation while the engine remains at room temperature and the components are free of debris. Place the timing belt cover spacer together with the timing belt guide afterward. Follow recommended torque values when you install the No.1 timing belt cover and drive belt tensioner together with the crankshaft pulley. The first step includes verifying the crankshaft pulley position before the installation of right-hand and left-hand camshaft timing pulleys and the connection of both timing pulleys to the timing belt for tensioner adjustment. The technician checks valve timing through crankshaft pulley adjustment while looking for timing marks. Then they tighten the crankshaft pulley bolt through use of tools 09213-54015 (90119-08216) and 09330-00021 (Special Service Tools). The sequence includes installing the fan bracket and A/C compressor and No.2 timing belt cover, then adding the RH and LH No.3 timing belt covers with the drive belt idler pulley and concluding with the radiator assembly, fan pulley, fan, fluid coupling, and drive belt. The last steps include installing the air cleaner alongside the intake air connector assembly together with the V-bank cover followed by engine coolant addition before starting the engine for leak detection and checking coolant levels and finally installing the battery clamp cover alongside engine under cover and oil pan protector.
Related 2002 Toyota Land Cruiser Parts
 2002 Toyota Land Cruiser Oil Filter
 2002 Toyota Land Cruiser Camshaft
 2002 Toyota Land Cruiser Crankshaft Gear
 2002 Toyota Land Cruiser Dipstick
 2002 Toyota Land Cruiser Dipstick Tube
 2002 Toyota Land Cruiser Engine Mount
 2002 Toyota Land Cruiser Harmonic Balancer
 2002 Toyota Land Cruiser Oil Pump
 2002 Toyota Land Cruiser Timing Chain Tensioner
 2002 Toyota Land Cruiser Timing Cover
 2002 Toyota Land Cruiser Timing Cover Gasket
 2002 Toyota Land Cruiser Valve Cover Gasket