×
ToyotaParts- Hello
- Login or Register
- Quick Links
- Live Chat
- Track Order
- Parts Availability
- RMA
- Help Center
- Contact Us
- Shop for
- Toyota Parts
- Scion Parts
My Garage
My Account
Cart
OEM 2002 Toyota Land Cruiser Fuel Injector
Gas Injector- Select Vehicle by Model
- Select Vehicle by VIN
Select Vehicle by Model
orMake
Model
Year
Select Vehicle by VIN
For the most accurate results, select vehicle by your VIN (Vehicle Identification Number).
1 Fuel Injector found


2002 Toyota Land Cruiser Injector
Part Number: 23209-0F010$192.91 MSRP: $275.44You Save: $82.53 (30%)Ships in 1-3 Business DaysProduct Specifications- Other Name: Injector Set, Fuel; Fuel Injector; Injector Assembly, Fuel
- Manufacturer Note: (L)
- Replaces: 23209-50040
- Part Name Code: 23250
- Item Weight: 0.50 Pounds
- Item Dimensions: 3.7 x 2.8 x 1.4 inches
- Condition: New
- Fitment Type: Direct Replacement
- Require Quantity: 8
- SKU: 23209-0F010
- Warranty: This genuine part is guaranteed by Toyota's factory warranty.
2002 Toyota Land Cruiser Fuel Injector
Looking for affordable OEM 2002 Toyota Land Cruiser Fuel Injector? Explore our comprehensive catalogue of genuine 2002 Toyota Land Cruiser Fuel Injector. All our parts are covered by the manufacturer's warranty. Plus, our straightforward return policy and speedy delivery service ensure an unparalleled shopping experience. We look forward to your visit!
2002 Toyota Land Cruiser Fuel Injector Parts Q&A
- Q: How to service and repair the fuel injectors on 2002 Toyota Land Cruiser?A: The initial step for fuel injector servicing and repair requires the removal of the V-bank cover and intake air connector and the fuel pressure pulsation damper while using shop towels under the delivery pipe before carefully loosening the pulsation damper. First disconnect the engine accelerator cable followed by taking out two nuts along with the accelerator cable bracket. The engine wire protector disconnects from the upper intake manifold after detaching the PCV hose from the PCV valve, disconnecting the VSV for EVAP, removing the accelerator cable clamp, removing the No.1, No.2, and No.3 V-bank cover brackets and then removing the two bolts for disconnection of engine wire protector and engine wire clamp from the No.1 engine hanger. Remove the two wire clamps to disconnect the engine wire at the right-hand delivery pipe. Carefully remove the delivery pipes and injectors, ensuring not to drop the injectors, by first removing the bolt holding the clamp on the fuel return pipe to the left-hand delivery pipe, then removing the bolt, two union bolts, four gaskets, and front fuel pipe, followed by disconnecting the eight injector connectors and removing the four nuts holding the delivery pipes to the lower intake manifold, ultimately taking out the two delivery pipes, eight injectors, four spacers, and eight insulators, and removing the O-ring and grommet from each injector. Each step of installation includes attaching new grommets to the injectors followed by petroleum application to O-rings before insertion into delivery pipes while rotating the injector into position. Begin by holding the injector connectors toward the outside while placing four spacers alongside eight new insulators onto the intake manifold followed by mounting the two delivery pipes with injector assemblies onto the lower intake manifold where you should temporarily install the four nuts. Place the front fuel pipe in position while using a bolt and four new gaskets and two union bolts for attachment, then tighten the union bolts up to 39 N.m (400 kgf.cm, 29 ft.lbf) and the bolt up to 7.5 N.m (80 kgf.cm, 66 in.lbf). When installing the clamp bolt for the fuel return pipe onto the left-hand delivery pipe it must be torqued to 7.5 N.m (80 kgf.cm, 66 in.lbf). Mnemonic checks should be performed to ensure smooth injector rotation with requisite replacement of worn O-rings. Follow by connecting the eight injector connectors after tightening the four delivery pipe nuts to 18 N.m (185 kgf.cm, 13 ft.lbf) against the lower intake manifold. To install the engine wire and engine wire protector follow these steps: Apply two clamps from the engine wire to delivery pipe brackets on the left-hand side and then fix the wires to engine wire hanger while tightening the bolts. Afterward, attach the PCV hose to the PCV valve, run the VSV for EVAP to the upper intake manifold and finish with the accelerator cable clamp on the upper intake manifold. The procedure ends with the installation of No.1, No.2, and No.3 V-bank cover brackets along with the installation and torquing of the accelerator cable bracket using two nuts to 18 N.m (185 kgf.cm, 13 ft.lbf) at the completion of which the engine receives the accelerator cable along with the fuel pressure pulsation damper, intake air connector and V-bank cover.
Related 2002 Toyota Land Cruiser Parts
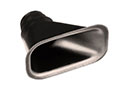 2002 Toyota Land Cruiser Air Duct
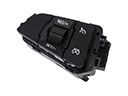 2002 Toyota Land Cruiser Cruise Control Switch
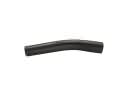 2002 Toyota Land Cruiser Fuel Filler Hose
 2002 Toyota Land Cruiser Fuel Filler Neck
 2002 Toyota Land Cruiser Fuel Pressure Regulator
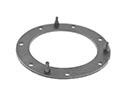 2002 Toyota Land Cruiser Fuel Pump Gasket
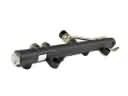 2002 Toyota Land Cruiser Fuel Rail
 2002 Toyota Land Cruiser Gas Cap
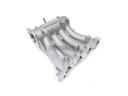 2002 Toyota Land Cruiser Intake Manifold
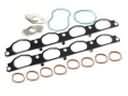 2002 Toyota Land Cruiser Intake Manifold Gasket
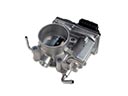 2002 Toyota Land Cruiser Throttle Body
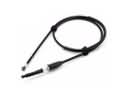 2002 Toyota Land Cruiser Throttle Cable