My Garage
Cart

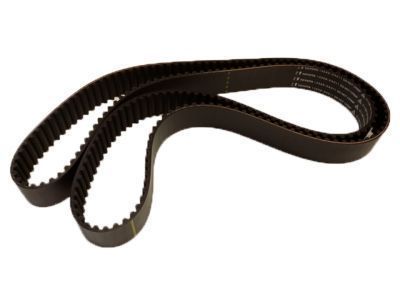
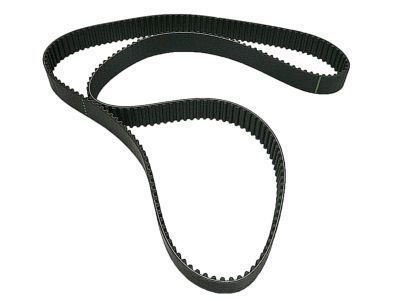
OEM 2001 Toyota Sienna Timing Belt

Engine Timing Belt
  • Select Vehicle by Model
  • Select Vehicle by VIN
Select Vehicle by Model
Make
Model
Year
or
Select Vehicle by VIN
For the most accurate results, select vehicle by your VIN (Vehicle Identification Number).

1 Timing Belt found

  • 2001 Toyota Sienna Timing Belt - 13568-09080
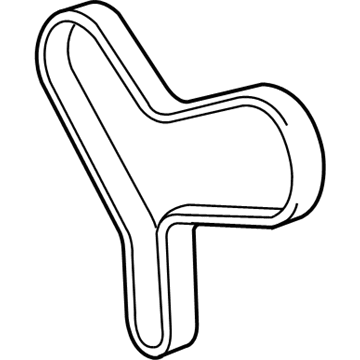
    2001 Toyota Sienna Timing Belt Diagram - 13568-09080
    View related parts

    2001 Toyota Sienna Timing Belt

    Part Number: 13568-09080
    $60.54 MSRP: $84.98
    You Save: $24.44 (29%)
    Ships in 1-2 Business Days
    ADD TO CART
    Product Specifications
    • Other Name: Belt, Timing; Engine Timing Belt; Timing Belt Kit
    • Replaces: 13568-09050
    • Part Name Code: 13568
    • Item Weight: 1.00 Pounds
    • Item Dimensions: 14.0 x 12.1 x 2.1 inches
    • Condition: New
    • Fitment Type: Direct Replacement
    • SKU: 13568-09080
    • Warranty: This genuine part is guaranteed by Toyota's factory warranty.
    More Info
    Fits the following 2001 Toyota Sienna Submodels:
    • CE, LE, Limited, XLE, XLE Limited | 6 Cyl 3.0 L GAS, 6 Cyl 3.3 L GAS

2001 Toyota Sienna Timing Belt

Looking for affordable OEM 2001 Toyota Sienna Timing Belt? Explore our comprehensive catalogue of genuine 2001 Toyota Sienna Timing Belt. All our parts are covered by the manufacturer's warranty. Plus, our straightforward return policy and speedy delivery service ensure an unparalleled shopping experience. We look forward to your visit!

2001 Toyota Sienna Parts Questions & Experts Answers

  • Q: How to remove and install the timing belt on 2001 Toyota Sienna?
    A: Workers must begin by taking out the outer front cowl top panel assembly and right-hand front wheel and right-hand fender apron seal. The first step involves unbolted the generator drive belt and the power steering pump drive belt's two securing bolts. The first step involves disconnecting the engine coolant reservoir hose from the water outlet followed by cutting grounding straps and eliminating the control link from the No.2 right-hand engine mounting bracket. The servicereader must first remove the right-hand engine mounting stay and engine moving control rod, No.2 right-hand engine mounting bracket along with the No.2 generator bracket when the generator pivot bolt is loosened and the nut and bracket are detached. Use Special Service Tool: 09213-54015 (91651-60855), plus 09330-00021 to detach the pulley bolt and afterwards the pulley with Special Service Tool: 09950-50012 (09951-05010, 09952-05010, 09953-05010, 09953-05020, 09954-05020). The procedure begins with dismantling the No.1 timing belt cover once the four bolts are removed followed by separating the timing belt guide. Subsequently, the No.2 timing belt cover releases when the engine wire protector clamps disconnect and the five bolts are removed. To eliminate the right-hand engine mounting bracket you need to remove the two bolts combined with that nut. Temporary installation of the crankshaft pulley bolt will allow you to turn the crankshaft until No.1 cylinder reaches TDC/compression position for verifying correct camshaft timing pulley alignment and No.3 timing belt cover alignment. The reinstallation of timing belts requires determination of existing installation markings at three and front positions; new marks should be added when missing to match the markings on the timing pulleys. Loosen the two bolts on the timing belt tensioner alternately before your removal of the timing belt. To remove the right-hand timing pulley use Special Service Tool: 09249-63010, 09960-10010 (09962-01000, 09963-01000) while Special Service Tool: 09960-10010 (09962-01000, 09963-01000) is needed for the left-hand timing pulley. Use a 10 mm hexagon wrench to free the No.2 idler pulley from the engine assembly and the No.1 idler pulley follows. The technician should remove the crankshaft timing pulley by taking off the bolt and timing belt plate while using Special Service Tool: 09950-50012 (09951-05010, 09952-05010, 09953-05010, 09953-05020, 09954-05010) to extract it without scratching the sensor part. The timing belt needs thorough checks for all kinds of defects which include that it should maintain its straight shape and avoid touching any water, oil or steam presence while looking for signs of wear and damage. Check the idler pulleys for oil leakage while inspecting their smooth operation and examine the timing belt tensioner for both oil leakage and appropriate push rod movements. Begin your installation process by placing the crankshaft timing pulley then align the pulley set key before installing the timing pulley onto the timing belt plate with final torque to 8.0 Nm (80 kgf-cm, 69 inch lbs.). Apply Part No. 08833-00080 THREE BOND 1344 LOCTITE 242 or equivalent adhesive to the No.1 idler pulley then fasten with a torque of 34 Nm (350 kgf-cm, 25 ft. lbs.) before moving to the No.2 idler pulley that requires 43 Nm (440 kgf-cm, 32 ft. lbs.) torque. Install the right-hand camshaft timing pulley while orienting its flange outward followed by right-side torque of 88 Nm (900 kgf-cm, 65 ft. lbs.). Next, install the left-hand camshaft timing pulley and torque it to 125 Nm (1,300 kgf-cm, 94 ft. lbs.). Use the timing marks to ensure the No.1 cylinder is at TDC/compression before continuing. Organize the installation of the timing belt while keeping the components clean and align the belt properly with the timing marks according to the specified arrangement. Press and lock the push rod using a 1.27 mm hexagon wrench for the timing belt tensioner setup and secure the tensioner afterward by torquing the bolts to 27 Nm (280 kgf-cm, 20 ft. lbs.). Verify valve timing by slowly rotating the crankshaft for two revolutions to confirm proper mark alignment. If alignment is off, the timing belt installation should resume. The next procedure requires installation of the right-hand engine mounting bracket and subsequent torque application to 28 Nm (290 kgf-cm, 21 ft. lbs.). The sequence continues with the installation of the No.2 timing belt cover while checking the gasket integrity and torque application to 8.5 Nm (85 kgf-cm, 74 inch lbs.). Install the timing belt guide followed by the No.1 timing belt cover while checking the gaskets for damage and applying torque to 8.5 Nm (85 kgf-cm, 74 inch lbs.). The last steps involve fitting the crankshaft pulley while torquing it to 215 Nm (2,200 kgf-cm, 159 ft. lbs.) and subsequently installing the No.2 generator bracket before completing with right-hand engine mounting component installation. Reconnect all DLC1 systems before reattaching the power steering pump and generator drive belts when working on the engine coolant reservoir hose and ground strap connectors. The technician completes vehicle testing and checks for abnormal noise, shock, slippage, correct shift points, smooth operation after reinstallation of the right-hand fender apron seal, right-hand front wheel and outer front cowl top panel assembly.

Related 2001 Toyota Sienna Parts