×
ToyotaParts- Hello
- Login or Register
- Quick Links
- Live Chat
- Track Order
- Parts Availability
- RMA
- Help Center
- Contact Us
- Shop for
- Toyota Parts
- Scion Parts
My Garage
My Account
Cart
OEM 2001 Toyota 4Runner Windshield
Glass Windshield- Select Vehicle by Model
- Select Vehicle by VIN
Select Vehicle by Model
orMake
Model
Year
Select Vehicle by VIN
For the most accurate results, select vehicle by your VIN (Vehicle Identification Number).
1 Windshield found

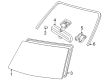
2001 Toyota 4Runner Windshield, Green, Front
Part Number: 56111-35161$557.95 MSRP: $817.69You Save: $259.74 (32%)Product Specifications- Other Name: Glass, Windshield; Windshield Glass, Front
- Position: Front
- Replaces: 56111-35160, 56111-35150
- Condition: New
- SKU: 56111-35161
- Warranty: This genuine part is guaranteed by Toyota's factory warranty.
2001 Toyota 4Runner Windshield
Looking for affordable OEM 2001 Toyota 4Runner Windshield? Explore our comprehensive catalogue of genuine 2001 Toyota 4Runner Windshield. All our parts are covered by the manufacturer's warranty. Plus, our straightforward return policy and speedy delivery service ensure an unparalleled shopping experience. We look forward to your visit!
2001 Toyota 4Runner Windshield Parts Q&A
- Q: How to remove and install a windshield on 2001 Toyota 4Runner?A: Starting the windshield removal process involves taking out the room light lens and map light assembly through lens removal and screw removal and connector detachment. Start by unscrewing the 3 screws on the inner rear view mirror and then carry out the removal sequence of sun visors, holders, assist grips and front pillar garnish with a screwdriver whose tip you have taped beforehand. Pick up the wiper arms following the removal of two caps combined with two nuts. You will then move on to taking off the cowl louver after unharnessing six screws and four clips. Cut off the Weather Strip and the windshield outside upper moulding with a knife to prevent body damage during removal. Prepare the windshield glass removal by passing piano wire through the interior body-gap and securing the ends with a wooden block then apply protective tape to shield against scratches. After using piano wire to cut the adhesive you should separate the glass from the body but keep as much adhesive attached to the body surface. To install the glass properly prepare the body contact area by cleaning and forming it while retaining adhesive and also treat the separated glass with care to avoid damage. Set the glass properly while the spacers maintain smooth surface contact then make position markings prior to conducting glass surface cleaning. Regularly check the body contact surface before coating it with Primer "M" and allowing it to dry for 3 minutes without touching the adhesive area. The glass edges require application of Primer "G" followed by immediate wiping before the adhesive received from cartridge (Part No. 08850-00801 or equivalent) reaches 8 - 12 mm (0.31 - 0.47 in.) elevation. Follow reference marks to set the glass in place and spread adhesive to the rim before removing extra adhesive with a scraper while securing it with protective tape until the adhesive becomes set. The glass must be inspected for leaks after the hardening process ends before you apply the sealant (Part No. 08833-00030 or equivalent) to closed areas. You should then apply adhesive to the moulding installation spots before you tap the windshield outside upper moulding into its proper place. The installation process ends with reattaching the protector and Weather Strip and installing the cowl louver that requires 6 screws and 4 clips then tightening the wiper arms (2 nuts reach a torque of 20 N.m) and finally attaching the caps followed by front pillar garnishes and assist grips sun visors and inner rear view mirror with 3 screws and completing the assembly with the map light assembly that includes the room light lens where connector connection must be completed.
Related 2001 Toyota 4Runner Parts
 2001 Toyota 4Runner Wiper Blade
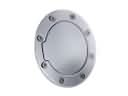 2001 Toyota 4Runner Fuel Door
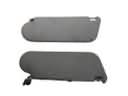 2001 Toyota 4Runner Sun Visor
 2001 Toyota 4Runner Windshield Washer Nozzle
 2001 Toyota 4Runner Wiper Arm
 2001 Toyota 4Runner Car Mirror
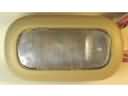 2001 Toyota 4Runner Dome Light
 2001 Toyota 4Runner Rear Passenger Door Handle Latch
 2001 Toyota 4Runner Washer Pump
 2001 Toyota 4Runner Washer Reservoir
 2001 Toyota 4Runner Windshield Wiper
 2001 Toyota 4Runner Wiper Motor