×
ToyotaParts- Hello
- Login or Register
- Quick Links
- Live Chat
- Track Order
- Parts Availability
- RMA
- Help Center
- Contact Us
- Shop for
- Toyota Parts
- Scion Parts
My Garage
My Account
Cart
OEM 2000 Toyota Solara Windshield
Glass Windshield- Select Vehicle by Model
- Select Vehicle by VIN
Select Vehicle by Model
orMake
Model
Year
Select Vehicle by VIN
For the most accurate results, select vehicle by your VIN (Vehicle Identification Number).
1 Windshield found

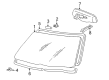
2000 Toyota Solara Glass, Front
Part Number: 56101-06010-83$546.83 MSRP: $801.39You Save: $254.56 (32%)Ships in 1-3 Business DaysProduct Specifications- Other Name: Glass Sub-Assembly, Windshield; Windshield Glass, Front
- Position: Front
- Replaces: 56101-06010
- Condition: New
- SKU: 56101-06010-83
- Warranty: This genuine part is guaranteed by Toyota's factory warranty.
2000 Toyota Solara Windshield
Looking for affordable OEM 2000 Toyota Solara Windshield? Explore our comprehensive catalogue of genuine 2000 Toyota Solara Windshield. All our parts are covered by the manufacturer's warranty. Plus, our straightforward return policy and speedy delivery service ensure an unparalleled shopping experience. We look forward to your visit!
2000 Toyota Solara Windshield Parts Q&A
- Q: How to remove and install a windshield on 2000 Toyota Solara?A: The first step in windshield removal consists of using a screwdriver to remove the front door scuff plate after taping the tip to protect the surface. Perform the same steps on the opposite side. After removing the front door opening covers continue by taking off the front pillar garnishes according to the same procedure. You should detach the map light assembly when you remove the lens and open the box cover while unscrewing all 3 screws before disconnecting the connectors. To remove the sun visors first detach their connector while unscrewing two screws and repeat the process for the opposite side then remove the holder screws. You must disconnect both connectors on the assist grip and inner rear view mirror before removal through the torx screw. To access the cowl louvers and wiper arms the user must first unscrew two nuts from the wiper arms and then remove the top hood cowl seal and two clips to take down the cowl louvers. Using a knife cut the windshield outside moulding after pulling down the headlining of the roof front section while being cautious about body damage. Remove the rest of the moulding. The process for taking out windshield glass requires users to push piano wire through the interior gap between body and glass before tying ends with wooden blocks and using protective tape on the outside followed by piano wire cutting of adhesive while preserving maximum remaining adhesive on the body surface. Clean the body surface by knife while preserving as much adhesive as possible before using a shop rag with cleaner to remove residue. The process to clean removed glass involves removing stoppers and retainers that show damage then removing the adhesive with scraping and cleaning it with an appropriate solution. Use the new stoppers together with retainers and dams to install glass while maintaining suitable alignment of all parts. Check for equal surface contact while properly locating the glass then make reference marks before cleaning the glass contact area. Apply Primer "M" to the body contact area before waiting for it to dry for three minutes and do the same with "G" primer on the glass then remove any unneeded excess primer before the glass drying stage. Place adhesive from part number 08850-00801 or equivalent on the glass while keeping in mind to work within the stated timeline before placing the glass properly into position according to reference marks while applying gentle pressure along the rim edges. Use a spatula to apply more adhesive and clean away any leftover material with a scraper. Secure the windshield with protective tape before the adhesive hardens then use Part No. 08833-00030 equivalent sealant to complete the leak test. Put adhesive on the moulding installation region and press the new windshield outside moulding in place by tapping it gently. Replace the front section of roof headlining along with the cowl louvers that use 2 clips and the hood to cowl top seal. Proceed with mounting the wiper arms before tightening their nuts to 24 N.m (245 kgf.cm, 18 ft.lbf) torque while reinstalling the inner rear view mirror, assist grip and sun visor holders and sun visors and map light assembly and front pillar garnishes followed by front door opening covers and front door scuff plate installations. Apply this same protocol to the relevant components of the opposite side.
Related 2000 Toyota Solara Parts
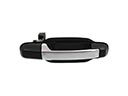 2000 Toyota Solara Door Handle
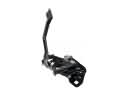 2000 Toyota Solara Hood Latch
 2000 Toyota Solara Interior Door Handle
 2000 Toyota Solara Window Regulator
 2000 Toyota Solara Air Deflector
 2000 Toyota Solara Car Mirror
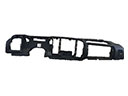 2000 Toyota Solara Dash Panel Vent Portion Covers
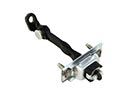 2000 Toyota Solara Door Check
 2000 Toyota Solara Hood Cable
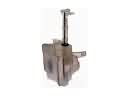 2000 Toyota Solara Washer Reservoir
 2000 Toyota Solara Weather Strip
 2000 Toyota Solara Window Run