My Garage
Cart
Make sure this part fits

Toyota 84119-52030
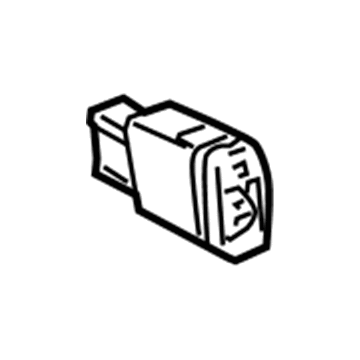
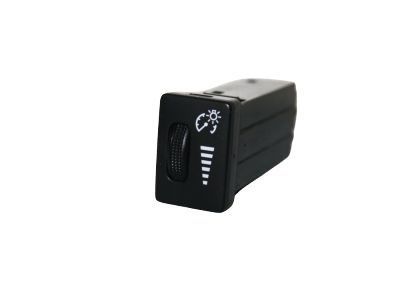
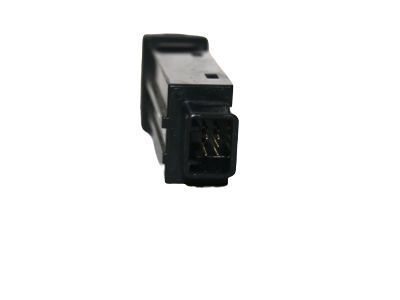
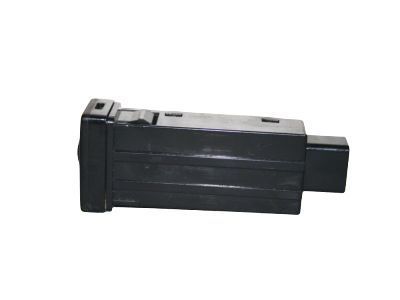
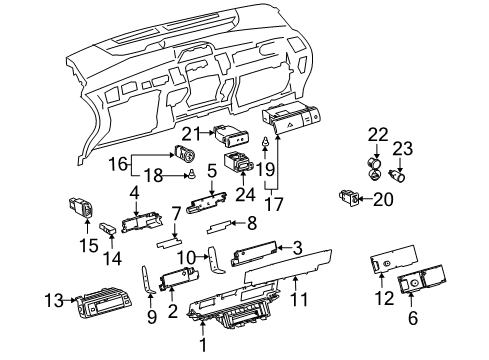
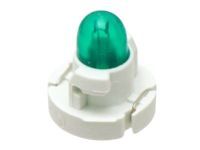
Instrument Light Rheostat, Passenger Side

2006-2015 Toyota 8411952030

Customer Questions & Expert Answers (19)
Toyota 84119-52030 Instrument Light Rheostat, Passenger Side
  • Part Description
    Rheostat, Light Control; Instrument Panel Dimmer Switch
  • Part Name Code
    84119
  • Position
    Passenger Side
  • Manufacturer
    Toyota
Make sure this part fits
$170.39 MSRP: $241.21
You Save: $70.82 (30%)
Ships in 1-2 Business Days
1
ADD TO CART
  • Related Parts
  • Product Specifications
  • Vehicle Fitment
  • Customer Questions & Expert Answers
  • Product Specifications

    BrandGenuine Toyota
    Part Name Code84119
    Manufacturer Part Number84119-52030
    Part DescriptionRheostat, Light Control; Instrument Panel Dimmer Switch
    Other NamesRheostat
    Item Dimensions3.7 x 2.2 x 1.3 inches
    Item Weight0.50 Pounds
    PositionPassenger Side
    ConditionNew
    Fitment TypeDirect Replacement
    ManufacturerToyota
    SKU84119-52030
    WarrantyThis genuine Toyota part is guaranteed by Toyota's factory warranty.
    Shipping & ReturnShipping Policy Return Policy
    Warning: California's Proposition 65
  • Vehicle Fitment

    Year Make Model Trim Engine
    2008-2015 Scion xBBase4 Cyl 2.4 L GAS
    2008-2014 Scion xDBase4 Cyl 1.8 L GAS
    2006-2009 Toyota PriusBase, Touring4 Cyl 1.5 L FULL HYBRID EV-GAS (FHEV)
    2007-2014 Toyota YarisBase, L, LE, S, SE4 Cyl 1.5 L GAS
  • Customer Questions & Expert Answers

    Q:
    Can you provide the right 84119-52030 for my car? Posted by ToyotaPartsNow Specialist
    A:
    Find out if part number 84119-52030 is the right fit for your car by Selecting Your Vehicle model.
    Posted by ToyotaPartsNow Specialist
    Q:
    How to remove the headlamp dimmer switch on Scion xB? Posted by Customer
    A:
    The removal process for the headlamp dimmer switch starts with a 90-second period of disconnecting the negative battery cable to stop Air Bag deployment. You must first ensure front wheel alignment before removing the steering pad then steering wheel assembly together with the steering column cover. Next, remove the spiral cable. Users should disconnect the 2 connectors from the wiper switch before using a screwdriver with taped tip to carefully disengage the claw that removes the wiper switch without damaging the claw. Disassembling the headlight dimmer switch involves disconnecting its connector followed by illustration-driven removal of the unit while disengaging its 2 claws to finalize the process.
    Posted by ToyotaPartsNow Specialist
    Q:
    How to remove the headlamp dimmer switch on Scion xB? Posted by Customer
    A:
    The first task for removing the headlamp dimmer switch requires disconnecting the negative battery cable while allowing at least 90 seconds to elapse before proceeding to avoid Air Bag deployment. Position the front wheels in a straight direction before beginning work. The first step involves removing the steering pad after which you must take off the steering wheel assembly before removing the steering column cover. Then, remove the spiral cable. The process requires disconnecting the two connectors from the wiper switch through the use of a screwdriver with taped tip to separate the claw from the wiper switch with no claw harm. After detaching the connector from the dimmer switch headlight terminate the switch removal by following the provided illustration and releasing the two claws.
    Posted by ToyotaPartsNow Specialist
    Q:
    How to remove the headlight dimmer switch on Scion xD? Posted by Customer
    A:
    Removing the headlight dimmer switch starts with disconnecting the cable from the negative battery terminal followed by a 90-second delay to avoid Air Bag deployment. Front wheels must be set in a direct alignment. Take off the steering pad as the first step before proceeding to remove the steering wheel assembly and finally the steering column cover. The spiral cable should be the next item to remove from the device. Users should disconnect the two connectors before using a screwdriver with taped tip while dislodging the claw from the wiper switch to prevent switch damage through careful pressure application. The final step involves disconnecting the connector from the headlight dimmer switch yet removing it while following the illustration while dislodging the two claws to finalize the uninstallation process.
    Posted by ToyotaPartsNow Specialist
    Q:
    How to service the headlamp dimmer switch on Toyota Prius? Posted by Customer
    A:
    Start servicing the headlamp dimmer switch after you disconnect and wait at least 90 seconds on the negative battery cable because this prevents the activation of Air Bags and seat belt pretensioners. The headlamp dimmer switch service requires removal of the following components: steering wheel cover lower No. 2 and No. 3, steering pad assembly, steering wheel assembly, steering column cover, spiral cable sub-assembly and wiper and washer switch assembly. To remove the headlight dimmer switch assembly disconnect the connectors then take off the band clamp before separating the claws. The procedure for installing the headlight dimmer switch assembly consists of setting its recessed section toward the steering column shaft and fastening it with band clamp and claw before reattaching all connectors. To complete this procedure refit the wiper and washer switch assembly followed by the spiral cable sub-assembly together with the steering column cover. The adjustment of the spiral cable sub-assembly should follow center point inspection with both steering wheel assembly and steering pad assembly reinstallation. The procedure ends with installing lower cover No. 2 and No. 3 followed by reconnecting the cable to the negative battery terminal then inspecting the steering pad assembly while checking the SRS warning light and performing system initialization which becomes essential when disconnecting and reconnection of the negative battery terminal cable occurs.
    Posted by ToyotaPartsNow Specialist
    Q:
    How to service the headlight dimmer switch on Toyota Yaris? Posted by Customer
    A:
    One must start by disconnecting the negative battery terminal cable before waiting 90 seconds to avoid deploying the Air Bag during service of the headlight dimmer switch. First position the front wheels directly ahead before you remove the steering pad and then the steering wheel assembly for hatchback and sedan models together with the steering column cover. The wiper switch removal requires disconnecting its cable connectors followed by using a screwdriver with taped-tip to loosen the claw from the wiper switch. You should disconnect the connector attached to the headlight dimmer switch before disengaging the two claws to perform removal. You install the headlight dimmer switch by connecting its connector after you fit the clamp with the two claws. After securing the wiper switch claw you must connect its two connectors. Install the spiral cable before adding the steering column cover that suits hatchback or sedan models followed by spiral cable adjustment and installation of the steering wheel according to each model. The last step involves putting on the steering pad together with reattaching the cable into the negative battery terminal using 5.4 N.m (55 kgf.cm, 48 in.lbf) torque before identifying the SRS warning light status.
    Posted by ToyotaPartsNow Specialist
    Q:
    What should be installed after the windshield wiper switch for the 2008 Scion xB? Posted by Customer
    A:
    Proceed to install the spiral cable, followed by the steering column cover.
    Posted by ToyotaPartsNow Specialist
    See expert answers on similar Dimmer Switch
    Q:
    What should be done carefully when removing the wiper switch for the 2010 Scion xB? Posted by Customer
    A:
    Disengage the claw without damaging it.
    Posted by ToyotaPartsNow Specialist
    See expert answers on similar Dimmer Switch
    Q:
    How should the front wheels be positioned before starting the removal for the 2009 Scion xD? Posted by Customer
    A:
    The front wheels should be positioned straight ahead.
    Posted by ToyotaPartsNow Specialist
    See expert answers on similar Dimmer Switch
    Q:
    How do you install the headlight dimmer switch for the 2010 Scion xD? Posted by Customer
    A:
    Engage the 2 claws and secure it in place, then attach it with the clamp and connect the connector.
    Posted by ToyotaPartsNow Specialist
    See expert answers on similar Dimmer Switch
    Q:
    How do you connect the cable to the battery for the 2008 Scion xD? Posted by Customer
    A:
    Connect the cable to the negative battery terminal with a torque of 5.4 Nm (55 kgf-cm, 48 in-lbf).
    Posted by ToyotaPartsNow Specialist
    See expert answers on similar Dimmer Switch
    Q:
    What adjustment is necessary after installing the spiral cable for the 2009 Scion xB? Posted by Customer
    A:
    Adjust the spiral cable as necessary.
    Posted by ToyotaPartsNow Specialist
    See expert answers on similar Dimmer Switch
    Q:
    What are the final steps to remove the headlight dimmer switch for the 2008 Toyota Prius? Posted by Customer
    A:
    Remove the band clamp, detach the claws, and take out the headlight dimmer switch.
    Posted by ToyotaPartsNow Specialist
    See expert answers on similar Dimmer Switch
    Q:
    What should be inspected before reinstalling the steering wheel assembly for the 2007 Toyota Prius? Posted by Customer
    A:
    Inspect the steering wheel center point.
    Posted by ToyotaPartsNow Specialist
    See expert answers on similar Dimmer Switch
    Q:
    What are the final steps to remove the headlight dimmer switch for the 2009 Toyota Prius? Posted by Customer
    A:
    Disconnect the connectors of the headlight dimmer switch assembly, remove the band clamp, detach the claws, and take out the headlight dimmer switch.
    Posted by ToyotaPartsNow Specialist
    See expert answers on similar Dimmer Switch
    Q:
    What should be removed after the steering column cover for the 2009 Toyota Yaris? Posted by Customer
    A:
    Remove the spiral cable.
    Posted by ToyotaPartsNow Specialist
    See expert answers on similar Dimmer Switch
    Q:
    What is the next step after disconnecting the battery for the 2010 Toyota Yaris? Posted by Customer
    A:
    Remove the steering pad.
    Posted by ToyotaPartsNow Specialist
    See expert answers on similar Dimmer Switch
    Q:
    What is the first step for installation of the light control rheostat for the 2007 Toyota Yaris? Posted by Customer
    A:
    Engage the 2 claws to install the light control rheostat.
    Posted by ToyotaPartsNow Specialist
    See expert answers on similar Dimmer Switch
    Q:
    What should be done after disconnecting the battery terminal for the 2008 Toyota Yaris? Posted by Customer
    A:
    Remove the instrument panel box.
    Posted by ToyotaPartsNow Specialist
    See expert answers on similar Dimmer Switch
    If you have any questions about this product, please don't hesitate to ask us. We will be happy to help you!

OEM Toyota 84119-52030, Excellent Performance and Perfect Fitment

To ensure reliability, purchase Toyota part # 84119-52030 Instrument Light Rheostat, Passenger Side. It is sometimes referred to as Toyota Dimmer Switch. OEM parts are unrivaled in terms of quality. They go through extensive quality control inspections and are produced in accordance with Toyota's official factory specifications. All of these remove defects and imperfections. So you can relax knowing they promise exceptional lifespan and flawless fitment.

ToyotaPartsNow.com is a leading supplier of genuine Toyota parts such as Toyota 8411952030 Instrument Light Rheostat, Passenger Side. At ToyotaPartsNow.com, we have a wide variety of OEM Toyota parts available at competitive prices. Our comprehensive range of genuine Toyota parts come with a manufacturer's warranty for peace of mind. We also prioritize customer satisfaction, providing a hassle-free return policy and expedited delivery for all our parts. For detailed Toyota parts information, click here.
Choose ToyotaPartsNow for discounted prices, exceptional service and fast delivery