My Garage
Cart
Make sure this part fits

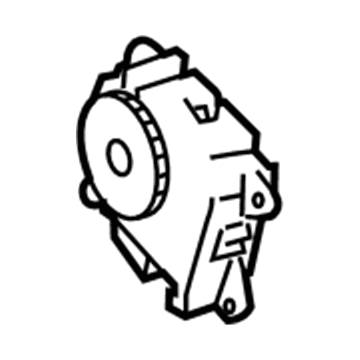
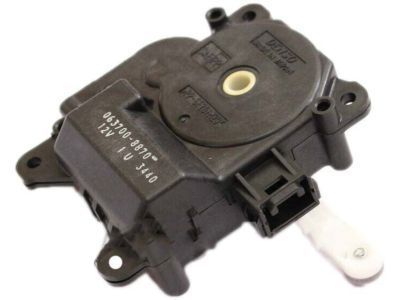
Toyota 87106-02190
Actuator

2009-2019 Toyota Corolla 8710602190

Customer Questions & Expert Answers (4)
Toyota 87106-02190 Actuator
  • Part Description
    Servo Sub-Assembly, Damper; HVAC Blend Door Actuator; HVAC Heater Blend Door Actuator
  • Part Name Code
    87106H
  • Comment
    (FOR AIRMIX)
  • Manufacturer
    Toyota
Make sure this part fits
$136.17 MSRP: $192.77
You Save: $56.60 (30%)
Ships in 1-3 Business Days
1
ADD TO CART
  • Related Parts
  • Product Specifications
  • Vehicle Fitment
  • Customer Questions & Expert Answers
  • Product Specifications

    BrandGenuine Toyota
    Part Name Code87106H
    Manufacturer Part Number87106-02190
    Part DescriptionServo Sub-Assembly, Damper; HVAC Blend Door Actuator; HVAC Heater Blend Door Actuator
    Other NamesServo; Servo Sub-Assembly, Damper(For Airmix)
    Item Dimensions6.2 x 4.7 x 3.5 inches
    Item Weight1.00 Pounds
    ConditionNew
    Fitment TypeDirect Replacement
    ManufacturerToyota
    SKU87106-02190
    WarrantyThis genuine Toyota part is guaranteed by Toyota's factory warranty.
    Shipping & ReturnShipping Policy Return Policy
    Warning: California's Proposition 65
  • Vehicle Fitment

    Year Make Model Trim Engine
    2009-2019 Toyota Corolla50th Anniversary Special Edition, Base, L, LE, LE Eco, Le Eco Plus, S, SE, Special Edition, XLE, XRS, XSE4 Cyl 1.8 L GAS, 4 Cyl 2.4 L GAS
  • Customer Questions & Expert Answers

    Q:
    Can you provide the right 87106-02190 for my car? Posted by ToyotaPartsNow Specialist
    A:
    Find out if part number 87106-02190 is the right fit for your car by Selecting Your Vehicle model.
    Posted by ToyotaPartsNow Specialist
    Q:
    What is the role of the Blend Door Actuator in the heating and air conditioning system on Toyota Corolla? Posted by Customer
    A:
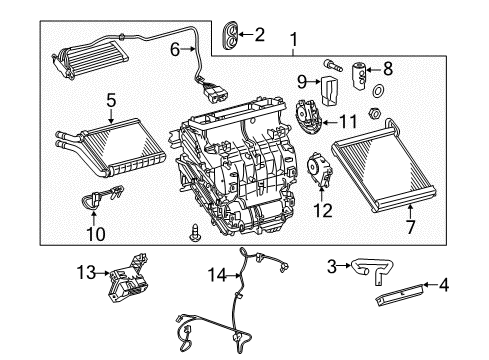
    A major part of heating and air conditioning systems operates using the air door actuator which has another name as air inlet control servo motor. This system functions to control airflow into the passenger compartment so cabin condition remains ideal. The successful maintenance of climate control system efficiency depends heavily on correct service and repair of the actuator.
    Posted by ToyotaPartsNow Specialist
    Q:
    How to remove the Blend Door Actuator / Motor on Toyota Corolla? Posted by Customer
    A:
    The first step to remove an Air Door Actuator / Motor is to steer the front wheels straight ahead and disconnect the negative battery terminal using a cable while allowing at least 90 seconds for the SRS system disablement; setting the air conditioning control switch to DEF-MODE before cable removal is recommended. Start by recovering refrigerant from the refrigeration system before removing the front wiper arm head caps and front wiper arms with their respective blades from both the left and right sides. The next step includes removal of the hood to cowl top seal along with the center No. 1 cowl top ventilator louver and cowl top ventilator louver situated on the left side. You should start by removing the windshield wiper motor and link assembly followed by the outer cowl top panel while disconnecting the suction pipe sub-assembly and air conditioning tube assembly and heater outlet and heater inlet water hoses. Workers must remove both lower instrument panel finish panels from the left and right sides along with the instrument panel finish panel ends, center instrument panel register assembly, instrument cluster finish panel assembly, and combination meter assembly. Begin by removing the front pillar garnish from each side followed by taking out the lower instrument panel finish panel assembly and disconnecting the front door opening trim Weather Strip from both sides. The glove compartment door assembly plus the No. 1 instrument panel box door sub-assembly must be removed and you should disconnect the instrument panel wire assembly. All technicians need to extract the upper instrument panel sub-assembly together with power steering ECU assembly from both 2ZR-FE and 2AZ-FE engines and the lower instrument panel finish panel sub-assembly. The technician adopts the following sequence to remove the lower steering wheel covers and pad as well as steering wheel assembly and then the lower and upper steering column covers. Start by removing the turn signal switch assembly that contains the spiral cable sub-assembly and column hole cover silencer sheet. Then disconnect the No. 2 steering intermediate shaft assembly from the rest of the components. Service technicians must detach the instrument panel sub reinforcement together with the No. 3 air duct sub-assembly and transponder key amplifier (when present) and stop light switch assembly and steering post assembly from both engine models. The radio receiver with bracket needs removal unless a navigation system is present while a center instrument cluster finish panel sub-assembly needs removal when the vehicle has a navigation system and the navigation receiver with bracket also requires removal. Drain and discard the lubricating fluid before removing the shift lever knob sub-assembly for both manual and automatic transaxles and the center No. 1 instrument cluster finish panel assembly for both transaxles as well as the instrument panel box assembly, instrument panel hole cover and air conditioning panel assembly for manual systems or air conditioning control assembly for automatic systems. All parts of the interior must be removed including front door scuff plates alongside cowl side trim boards situated on both sides of the front No. 1 and No. 2 console box inserts, upper console panel sub-assembly, console box carpet and console box assembly for manual and automatic transaxles. The service technician should detach the No. 2 antenna cord sub-assembly together with the lower instrument panel sub-assembly and smart key ECU assembly if equipped along with the No. 1 air duct sub-assembly and lower defroster nozzle assembly and center instrument panel to cowl brace. Both rear air ducts numbered No. 2 and No. 3 should be removed if present alongside the manual and automatic instrument panel brace sub-assemblies for No. 1 and No. 2 positions and rear No. 1 air duct if equipped. The instrument panel reinforcement assembly should also be taken out for both systems. Use the 2 screws to separate both automatic and manual air conditioning systems from the air conditioning unit and PTC heater and blower assembly along with both No. 2 air duct sub-assemblies.
    Posted by ToyotaPartsNow Specialist
    Q:
    What is the procedure for installing the instrument panel reinforcement assembly for the 2009 Toyota Corolla? Posted by Customer
    A:
    Install it for both Manual and Automatic Air Conditioning Systems, then install the air conditioning unit.
    Posted by ToyotaPartsNow Specialist
    See expert answers on similar Blend Door Actuator
    If you have any questions about this product, please don't hesitate to ask us. We will be happy to help you!

OEM Toyota 87106-02190, Excellent Performance and Perfect Fitment

To ensure reliability, purchase Toyota part # 87106-02190 Actuator. It is sometimes referred to as Toyota Blend Door Actuator. OEM parts are unrivaled in terms of quality. They go through extensive quality control inspections and are produced in accordance with Toyota's official factory specifications. All of these remove defects and imperfections. So you can relax knowing they promise exceptional lifespan and flawless fitment.

ToyotaPartsNow.com is a leading supplier of genuine Toyota parts such as Toyota 8710602190 Actuator. At ToyotaPartsNow.com, we have a wide variety of OEM Toyota parts available at competitive prices. Our comprehensive range of genuine Toyota parts come with a manufacturer's warranty for peace of mind. We also prioritize customer satisfaction, providing a hassle-free return policy and expedited delivery for all our parts. For detailed Toyota parts information, click here.
Choose ToyotaPartsNow for discounted prices, exceptional service and fast delivery