My Garage
Cart
Make sure this part fits

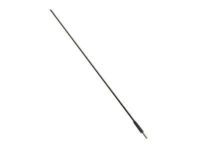
Toyota 86101-04010
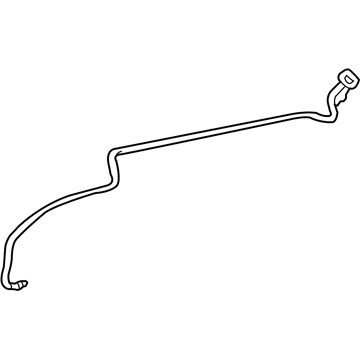
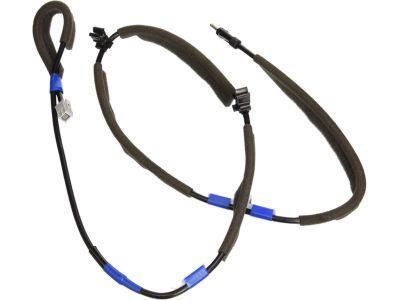
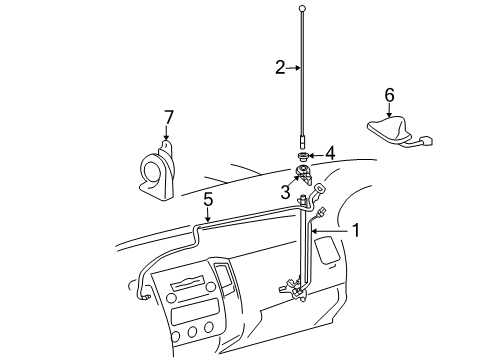
Antenna Cable

2005-2012 Toyota Tacoma 8610104010

Customer Questions & Expert Answers (6)
Toyota 86101-04010 Antenna Cable
  • Part Description
    Cord Sub-Assembly, Antenna
  • Part Name Code
    86101
  • Manufacturer
    Toyota
Make sure this part fits
$104.40 MSRP: $146.53
You Save: $42.13 (29%)
Ships in 1-3 Business Days
1
ADD TO CART
  • Related Parts
  • Product Specifications
  • Vehicle Fitment
  • Customer Questions & Expert Answers
  • Product Specifications

    BrandGenuine Toyota
    Part Name Code86101
    Manufacturer Part Number86101-04010
    Part DescriptionCord Sub-Assembly, Antenna
    Item Dimensions15.4 x 6.0 x 2.1 inches
    Item Weight0.60 Pounds
    ConditionNew
    Fitment TypeDirect Replacement
    ManufacturerToyota
    SKU86101-04010
    WarrantyThis genuine Toyota part is guaranteed by Toyota's factory warranty.
    Shipping & ReturnShipping Policy Return Policy
    Warning: California's Proposition 65
  • Vehicle Fitment

    Year Make Model Trim Engine
    2005-2012 Toyota TacomaBase, Pre Runner, X-Runner4 Cyl 2.7 L GAS, 6 Cyl 4.0 L GAS
  • Customer Questions & Expert Answers

    Q:
    Can you provide the right 86101-04010 for my car? Posted by ToyotaPartsNow Specialist
    A:
    Find out if part number 86101-04010 is the right fit for your car by Selecting Your Vehicle model.
    Posted by ToyotaPartsNow Specialist
    Q:
    How to service and repair the antenna cable on Toyota Tacoma? Posted by Customer
    A:
    Begin the antenna cable repair process by taking it off the negative battery terminal. Take out the front footrest plus front door scuff plates from both sides and cowl side trim panels while splitting the front door opening Weather Strips. Service starts by taking off the LH and RH front pillar garnishes and the under tray from instrument panel when parking brake uses pedals and placing aside the instrument panel's hole cover for lever brakes. Take out the rear box and instrument panel cup holder tray (for automatic transmission users of separate seats) and remove the front console boxes from the separate and bench seats on automatic and manual transmissions. Take the air conditioner controls out with the radio receiver unit and break apart the hood lock control lever. Proceed by taking the No. 1 lower instrument panel finish panel, instrument cluster finish panel sub-assembly, combination meter assembly, instrument cluster center finish panel sub-assembly, glove compartment door assembly, instrument panel lower finish panel sub-assembly (RH), lower instrument panel (LH), and instrument lower cover subassembly apart. Take out the instrument side panel from the right side and disconnect the passenger Air Bag connector before taking out both the instrument panel passenger Air Bag assembly and instrument panel sub-assembly. After you finish all steps unclick the four claws to take out the radio antenna cord sub-assembly. Begin installation by fitting the antenna cord sub-assembly using all 4 claws before putting on the instrument panel and its connected passenger Air Bag while reinspecting the passenger Air Bag connector. Add these components one after another in the correct sequence: instrument side panel (RH), instrument lower cover subassembly, lower instrument panel (LH), instrument panel lower finish panel sub-assembly (RH), glove compartment door assembly, center instrument cluster finish panel sub-assembly, combination meter assembly, instrument cluster finish panel sub-assembly, and No. 1 lower instrument panel finish panel. Add the hood lock control piece and the radio receiver trim to your installation with the air conditioning control device and front console pieces (one set for manual transmission plus bench seat and another set for the automatic transmission). Put the automatic transmission instrument panel cup holder tray along with the rear console box assembly for separate seat types and console upper rear panels for all transmission and seat types. Position first the instrument panel hole cover (for lever brake) and instrument panel under tray (for pedal brake). Add next the front pillar garnishes on both sides with their Weather Strips. Install each cowl side trim board and front door scuff plates including the left and right ones. Place lastly the front floor footrest. Connect the battery cable to its negative terminal and use a torque of 3.9 N.m to fasten it.
    Posted by ToyotaPartsNow Specialist
    Q:
    How to service the radio antenna cable on Toyota Tacoma? Posted by Customer
    A:
    Service of the radio antenna cable begins with disconnecting it from the negative terminal of the battery. The service procedure requires removal of the front floor footrest along with front door scuff plates (LH and RH), cowl side trim boards (LH and RH) and separation of front door opening trim Weather Strips (LH and RH). Service on the radio antenna requires removal of the front pillar garnishes (LH and RH) as well as the instrument panel under tray (for pedal type parking brake), the instrument panel hole cover (for lever type parking brake), and the console upper rear panel subassembly (for both automatic and manual transmissions on separate seat types). The instrument panel cup holder tray (for automatic transmission on separate seat type), rear console box assembly (for separate seat type), front console boxes (for both automatic and manual transmissions on bench and separate seat types) must be removed. The installer should remove in this order the air conditioner control assembly, radio receiver assembly, hood lock control lever subassembly, No. 1 lower instrument panel finish panel, instrument cluster finish panel sub-assembly, combination meter assembly, instrument cluster center finish panel sub-assembly, glove compartment door assembly, instrument panel lower finish panel sub-assembly (RH), lower instrument panel (LH), instrument lower cover subassembly, and instrument side panel (RH). After disconnecting the passenger Air Bag connector you should take out both the instrument panel passenger Air Bag assembly along with the instrument panel sub-assembly. The installation of the radio antenna cord sub-assembly requires users to disengage its 4 claws before extraction. The installation process requires engagement of the 4 claws for radio antenna cord sub-assembly before the instrument panel sub-assembly and passenger Air Bag assembly with their final step being passenger Air Bag connector reconnection. The installation process requires the instrument side panel (RH) followed by the instrument lower cover subassembly then the lower instrument panel (LH) with the instrument panel lower finish panel sub-assembly (RH) after which the glove compartment door assembly goes in followed by the center instrument cluster finish panel sub-assembly and combination meter assembly then the instrument cluster finish panel sub-assembly before the No. 1 lower instrument panel finish panel gets installed. Reinstall the hood lock control lever subassembly together with radio receiver assembly and air conditioning control assembly followed by front console boxes for both manual and automatic transmissions of bench and separate seat vehicles. The installer should position the instrument panel cup holder tray for automatic transmission on separate seat type followed by the rear console box assembly for separate seat type and the console upper rear panel subassemblies for both manual and automatic transmissions on separate seat types. Reposition the instrument panel hole cover (if you have lever parking brake) followed by the instrument panel under tray (if you have pedal braking) and front pillar garnishes (for both sides) before installing both front door opening trim Weather Strips and cowl side trim boards (positioned on both sides) as well as front door scuff plates (applied to each side). Finish by reconnecting the battery cable to the negative terminal and tighten it to 3.9 N.m (40 kgf.cm, 35 in.lbf).
    Posted by ToyotaPartsNow Specialist
    Q:
    What should be installed after the lower instrument panel LH for the 2008 Toyota Tacoma? Posted by Customer
    A:
    Install the instrument panel lower finish panel sub-assembly RH, the glove compartment door assembly, and the center instrument cluster finish panel sub-assembly.
    Posted by ToyotaPartsNow Specialist
    See expert answers on similar Antenna Cable
    Q:
    What is the first step to install the Radio Antenna Cord for the 2009 Toyota Tacoma? Posted by Customer
    A:
    Engage the 4 claws and install the Radio antenna cord sub-assembly.
    Posted by ToyotaPartsNow Specialist
    See expert answers on similar Antenna Cable
    Q:
    What is the final step in the process for the 2005 Toyota Tacoma? Posted by Customer
    A:
    Reinstall the console box fronts (for both M/T and A/T transmissions, in both separate and bench seat types), instrument panel cup holder tray (A/T transmission, separate seat type), console box assembly rear (separate seat type), console upper rear panel sub-assemblies (for both M/T and A/T transmissions, separate seat type), instrument panel hole cover (lever type parking brake), instrument panel under tray (pedal type parking brake), front pillar garnishes (LH and RH), front door opening trim weatherstrips (LH and RH), cowl side trim boards (LH and RH), front door scuff plates (LH and RH), front floor footrest, and reconnect the cable to the negative battery terminal, ensuring a torque of 3.9 N.m (40 kgf.cm, 35 in.lbf).
    Posted by ToyotaPartsNow Specialist
    See expert answers on similar Antenna Cable
    If you have any questions about this product, please don't hesitate to ask us. We will be happy to help you!

OEM Toyota 86101-04010, Excellent Performance and Perfect Fitment

To ensure reliability, purchase Toyota part # 86101-04010 Antenna Cable. It is sometimes referred to as Toyota Antenna Cable. OEM parts are unrivaled in terms of quality. They go through extensive quality control inspections and are produced in accordance with Toyota's official factory specifications. All of these remove defects and imperfections. So you can relax knowing they promise exceptional lifespan and flawless fitment.

ToyotaPartsNow.com is a leading supplier of genuine Toyota parts such as Toyota 8610104010 Antenna Cable. At ToyotaPartsNow.com, we have a wide variety of OEM Toyota parts available at competitive prices. Our comprehensive range of genuine Toyota parts come with a manufacturer's warranty for peace of mind. We also prioritize customer satisfaction, providing a hassle-free return policy and expedited delivery for all our parts. For detailed Toyota parts information, click here.
Choose ToyotaPartsNow for discounted prices, exceptional service and fast delivery