×
ToyotaParts- Hello
- Login or Register
- Quick Links
- Live Chat
- Track Order
- Parts Availability
- RMA
- Help Center
- Contact Us
- Shop for
- Toyota Parts
- Scion Parts
My Garage
My Account
Cart
OEM Scion tC A/C Clutch
Air Conditioning Clutch- Select Vehicle by Model
- Select Vehicle by VIN
Select Vehicle by Model
orMake
Model
Year
Select Vehicle by VIN
For the most accurate results, select vehicle by your VIN (Vehicle Identification Number).
2 A/C Clutches found

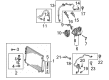
Scion tC Clutch Plate & Hub Assembly
Part Number: 88410-21040$160.14 MSRP: $226.70You Save: $66.56 (30%)Ships in 1-3 Business DaysScion tC Clutch Plate & Hub Assembly
Part Number: 88410-21030$175.06 MSRP: $247.83You Save: $72.77 (30%)Ships in 1-3 Business Days
Scion tC A/C Clutch
Choose genuine A/C Clutch that pass strict quality control tests. You can trust the top quality and lasting durability. Shopping for OEM A/C Clutch for your Scion tC? Our website is your one-stop destination. We stock an extensive selection of genuine Scion tC parts. The price is affordable so you can save more. It only takes minutes to browse and find the exact fit. Easily add to cart and check out fast. Our hassle-free return policy will keep you stress-free. We process orders quickly for swift delivery. Your parts will arrive faster, so you can get back on the road sooner.
The A/C Clutch is a well-known part in the Scion tC car model, that is appreciated for its reliability and efficiency as an A/C system part. It is this A/C Clutch that effectively transfers the engine power to involve the A/C compressor when switching on the cooling mechanism. It reduces the amount of load that is put on the engine by disenging when not in use hence improving the efficiency and safety of the vehicle. General Information about the A/C Clutch is that it fits different models of tC thus be assured that you can always get a reliable ac system if you are involved in car racing. Its price has always been a major selling point of the Scion tC apart from offering a sporting line, and the A/C Clutch keeps its consumers coming back with satisfaction. Some uniqueness of the A/C Clutch is that it minimizes sticking or slipping that is usual for this A/C type and prolongs A/C system's durability. This reliability is important because failure leads to dilution of A/C performance and consequently fuel expenditure. A/C Clutch, besides improving the sensitivity of handling, also plays an important role in car safety as it aids in controlling the A/C system. As seen in the above performance, the A/C Clutch is one of the premier in the market, and therefore, should be among the suggested list for all Scion tC owners in order to meet the comfort and performance of their vehicle.
Scion tC A/C Clutch Parts and Q&A
- Q: How to remove and replace the A/C Clutch on Scion tC?A:Begin compressor clutch replacement by removing refrigerant from the refrigeration system and cutting off the negative battery terminal cable which requires 90 seconds of waiting time before starting the task. You need to disconnect the No. 1 cooler refrigerant suction hose by unbolting the fastener while taking out the O-ring before applying vinyl tape at both openings to stop moisture and foreign material infiltration. Move on to the procedure of separating the No. 1 cooler refrigerant discharge hose in a similar process. The procedure starts with engine under cover removal along with fan and generator V belt before the cooler compressor assembly can be disconnected and its four bolts removed. The installation process requires fitting the four bolts on the cooler compressor assembly at a torque of 25 N.m (255 kgf.cm, 18 ft.lbf) and connecting the connector. The No. 1 cooler refrigerant discharge hose installation requires vinyl tape removal followed by adding compressor oil (ND-OIL 8 or equivalent) to a new O-ring and the fitting surface then adding the O-ring and screwing the hose in place using a bolt torqued to 9.8 N.m (100 kgf.cm, 7 ft.lbf). Rephrase the same procedure for installing the No. 1 cooler refrigerant suction hose. Reinstall the engine under cover RH before reestablishing the cable connection to the negative battery terminal and the fan along with generator V belt. Initialization steps must be done because selected vehicle systems need system initialization following battery connector removal. The technician should charge the refrigerant system after engine warm-up while checking for any refrigerant leakages.

Related Scion tC Parts
 Scion tC A/C Accumulator
 Scion tC A/C Compressor
 Scion tC A/C Condenser
 Scion tC A/C Expansion Valve
 Scion tC A/C Hose
 Scion tC A/C Service Cap
 Scion tC A/C System Valve Core
 Scion tC Ambient Temperature Sensor
 Scion tC Blend Door Actuator
 Scion tC Evaporator
 Scion tC HVAC Pressure Switch
 Scion tC Heater Core