×
ToyotaParts- Hello
- Login or Register
- Quick Links
- Live Chat
- Track Order
- Parts Availability
- RMA
- Help Center
- Contact Us
- Shop for
- Toyota Parts
- Scion Parts
My Garage
My Account
Cart
OEM 2007 Toyota Matrix Fuel Pressure Regulator
Fuel Tank Pressure Regulator- Select Vehicle by Model
- Select Vehicle by VIN
Select Vehicle by Model
orMake
Model
Year
Select Vehicle by VIN
For the most accurate results, select vehicle by your VIN (Vehicle Identification Number).
1 Fuel Pressure Regulator found


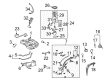
2007 Toyota Matrix Fuel Pressure Regulator
Part Number: 23280-21010$80.57 MSRP: $113.09You Save: $32.52 (29%)Ships in 1 Business DayProduct Specifications- Other Name: Regulator Assembly, Fuel; Fuel Injection Pressure Regulator; Pressure Regulator; Regulator Assembly, Fuel Pressure
- Part Name Code: 23280J
- Item Weight: 0.50 Pounds
- Item Dimensions: 5.9 x 4.6 x 2.5 inches
- Condition: New
- Fitment Type: Direct Replacement
- SKU: 23280-21010
- Warranty: This genuine part is guaranteed by Toyota's factory warranty.
2007 Toyota Matrix Fuel Pressure Regulator
Looking for affordable OEM 2007 Toyota Matrix Fuel Pressure Regulator? Explore our comprehensive catalogue of genuine 2007 Toyota Matrix Fuel Pressure Regulator. All our parts are covered by the manufacturer's warranty. Plus, our straightforward return policy and speedy delivery service ensure an unparalleled shopping experience. We look forward to your visit!
2007 Toyota Matrix Fuel Pressure Regulator Parts Q&A
- Q: How to service and repair the fuel pressure regulator on 2007 Toyota Matrix?A: Service and repair operations on the fuel pressure regulator should begin with disconnecting the battery negative terminal. The service hole cover can be removed after extracting the floor bolts followed by disconnecting the fuel pump connector when all screws are removed from the floor. The system will drain its fuel pressure after connecting the battery negative terminal followed by engine start-up and engagement stop after the engine power dies. The solution of any residual pressure from the system requires removing the fuel tank cap after engine cranking both times to ensure no engine start. Proceed to once more disconnect the battery negative terminal. To proceed remove the fuel suction with pump and gauge tube assembly by disconnecting the fuel tank main tube and vent hose while preventing entry of dirt into the joints. Use tool 09808-14020 to unwind the fuel pump gauge retainer before removing it when holding the fuel suction tube. First remove the fuel suction tube together with its gasket then detach the fuel sender gauge assembly after unconnecting its connector and sliding it out. The E-ring needs removal to free the fuel suction plate sub-assembly claws enabling the extraction of both the fuel pump filter plus suction plate. Go ahead with the removal of No.1 fuel suction support and fuel pump filter by using a screwdriver covered by tape to prevent damage. The installation of O-rings requires light petroleum liquid application before the fuel pump and fuel pressure regulator assembly fits into the fuel filter while inspecting for any O-ring damage during the process. First install the fuel pump filter before adding the No.1 fuel suction support and connecting both fuel pump harness connectors. The fuel suction plate sub-assembly must be reinstalled while the claws are engaged then new E-ring should be added. Install the fuel sender gauge while joining its connector to it. A new gasket goes onto the fuel tank followed by proper placement of the fuel suction tube before tightening the fuel pump gauge retainer with Special Service Tool: 09808-14020. Secure the connections between the fuel tank vent hose and main tube while verifying complete attachment of all junctions. To complete the repair, reconnect the negative battery terminal followed by checking for fuel leaks and then install the rear floor service hole cover and reinstall the right-hand rear seat cushion assembly before torquing all connections to their specified values.
Related 2007 Toyota Matrix Parts
 2007 Toyota Matrix Fuel Tank
 2007 Toyota Matrix Gas Cap
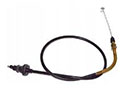 2007 Toyota Matrix Accelerator Cable
 2007 Toyota Matrix Fuel Filler Hose
 2007 Toyota Matrix Fuel Filler Neck
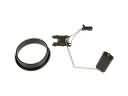 2007 Toyota Matrix Fuel Level Sensor
 2007 Toyota Matrix Fuel Line Clamps
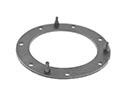 2007 Toyota Matrix Fuel Pump Gasket
 2007 Toyota Matrix Fuel Pump Seal
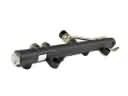 2007 Toyota Matrix Fuel Rail
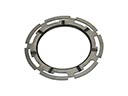 2007 Toyota Matrix Fuel Tank Lock Ring
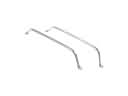 2007 Toyota Matrix Fuel Tank Strap