×
ToyotaParts- Hello
- Login or Register
- Quick Links
- Live Chat
- Track Order
- Parts Availability
- RMA
- Help Center
- Contact Us
- Shop for
- Toyota Parts
- Scion Parts
My Garage
My Account
Cart
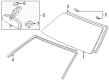
OEM 2001 Toyota Corolla Windshield
Glass Windshield- Select Vehicle by Model
- Select Vehicle by VIN
Select Vehicle by Model
orMake
Model
Year
Select Vehicle by VIN
For the most accurate results, select vehicle by your VIN (Vehicle Identification Number).
1 Windshield found

 Product Specifications
- Other Name: Glass Sub-Assembly, Windshield; Windshield Glass, Front; Glass, Windshield
- Manufacturer Note: *TL,T=4.76,GREEN
- Position: Front
- Part Name Code: 56111
- Condition: New
- Fitment Type: Direct Replacement
- SKU: 56101-02020
- Warranty: This genuine part is guaranteed by Toyota's factory warranty.
2001 Toyota Corolla Windshield
Looking for affordable OEM 2001 Toyota Corolla Windshield? Explore our comprehensive catalogue of genuine 2001 Toyota Corolla Windshield. All our parts are covered by the manufacturer's warranty. Plus, our straightforward return policy and speedy delivery service ensure an unparalleled shopping experience. We look forward to your visit!
2001 Toyota Corolla Windshield Parts Q&A
- Q: How to remove and install a windshield on 2001 Toyota Corolla?A: Beginning the windshield removal process requires complete removal of the inner rear view mirror and sun visors and their related holders. The front pillar garnish requires removing first by using a tool to remove the clips before pulling it upward on both sides of the windshield. This operation applies only to vehicles with a sliding roof. Begin by taking out wiper arms together with hood to cowl top seal followed by cowl louver and assist grip. The windshield removal process starts with vehicles equipped with sliding roofs by taking off the sliding roof opening trim first before handling the roof headlining front side. Start by cutting the windshield moulding with a knife while avoiding body damage then carefully remove the windshield glass through interior piano wire application which requires wooden block support for the ends. You should protect the paint and ornaments by applying adhesive tape to the exterior before cautiously slicing through the adhesive with piano wire. Keep all possible adhesive on the body surface. Before installation the contact surface of the body needs to be cleaned by forming it into shape while removing rough areas and treating it with a cleanup agent soaked into a shop rag. The damaged stopper needs replacement after removing it and scraping off old glue while cleaning the space where the stopper will go. A new stopper should then be placed onto the glass. Scrape and clean the discarded glass particles while preventing physical contact with the glass after completion of cleaning. The implementation process requires cleaning both areas and installing a new dam through use of double-stick tape. Place the glass so that all its contact surfaces are even before starting reference mark placement while removing it. The glass rim contact surface needs cleaning with a specific solution followed by Primer M application so the material can dry for at least 3 minutes. A thin layer of Primer G should be applied to both glass edges and contact surface before removing it while the solution remains wet. The glass requires adhesive treatment by using Part No. 08850-00801 or equivalent tip-cut cartridge nozzle inside the sealer gun to apply adhesive onto the glass surface. Use reference marks to align the glass before using light pressure on the rim while also coating the glass with adhesive through a spatula followed by cleaning up the excess with a scraper. The glass needs protective tape for mounting security until when the adhesive reaches full strength while maintenance on the vehicle must stop during this period. You should inspect the glass for any leakage after hardening while utilizing the provided sealant (Part No. 08833-00030 or equivalent). The installation of new mouldings requires adhesive application to the chosen mounting spots followed by a tapping procedure to secure the new pieces. Reinstall the front side of the roof headlining alongside sliding roof opening trim if applicable together with assist grip and cowl louver and hood to cowl top seal and wiper arms by adjusting all components manually according to required dimensions and tightening nuts to 20 N.m (205 kgf.cm, 15 ft.lbf). Conclude the installation by adding front pillar garnishes together with map light when vehicle has a sliding roof and by installing sun visors and holders and the inner rear view mirror.
Related 2001 Toyota Corolla Parts
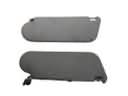 2001 Toyota Corolla Sun Visor
 2001 Toyota Corolla Door Hinge
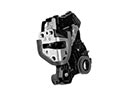 2001 Toyota Corolla Door Lock
 2001 Toyota Corolla Door Lock Actuator
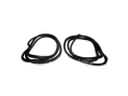 2001 Toyota Corolla Door Seal
 2001 Toyota Corolla Washer Pump
 2001 Toyota Corolla Wiper Arm
 2001 Toyota Corolla Wiper Motor
 2001 Toyota Corolla Washer Reservoir
 2001 Toyota Corolla Wiper Linkage
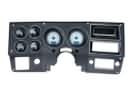 2001 Toyota Corolla Dash Panels
 2001 Toyota Corolla Weather Strip