×
ToyotaParts- Hello
- Login or Register
- Quick Links
- Live Chat
- Track Order
- Parts Availability
- RMA
- Help Center
- Contact Us
- Shop for
- Toyota Parts
- Scion Parts
My Garage
My Account
Cart
Antenna & Radio
2006 Toyota Prius Relay, Antenna, Car Speakers, Subwoofer
Currently shopping for
2006 Toyota Prius
Change VehicleVehicle Options
Base; 4 Cyl 1.5 L FULL HYBRID EV-GAS (FHEV)Vehicle Options
Base; 4 Cyl 1.5 L FULL HYBRID EV-GAS (FHEV)Categories Close X
Currently selected
Electrical
- ABS Components
- Air Bag Components
- Alarm System
- Antenna & Radio
- Anti-Theft Components
- Blower Motor - Hybrid Component
- Controls - Instruments & Gauges
- Cooling System - Hybrid Component
- Cruise Control System
- Electrical Components
- Flashers
- Front Door
- Front Seat Belts
- Gauges
- Horn
- Hybrid Components
- Ignition Lock
- Ignition System
- Instruments & Gauges
- Keyless Entry Components
- Lift Gate
- Mirrors
- Navigation System
- Parking Aid
- Powertrain Control
- Rear Door
- Rear Seat Belts
- Ride Control Components
- Senders
- Supplemental Restraint System
- Switches
- Tire Pressure Monitoring
- Wipers
- Wiring Harness
Other Categories
A/C & Heating
Air & Fuel Delivery
Belts & Cooling
Body & Hardware
Brakes
Charging & Starting
Driveline & Axles
Emission Control & Exhaust
Engine
Headlights & Lighting
Interior & Exterior Trim
Maintenance & Lubrication
Steering
Suspension
Transmission


How to use OE catalog
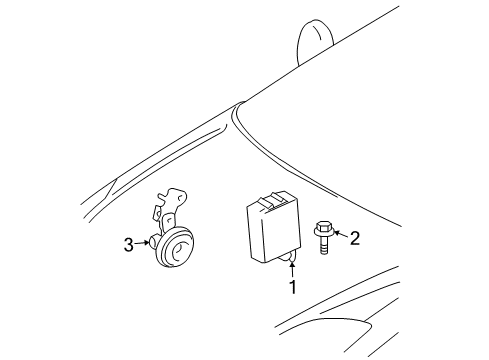
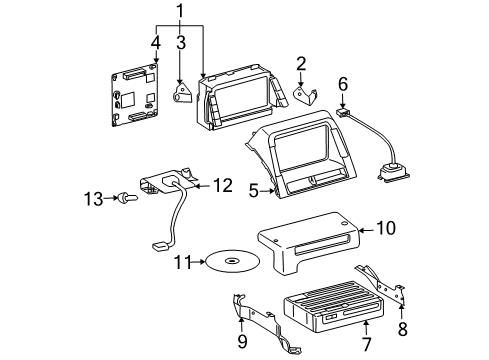
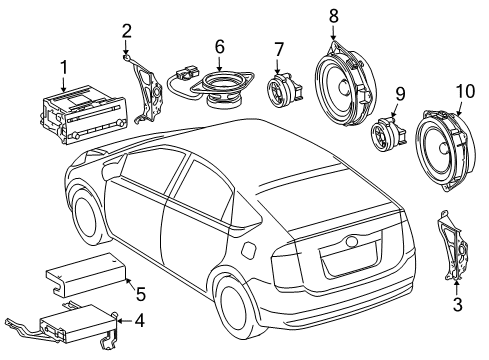
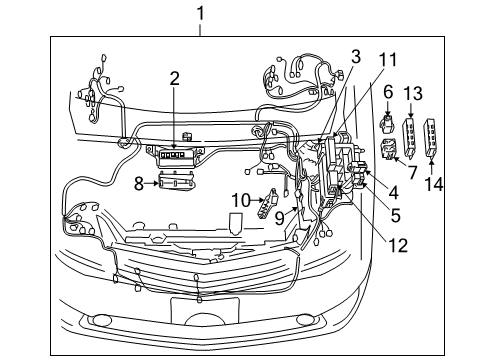
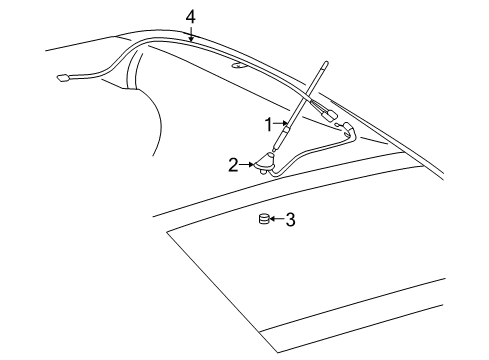
Diagram (1 of 1): Electrical - Antenna
Sort by:
Ref No.
Ref No.
Part No. & Part Description
Price & Qty.
Part No. &
Part Description
Part Description
- 1

 MSRP: $92.80 Your Price: $66.111
- 2
 MSRP: $501.32 Your Price: $342.081
- 3

 MSRP: $3.31 Your Price: $2.381
- 4
 MSRP: $151.18 Your Price: $107.701

 MSRP: $2.98 Your Price: $2.14
 86101-47110
Cord Sub-Assy, Antenna, NO.2- Production Date: 11/2005-03/2009
- Fitting Vehicle Options: NHW20
- Part Name Code: 86101J
MSRP: $131.72 Your Price: $93.84

 90010-24121
Knob, Radio Receiver Switch- Part Notes: AUDIO-05AM/FM+CD 6 SPEAKER
AUDIO-05AM/FM+CD-CHANGER JBL 9 SPEAKER - Production Date: 11/2005-03/2009
- Fitting Vehicle Options: NHW20.. USA
- Require Quantity: 2
- Package Quantity: 1
- Part Name Code: 86120A
MSRP: $22.61 Your Price: $16.24
OEM 2006 Toyota Prius Parts for Antenna & Radio
Genuine 2006 Toyota Prius parts are produced by Toyota with the official design and standards, thus they ensure a high quality throughout the production process. OEM parts are the ideal choice for people looking for new Antenna & Radio parts. With our competitive prices, we offer 2006 Toyota Prius Relay, Antenna, Car Speakers, Subwoofer that fit tight budgets, while still including the manufacturer warranties, a hassle-free returns policy and quick shipping options.
Antenna Cable Installation and Repair Tips for 2006 Toyota Prius
- Q: How to service the radio antenna cable on 2006 Toyota Prius?A: When replacing the radio antenna cord, be sure to un-hook the cable to the negative battery contact first to avoid Air Bag deployment. Disassemble the roof headlining assembly and then the antenna cord sub-assembly with a disconnection of the connector, clamps and bolts. Install backwards, making sure connections are made correctly and with the correct torque. And lastly- replace the cable and initialize.