My Garage
Cart
Make sure this part fits

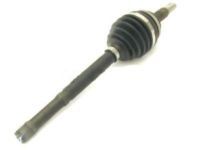
Toyota 43420-44050
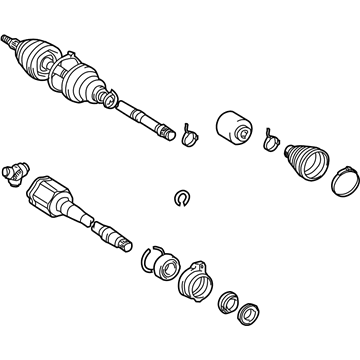
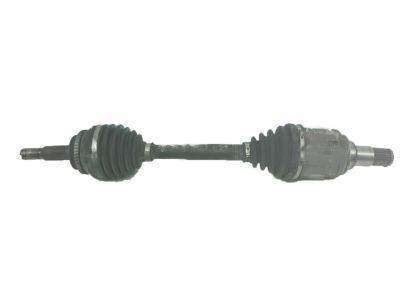
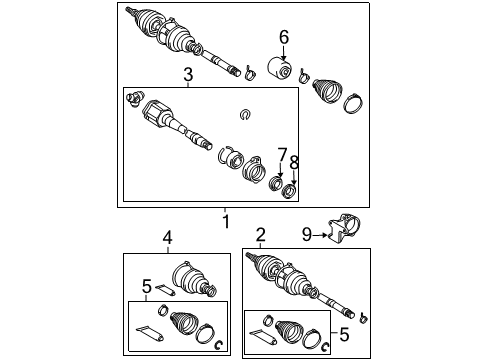
Axle Assembly, Driver Side

2005-2010 Scion tC 4342044050

Customer Questions & Expert Answers (9)
Toyota 43420-44050 Axle Assembly, Driver Side
  • Part Description
    Shaft Assembly, Front Drive; CV Axle Assembly, Front Left; GSP Cv Axle; Axle Shaft
  • Part Name Code
    43420
  • Position
    Driver Side
  • Manufacturer
    Toyota
Make sure this part fits
$353.43 MSRP: $517.96
You Save: $164.53 (32%)
Ships in 1-3 Business Days
1
ADD TO CART
  • Related Parts
  • Product Specifications
  • Vehicle Fitment
  • Customer Questions & Expert Answers
  • Product Specifications

    BrandGenuine Toyota
    Part Name Code43420
    Manufacturer Part Number43420-44050
    Part DescriptionShaft Assembly, Front Drive; CV Axle Assembly, Front Left; GSP Cv Axle; Axle Shaft
    Other NamesShaft Assembly, Front Drive, Driver Side; CV Axle Assembly
    Item Dimensions31.2 x 6.2 x 6.2 inches
    Item Weight17.90 Pounds
    PositionDriver Side
    ConditionNew
    Fitment TypeDirect Replacement
    ManufacturerToyota
    SKU43420-44050
    WarrantyThis genuine Toyota part is guaranteed by Toyota's factory warranty.
    Shipping & ReturnShipping Policy Return Policy
    Warning: California's Proposition 65
  • Vehicle Fitment

    Year Make Model Trim Engine
    2005-2010 Scion tCBase, Spec4 Cyl 2.4 L GAS
  • Customer Questions & Expert Answers

    Q:
    Will 43420-44050 fit my vehicle? Posted by ToyotaPartsNow Specialist
    A:
    Find out if part number 43420-44050 is the right fit for your car by Selecting Your Vehicle model.
    Posted by ToyotaPartsNow Specialist
    Q:
    How to disassemble the axle shaft on Scion tC? Posted by Customer
    A:
    Starting front drive shaft disassembly requires users to remove the No. 2 axle inboard joint boot clamp either with screwdriver or needle-nose pliers based on the clamp type. You need to remove the front axle inboard joint boot clamp by using the same method. The inboard joint boot must be uninstalled from the inboard joint assembly before cleaning the inboard joint with old grease debris. Make match marks on the inboard and outboard joint shaft assembly while avoiding punched marks and separate the inboard joint from the outboard joint shaft. A snap ring expander extraction tool should remove the shaft snap ring before applying matchmarks to both the outboard joint shaft and tripod joint without punching the marks. A brass bar with a hammer should be used to carefully remove the tripod joint from the outboard joint shaft while avoiding the rollers before finally taking off the inboard joint boot. You need a screwdriver if your front drive shaft damper has a one-touch clamp but needle-nose pliers work for the claw engagement type to detach the clamp before pulling out the front drive shaft damper. Start by utilizing a screwdriver to remove the one-touch type outboard joint boot clamp from the No. 2 axle and proceed with removing the front axle outboard joint boot clamp in the same fashion. Take off the outboard joint boot from the outboard joint shaft then wipe away all old grease from the joint. Use the screwdriver to remove the front drive shaft hole snap ring while Special Service Tool: 09950-00020 and a press extract the front drive shaft dust cover from the LH side keeping the inboard joint assembly safe from dropping before repeating the process on the RH side. Press the drive shaft bearing case out using a press after removing its sub-assembly snap ring with a screwdriver and avoid letting the inboard joint assembly fall. Also extract the straight pin. Using Special Service Tool 09950-00020 press the front drive shaft dust cover to completion while keeping the inboard joint assembly protected from falling. Then extract the drive shaft bearing by first applying a snap ring expander to remove the drive shaft hole snap ring before using Service Tool 09527-10011 and a press to push out the bearing then discarding the snap ring.
    Posted by ToyotaPartsNow Specialist
    Q:
    How to remove and replace the axle shaft assembly on Scion tC? Posted by Customer
    A:
    The first step for axle shaft assembly replacement requires draining both automatic transaxle fluid and manual transaxle oil. The front wheel and engine under cover needs to be removed first before using Special Service Tool: 09930-00010 and a hammer to unstake the front axle hub nut. The nut must be fully loosened to protect the drive shaft screw from damage. The front stabilizer link assembly requires removing its nut before checking if the ball joint rotates. Use a 6 mm hexagon wrench to maintain the stud position in place. Pull off the front speed sensor by disconnecting its wire and flexible hose attached to the shock absorber then to the steering knuckle while being careful not to damage the components. The disconnect process requires removal of the cotter pin along with the nut from the tie rod end sub-assembly for subsequent use of Special Service Tool: 09628-00011 to separate the sub-assembly from the steering knuckle. To perform the front No. 1 suspension lower arm sub-assembly removal you must first uninstall the bolt and two nuts. The procedure to remove the front axle assembly starts with marking both the drive shaft and axle hub before separating them using a plastic-faced hammer while protecting the boot and speed sensor rotor. Special Service Tools: 09520-01010, 09520-24010, and 09520-32040 remove the front drive shaft assembly LH while protecting the transaxle case oil seal alongside the inboard joint boot and drive shaft dust cover from damage. To access the drive shaft bearing case of the RH front assembly remove its two retaining bolts then carefully extract the drive shaft keeping safety in mind of inboard joint boot damage or dust cover wear. It is appropriate to add vehicle weight to hub bearings using Special Service Tools: 09608-16042, 09608-02021, or 09608-02041 but keep the tools as safety mechanisms to avoid damage.
    Posted by ToyotaPartsNow Specialist
    Q:
    How should the dust covers and outboard joint boot be installed for the 2007 Scion tC? Posted by Customer
    A:
    Install the dust covers ensuring they are not damaged, and install the outboard joint boot and clamps, packing with grease.
    Posted by ToyotaPartsNow Specialist
    See expert answers on similar Axle Shaft
    Q:
    How do you connect the drive shaft to the front axle for the 2009 Scion tC? Posted by Customer
    A:
    Align the matchmarks and install the drive shaft to the front axle, taking care not to damage the outboard joint boot and speed sensor rotor.
    Posted by ToyotaPartsNow Specialist
    See expert answers on similar Axle Shaft
    Q:
    What steps are involved in disassembly of the inboard joint for the 2006 Scion tC? Posted by Customer
    A:
    Remove the inboard joint boot clamps and the inboard joint boot, clean the inboard joint, and carefully remove the inboard joint assembly and dust covers using Special Service Tool: 09950-00020 and a press.
    Posted by ToyotaPartsNow Specialist
    See expert answers on similar Axle Shaft
    Q:
    What tools are needed to remove the front drive shaft assembly on the left side for the 2008 Scion tC? Posted by Customer
    A:
    Use Special Service Tool: 09520-01010, 09520-24010, and 09520-32040.
    Posted by ToyotaPartsNow Specialist
    See expert answers on similar Axle Shaft
    Q:
    How do you remove the front axle hub nut for the 2010 Scion tC? Posted by Customer
    A:
    Use Special Service Tool: 09930-00010 and a hammer to unstake the nut, ensuring it is completely loosened to avoid damaging the drive shaft screw.
    Posted by ToyotaPartsNow Specialist
    See expert answers on similar Axle Shaft
    Q:
    What is the first step to overhaul the front drive shaft for the 2005 Scion tC? Posted by Customer
    A:
    Begin by draining the automatic transaxle fluid and manual transaxle oil.
    Posted by ToyotaPartsNow Specialist
    See expert answers on similar Axle Shaft
    If you have any questions about this product, please don't hesitate to ask us. We will be happy to help you!

OEM Toyota 43420-44050, Excellent Performance and Perfect Fitment

To ensure reliability, purchase Toyota part # 43420-44050 Axle Assembly, Driver Side. It is sometimes referred to as Toyota Axle Shaft. OEM parts are unrivaled in terms of quality. They go through extensive quality control inspections and are produced in accordance with Toyota's official factory specifications. All of these remove defects and imperfections. So you can relax knowing they promise exceptional lifespan and flawless fitment.

ToyotaPartsNow.com is a leading supplier of genuine Toyota parts such as Toyota 4342044050 Axle Assembly, Driver Side. At ToyotaPartsNow.com, we have a wide variety of OEM Toyota parts available at competitive prices. Our comprehensive range of genuine Toyota parts come with a manufacturer's warranty for peace of mind. We also prioritize customer satisfaction, providing a hassle-free return policy and expedited delivery for all our parts. For detailed Scion parts information, click here.
Choose ToyotaPartsNow for discounted prices, exceptional service and fast delivery