My Garage
Cart
Make sure this part fits

Toyota 69210-33080-B6
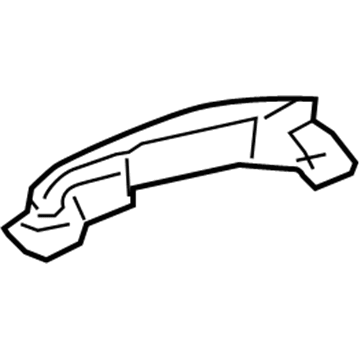
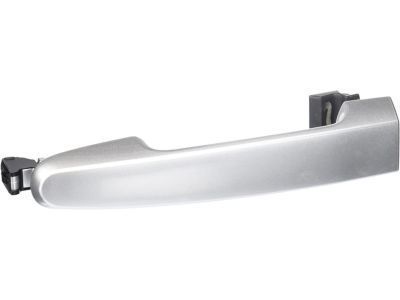
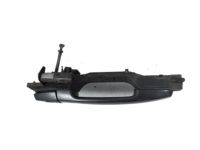
Handle, Outside, Silver, Front

2005-2010 Toyota 6921033080B6

Customer Questions & Expert Answers (3)
Toyota 69210-33080-B6 Handle, Outside, Silver, Front
  • Part Description
    Handle Assembly, Front Door; Exterior Door Handle, Front Outer, Rear Outer
  • Position
    Front
  • Replaces
    69210-33080-B3
  • Manufacturer
    Toyota
Make sure this part fits
$36.44 MSRP: $50.72
You Save: $14.28 (29%)
Ships in 1-3 Business Days
1
ADD TO CART
  • Related Parts
  • Product Specifications
  • Vehicle Fitment
  • Customer Questions & Expert Answers
  • Product Specifications

    BrandGenuine Toyota
    Manufacturer Part Number69210-33080-B6
    Part DescriptionHandle Assembly, Front Door; Exterior Door Handle, Front Outer, Rear Outer
    Other NamesHandle Assembly, Front Door, Outside Passenger Side; Rear Door Outside, Driver/Passenger Side.
    Manufacturer NoteSILVER ME.,1F7
    Item Dimensions14.2 x 10.9 x 2.4 inches
    Item Weight1.50 Pounds
    PositionFront
    ConditionNew
    Fitment TypeDirect Replacement
    Replaces69210-33080-B3
    ManufacturerToyota
    SKU69210-33080-B6
    WarrantyThis genuine Toyota part is guaranteed by Toyota's factory warranty.
    Shipping & ReturnShipping Policy Return Policy
    Warning: California's Proposition 65
  • Vehicle Fitment

    Year Make Model Trim Engine
    2005-2010 Scion tCBase, Spec4 Cyl 2.4 L GAS
    2006-2009 Toyota PriusBase, Touring4 Cyl 1.5 L FULL HYBRID EV-GAS (FHEV)
  • Customer Questions & Expert Answers

    Q:
    Is 69210-33080-B6 a good match for my car? Posted by ToyotaPartsNow Specialist
    A:
    Find out if part number 69210-33080-B6 is the right fit for your car by Selecting Your Vehicle model.
    Posted by ToyotaPartsNow Specialist
    Q:
    What is the step-by-step procedure for reassembling the front door and Door Handle after disassembly on Scion tC? Posted by Customer
    A:
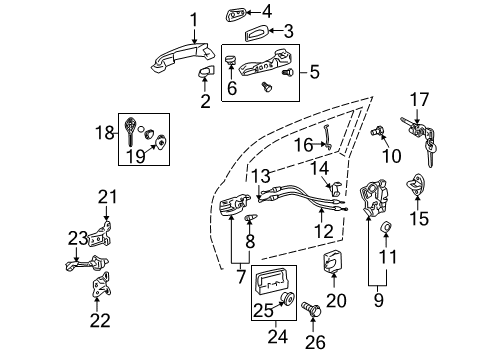
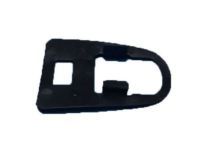
    Install the front door Weather Strip LH on its complementary locations while fixing all 17 clips with special attention to the two marked by arrows. Apply MP grease to the sliding areas of the front door check assembly LH then mount it to the door panel with 2 nuts tightened to 5.5 Nm. Afterwards secure the bolt to the body panel using adhesive (Part No. 08833-00070, THREE BOND 1324 or equivalent) before tightening it to 30 Nm. Secure the two claws each that connect the front door outside handle pad both at the rear and at the front positions. To assemble the left-hand side front door lock outside handle frame you must install the front door lock open rod then apply MP grease before securing it with a T30 "TORX" socket wrench that should produce 4.0 Nm torque. The bellcrank lever should be pulled and held during installation of the front door handle assembly outside LH in order to protect it from getting damaged. Use new packing to finish securing the door lock assembly LH after engagement of the control rod and door lock connector connection with three screws (torque set at 5.0 Nm). Application of MP grease precedes this step. The front door outside handle cover LH requires installation with a T30 "TORX" socket wrench that applies 4.0 Nm of torque while using the hole plug. The installation requires a bolt (torque at 8.5 Nm) for the front door frame sub-assembly rear lower LH followed by a T25 "TORX" socket-wrenched (torque at 5.4 Nm) attachment of the power window regulator motor assembly LH front. Before installation apply window regulator grease then screw Bolt A loosely and insert the regulator into the door panel before torquing 5 bolts to 8.0 Nm. Install the front door glass sub-assembly LH while maintaining the proper glass run position and attach it to the window regulator using 2 bolts tightened to 8.0 Nm. Fasten the front door No. 1 stiffener cushion with 2 bolts as well as install the side Air Bag sensor assembly LH if equipped and a new front door service hole cover and make sure no wrinkles or folds remain visible. Connect each connector after which install the front door inside handle sub-assembly LH by moving the handle as specified while connecting the two cables. The service process includes installation of the front door glass Weather Strip inner LH component alongside the front No. 2 speaker assembly and the front No. 1 speaker assembly. Secure the outer rear view mirror assembly LH and then add the front door trim board sub-assembly LH while installing clips and screws. Begin by plugging in the front door inside handle bezel then fit the front armrest base panel along the upper LH side or RH accordingly before connecting all functional switches. Installation of the assist grip cover LH followed by the front door lower frame bracket garnish LH comes first then reconnect the negative battery terminal before inspecting the SRS warning light and performing initializations for systems which need battery reconnect.
    Posted by ToyotaPartsNow Specialist
    Q:
    How to disassemble the front door handle on the LH side on Scion tC? Posted by Customer
    A:
    Disassembly of the LH front door handle requires starting with negative battery terminal cable removal followed by a minimum 90-second waiting period to stop Air Bag activation. The technician removes the front door lower frame bracket garnish on the left-hand side using a screwdriver which needs to be taped to handle the task. The assist grip cover LH requires detachment of 11 claws before one can proceed to remove the front armrest base panel upper LH along with its clip and 5 claws and switch connector detaching and 3 screw and window regulator master switch removal process. Detach the claw from the front door inside handle bezel plug before you move onward to take out the front door trim board sub-assembly LH by using protective tape to remove three screws and detach nine clips and carefully pull the trim horizontally. Start by removing the outer rear view mirror assembly LH followed by the front door belt moulding LH and front No. 1 and No. 2 speaker assemblies then proceed to remove the front door glass Weather Strip inner LH. Complete the process by separating the front door inside handle sub-assembly LH after disconnecting 2 cables and detaching the claw. Start the front door service hole cover removal by taking out 2 bolts that also require removing the side Air Bag sensor assembly LH and front door No. 1 stiffener cushion. To access the bolts on the front door glass sub-assembly LH the technician must install a window regulator master switch or power window regulator switch to push the door glass and proceed with careful glass removal. The procedure for front door window regulator sub-assembly LH removal starts with disconnecting the connector and loosening bolt A then proceeding to remove 5 bolts. The power window regulator motor assembly LH front can be removed by using a T25 "TORX" socket wrench to unfasten its three attached screws. To detach the front door frame sub-assembly rear lower LH you need to remove its bolt while also removing the frame itself. To access the front door outside handle cover LH, first take out the hole plug then free the screw by using a T30 "TORX" socket wrench. First unlock the front door lock assembly LH by removing 3 screws before sliding out and pulling the front door handle assembly outside LH in the instructed direction. Relax the screw of the front door outside handle frame sub-assembly LH with a T25 "TORX" socket wrench followed by gentle plier compression of the clip then unlock the lock control rod. Stretch the two claws which secure the front door outside handle pads in front and rear positions before separating the front door check assembly on the LH side by unplugging its bolt along with two nuts. Use a clip remover to unfasten and replace damaged clips before taking away the 19 clips on the front door Weather Strip LH.
    Posted by ToyotaPartsNow Specialist
    If you have any questions about this product, please don't hesitate to ask us. We will be happy to help you!

OEM Toyota 69210-33080-B6, Excellent Performance and Perfect Fitment

To ensure reliability, purchase Toyota part # 69210-33080-B6 Handle, Outside, Silver, Front. It is sometimes referred to as Toyota Door Handle. OEM parts are unrivaled in terms of quality. They go through extensive quality control inspections and are produced in accordance with Toyota's official factory specifications. All of these remove defects and imperfections. So you can relax knowing they promise exceptional lifespan and flawless fitment.

ToyotaPartsNow.com is a leading supplier of genuine Toyota parts such as Toyota 6921033080B6 Handle, Outside, Silver, Front. At ToyotaPartsNow.com, we have a wide variety of OEM Toyota parts available at competitive prices. Our comprehensive range of genuine Toyota parts come with a manufacturer's warranty for peace of mind. We also prioritize customer satisfaction, providing a hassle-free return policy and expedited delivery for all our parts. For detailed Toyota parts information, click here.
Choose ToyotaPartsNow for discounted prices, exceptional service and fast delivery